1 Like many other owners after a couple of years, the constant rattle of my glovebox was starting to drive me crazy. I started noticing it get particularly bad during the winter of 2003, but managed to live with it for several months. Finally in March 2003, I fired my first salvo by removing the hefty owner's manual from the glovebox. The reduced weight stress on the flimsy mechanism helped a lot, but it was obvious that real surgery ultimately had to be performed. Finally, in July 2003, after reading the many instructions and success stories that had been posted on the various message boards, I bit the bullet and started to work on silencing my glovebox once and for all. As I write this, I have been driving the Z3 for 3 days with its newly reinforced (and quiet!) glovebox over the rutted rural roads near my house. So far, all I hear is the motor and the stereo and I am very pleased with the results of my 3 hours of work.Here is a summary of what I did in the hopes that it might help the many other Z3 owners suffering this auditory plague. Basically, I followed the instructions of several others, with some minor variations of my own thrown in. Unfortunately, during the intervening years all of the original instruction pages have disappeard from the interwebs and all that remains is this pdf that I luckily socked away for safe keeping. Although it was written to accompany a repair kit that was being sold on ebay, it is still relevant and you should study it thoroughly before attempting to fix your glovebox.
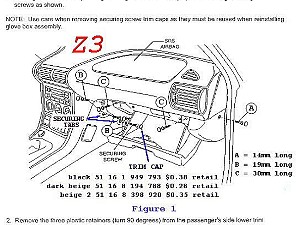
2 To start, here is a diagram of the Z3 glovebox that includes the part numbers for the trim caps that are used to cover the attaching screws. I suggest that you promptly order a pack of 10 in the correct color from your dealer. I guarantee that you will damage some of them as you pry them off. For a couple of dollars, avoid the anxiety and know that you will have new trim caps to apply when you reinstall your silent glovebox.
3 So, here is a basic outline of where I followed and diverged from my predecessors' instructions:
- I removed and reinstalled the glovebox per the pdf instructions.
- I fabricated the bar from a 1" x 11 guage flat bar that I bought at Home Depot.
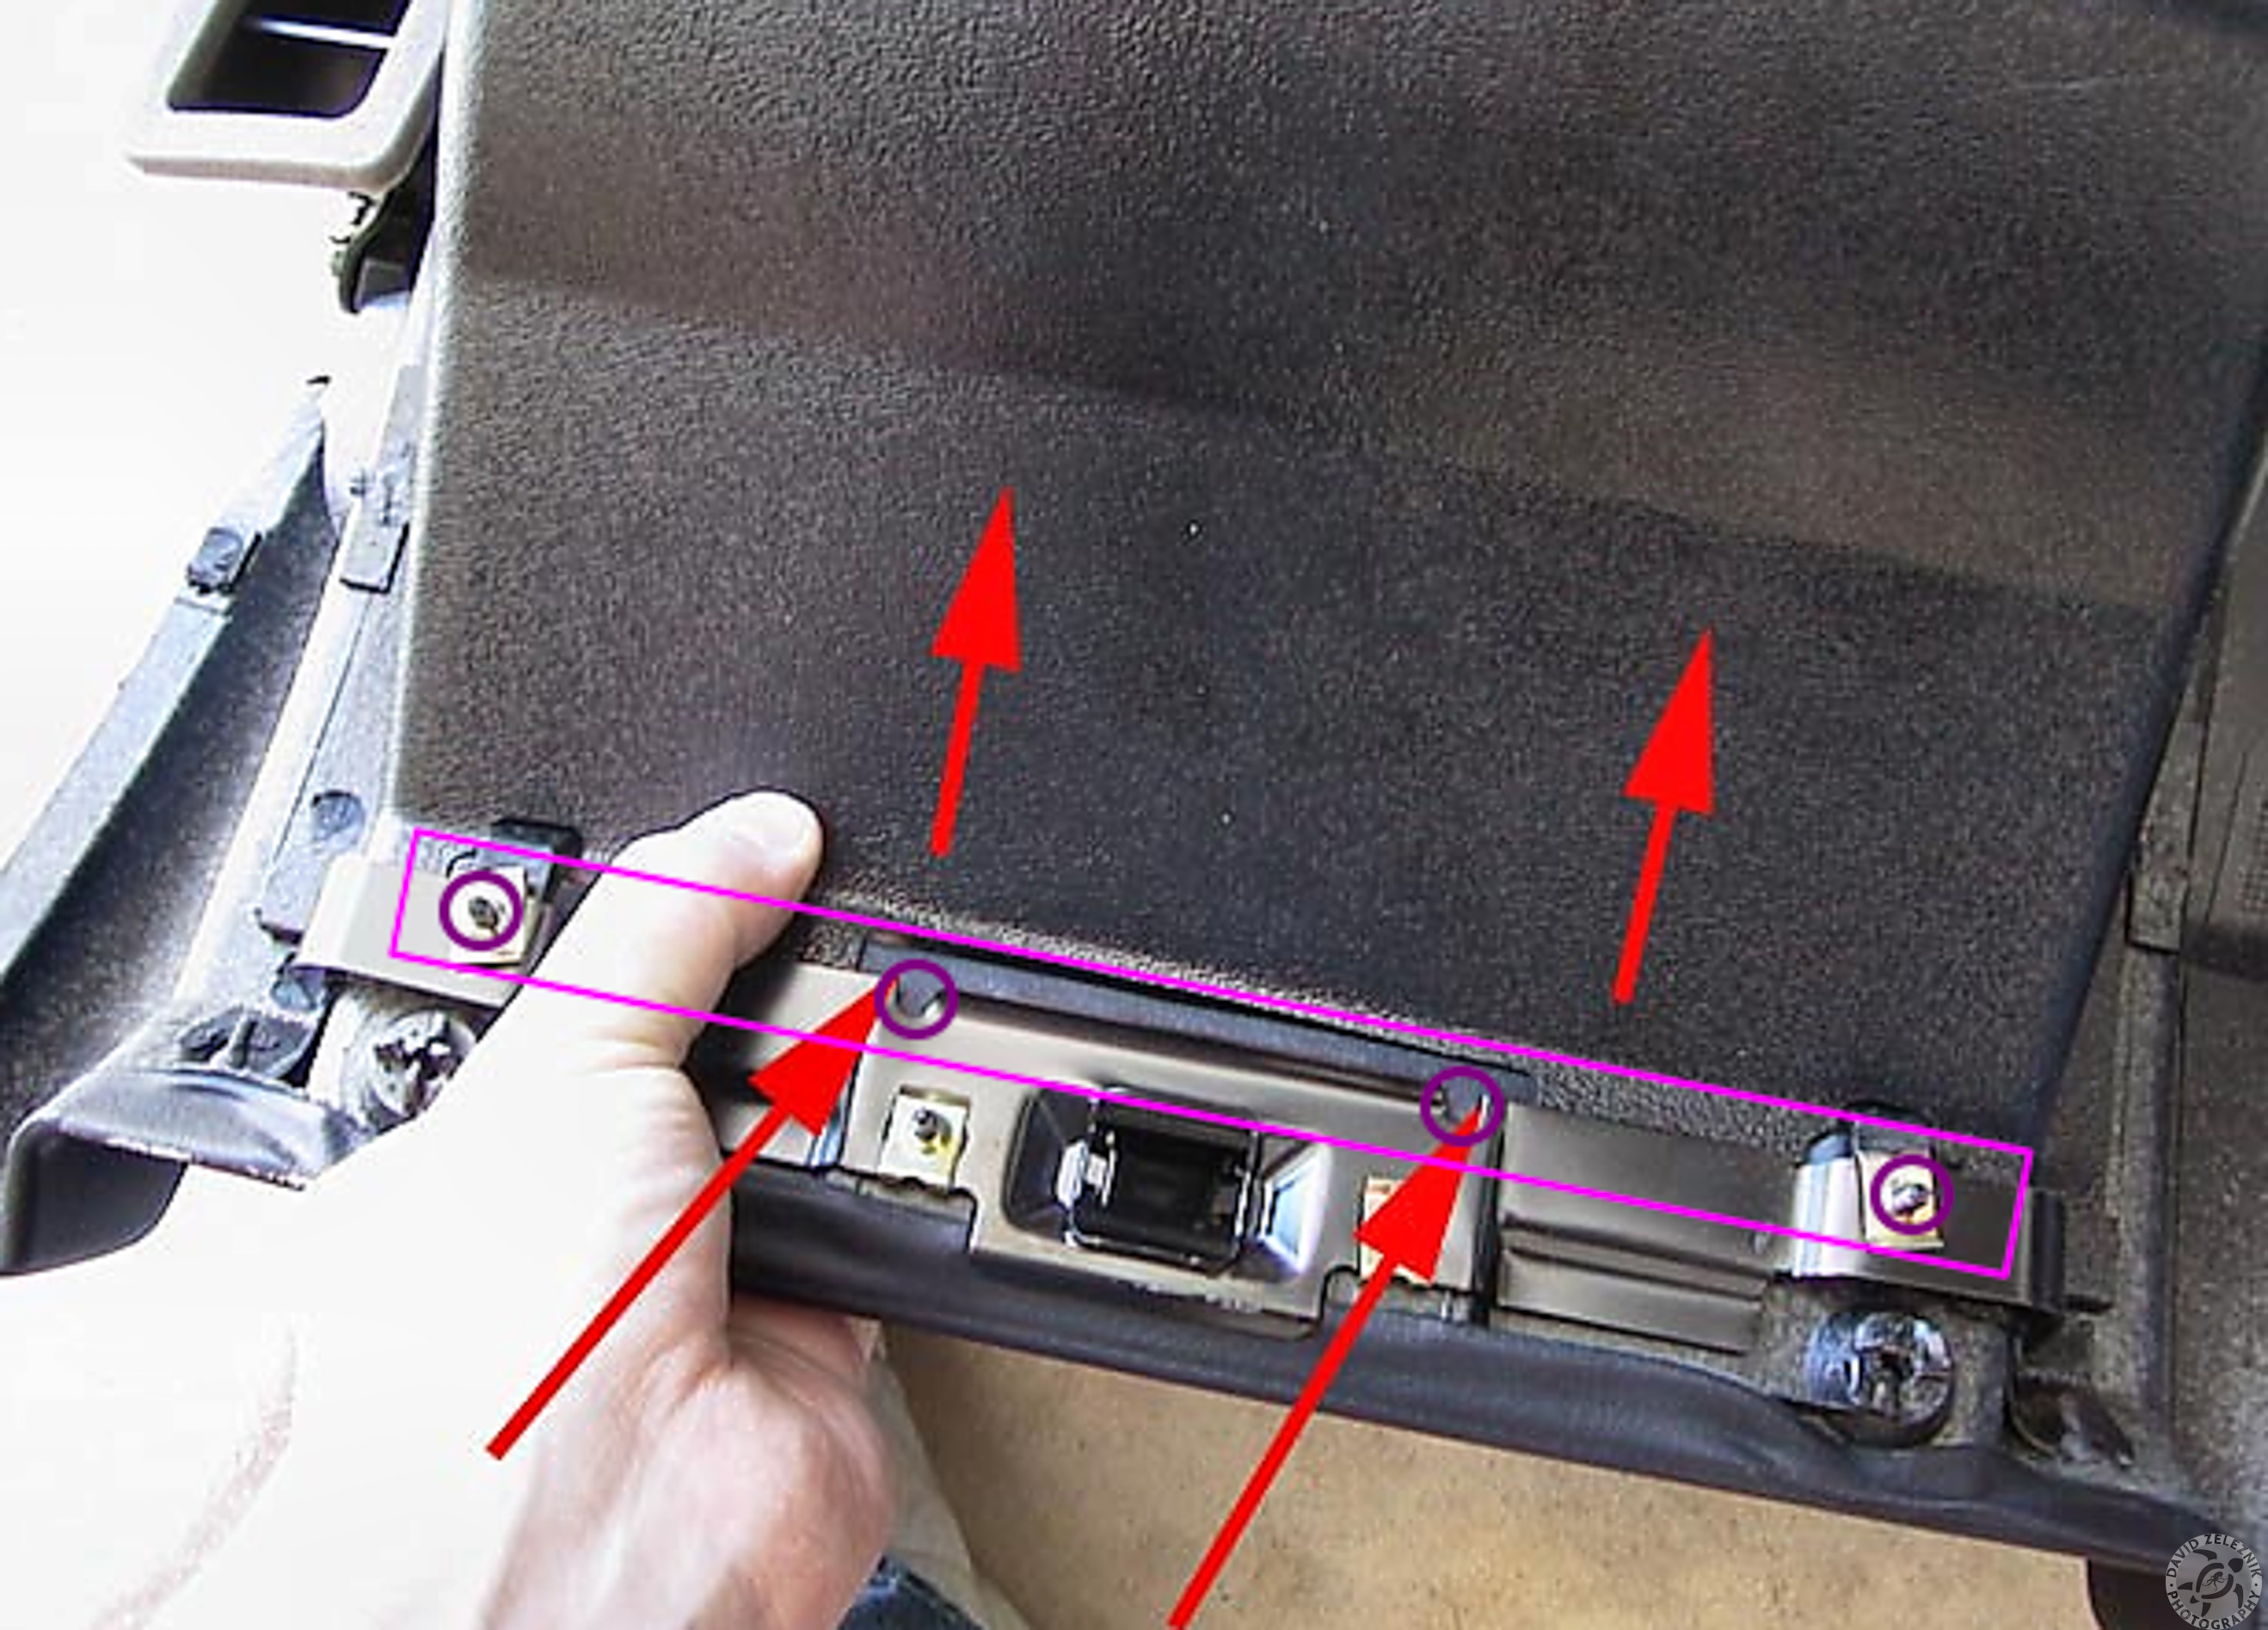
- At first, I tried following Warren Campbell's template for cutting the various notches and slots needed to clear the latch mechanism. This rapidly became very tedious with the hardened steel bar and my limited tool set. I decided that a Plan B was needed and I set about trying to reposition the bar and use different attachment points so that the bar would completely clear the latch on its own. In this way, I only needed to drill 4 bolt holes in the bar. This worked out quite well and was much easier and faster for me to fabricate. I have marked up the following photo with a purple rectangle showing the positioning that I used for my reinforcement bar. Like Warren, I used the 2 outermost bolts as attachment points. However, instead of using the 2 bolts by the latch as the inner attachment points, I used the 2 notches along the other edge of the latch. Because of the height differential between the inner and outer attachment points, I had to use quite a few washers at the notches to make up the difference.