1 By November 2016 the high beams on the Z4 had been acting increasingly wonky to the point that it was hard to trust driving at night. They'd flip on at random times, not go off, not go on. Sometimes the dashboard indicator would light up, sometimes not. Really crazy. The so-called bi-xenons use a single bulb for the low and high beams with a vertical shutter that is lowered to cut off the top of the beam and form the low beams. When the internal shutter is raised, voila the high beams. The bulb wasn't the problem since the low beams worked. Even weirder, the ECU and lighting module were not throwing any error codes.
After several months of headlight insanity I eventually detected a pattern that the flake-outs tended to happen when it was raining or damp. So, the other day it was warm enough outside for me to shoot the hose gently at the headlights to see if I could localize it. Sure enough, wetting down the passenger side headlight caused both headlights to go crazy. There was no detectable moisture getting inside the headlights, so I looked inside with the hood up and saw a few small wisps of smoke coming from the passenger side headlight cable! With a flashlight in the tight space it looked like the cable was pinched between the plastic wheel well liner and the edge of the metal plate that supports the engine fan.
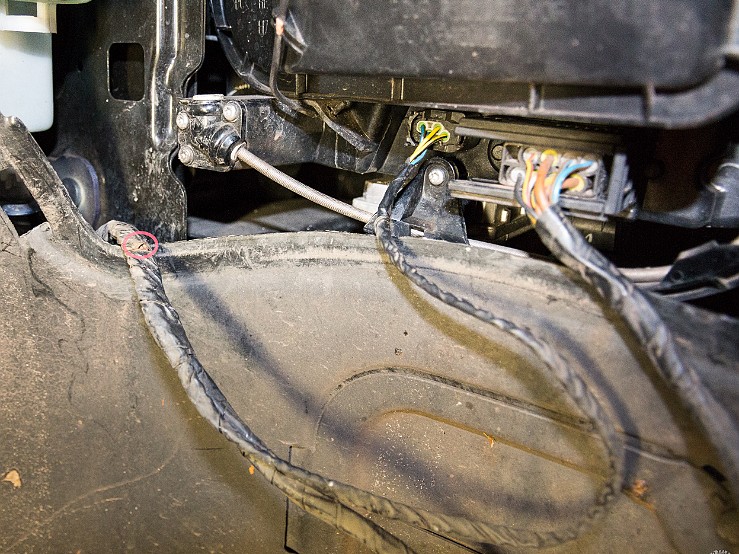
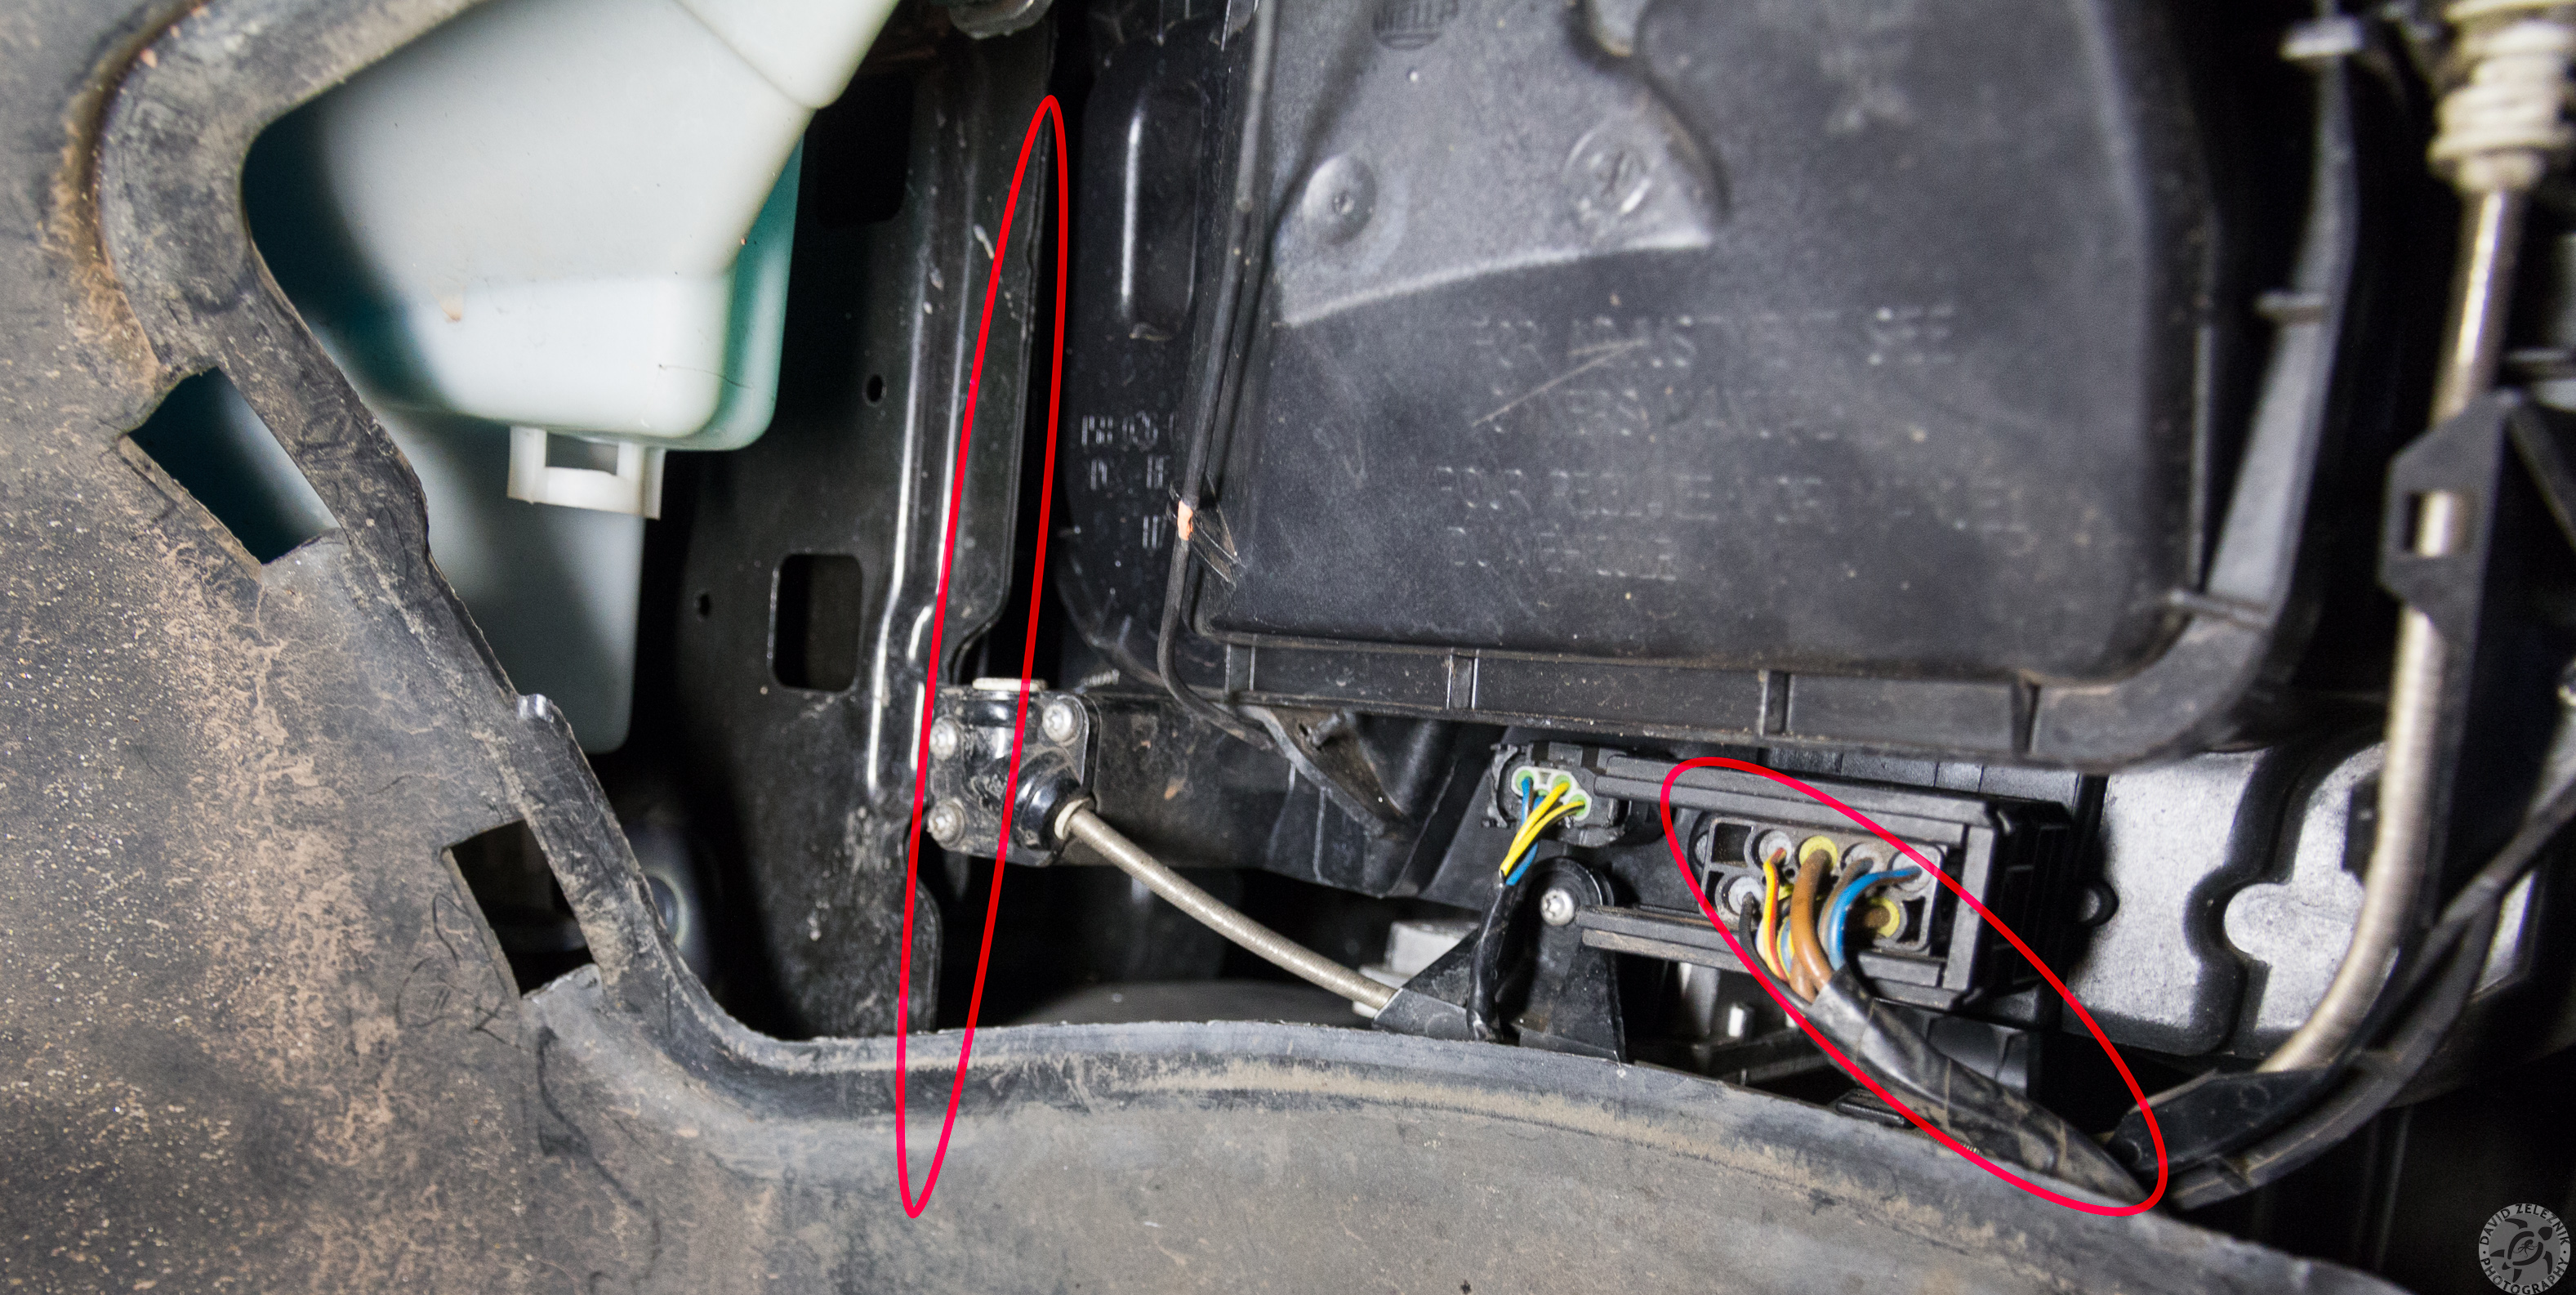
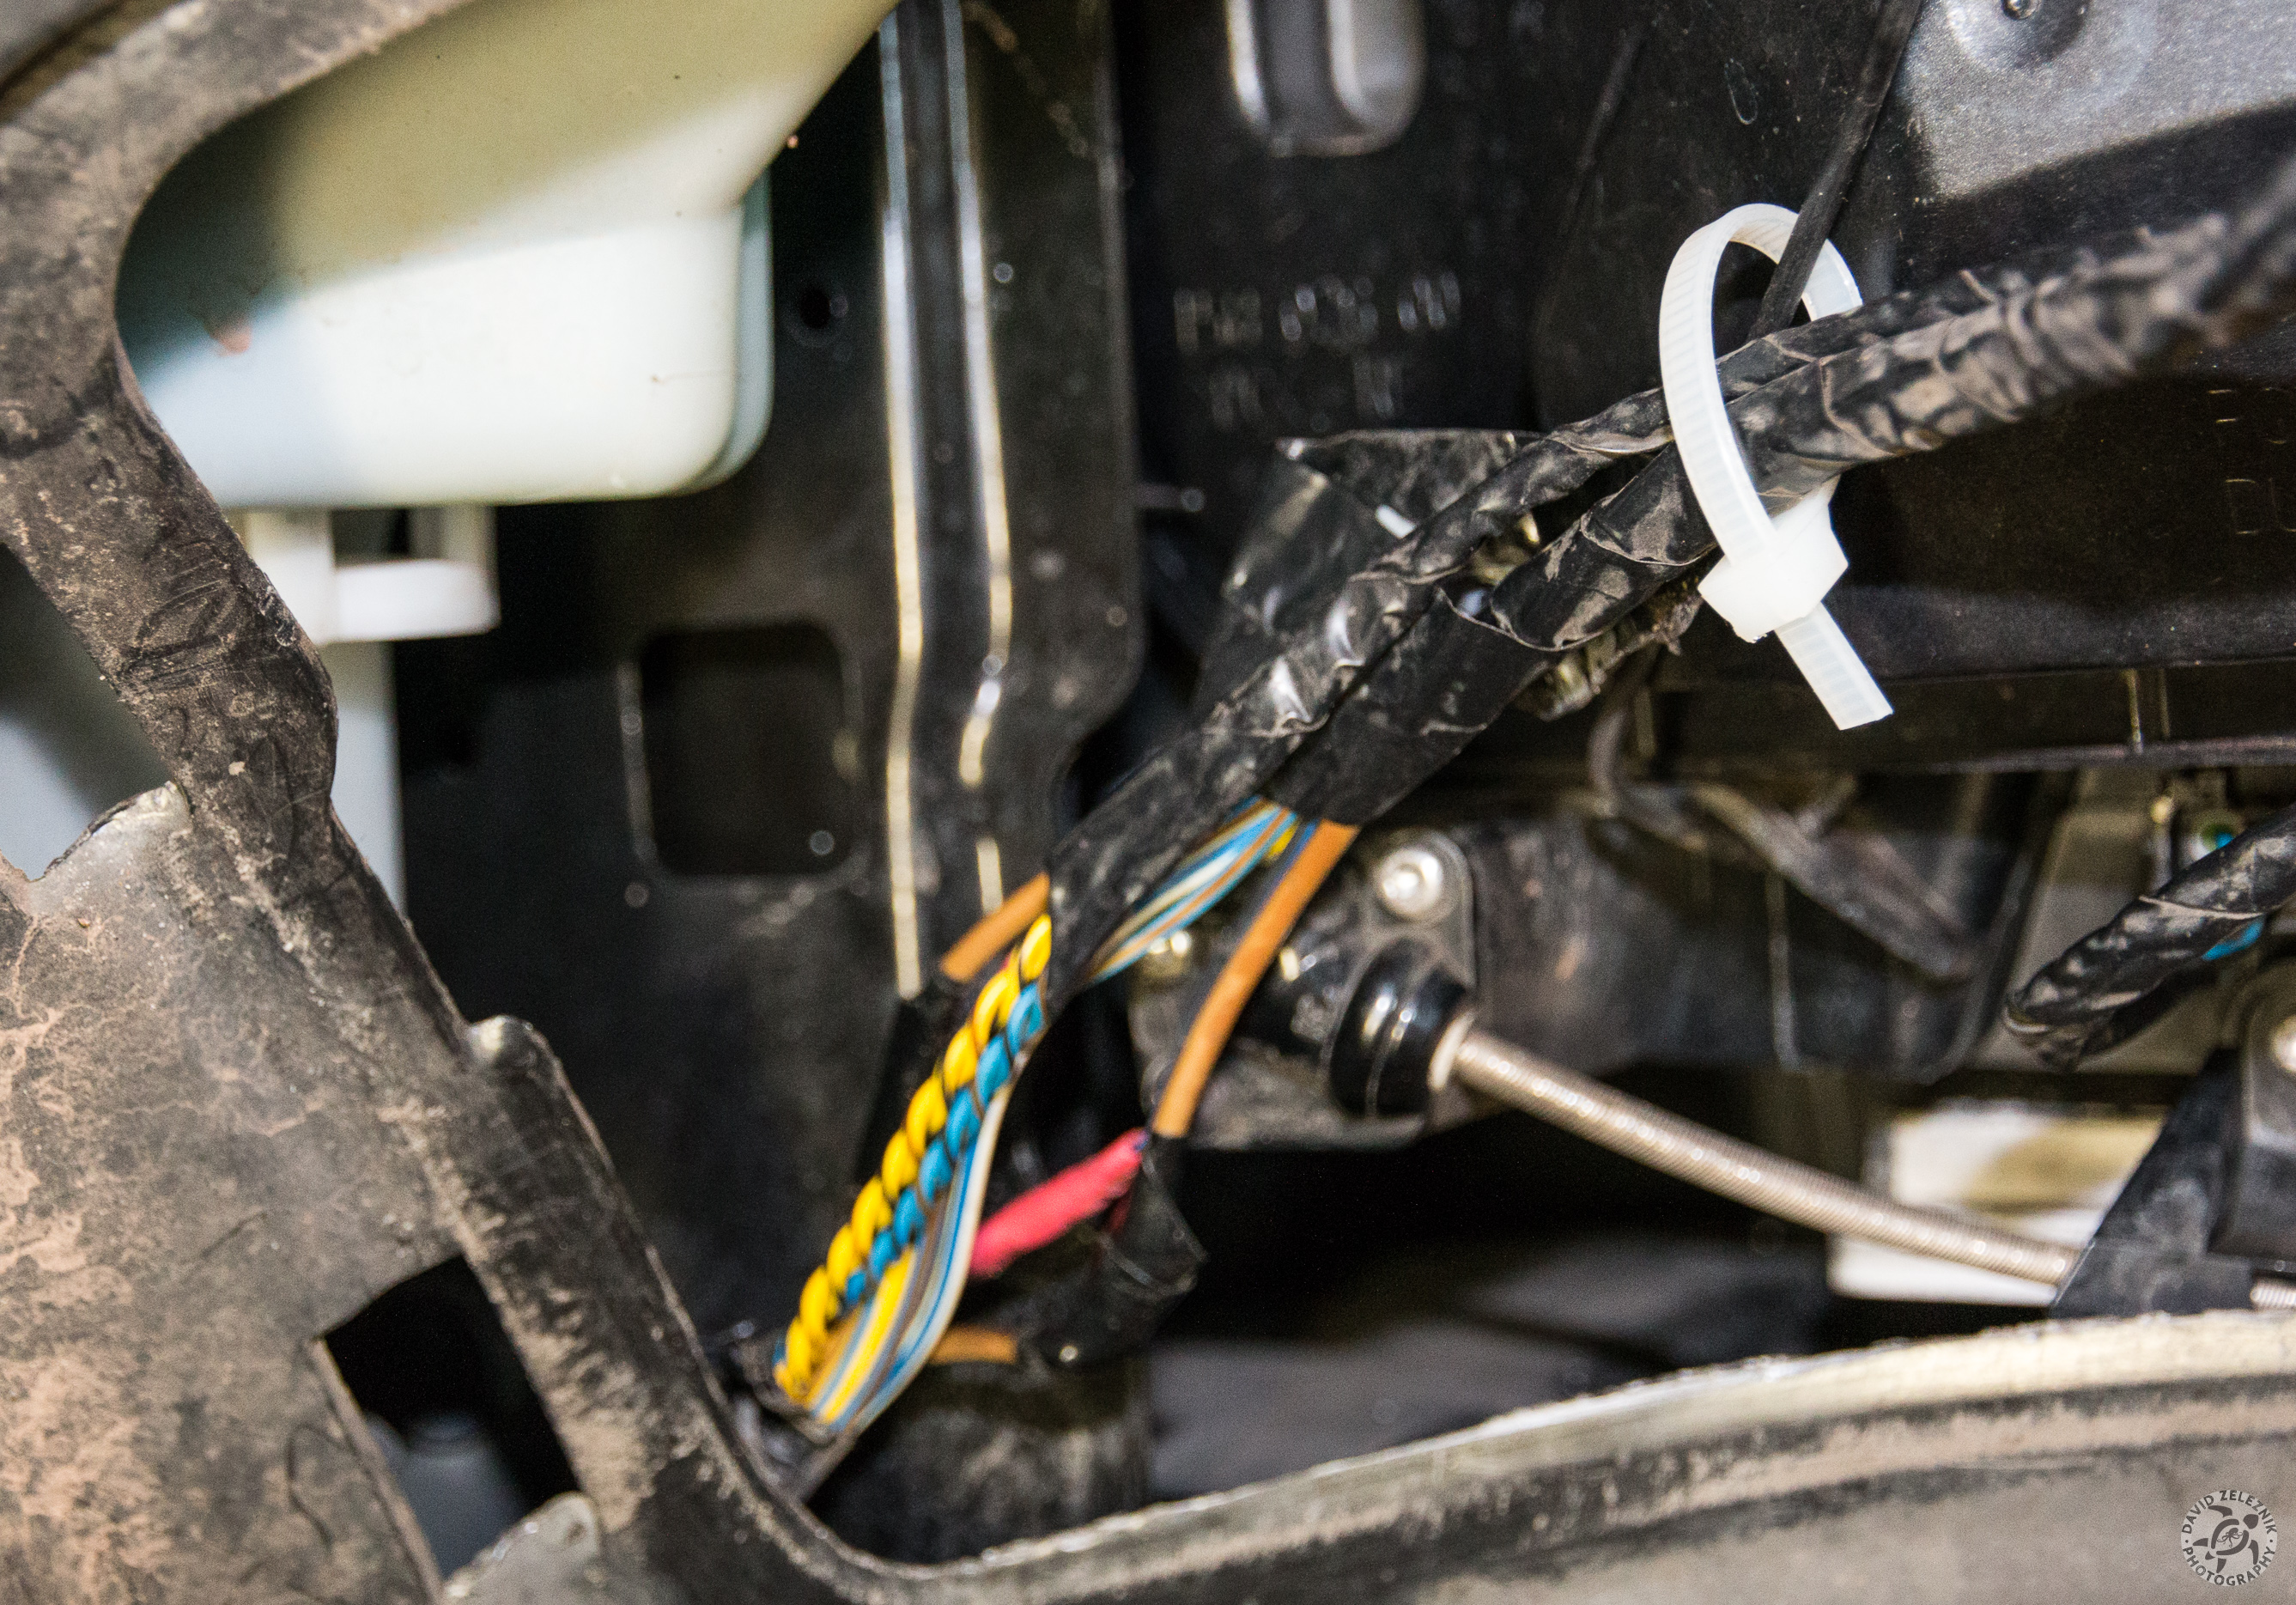
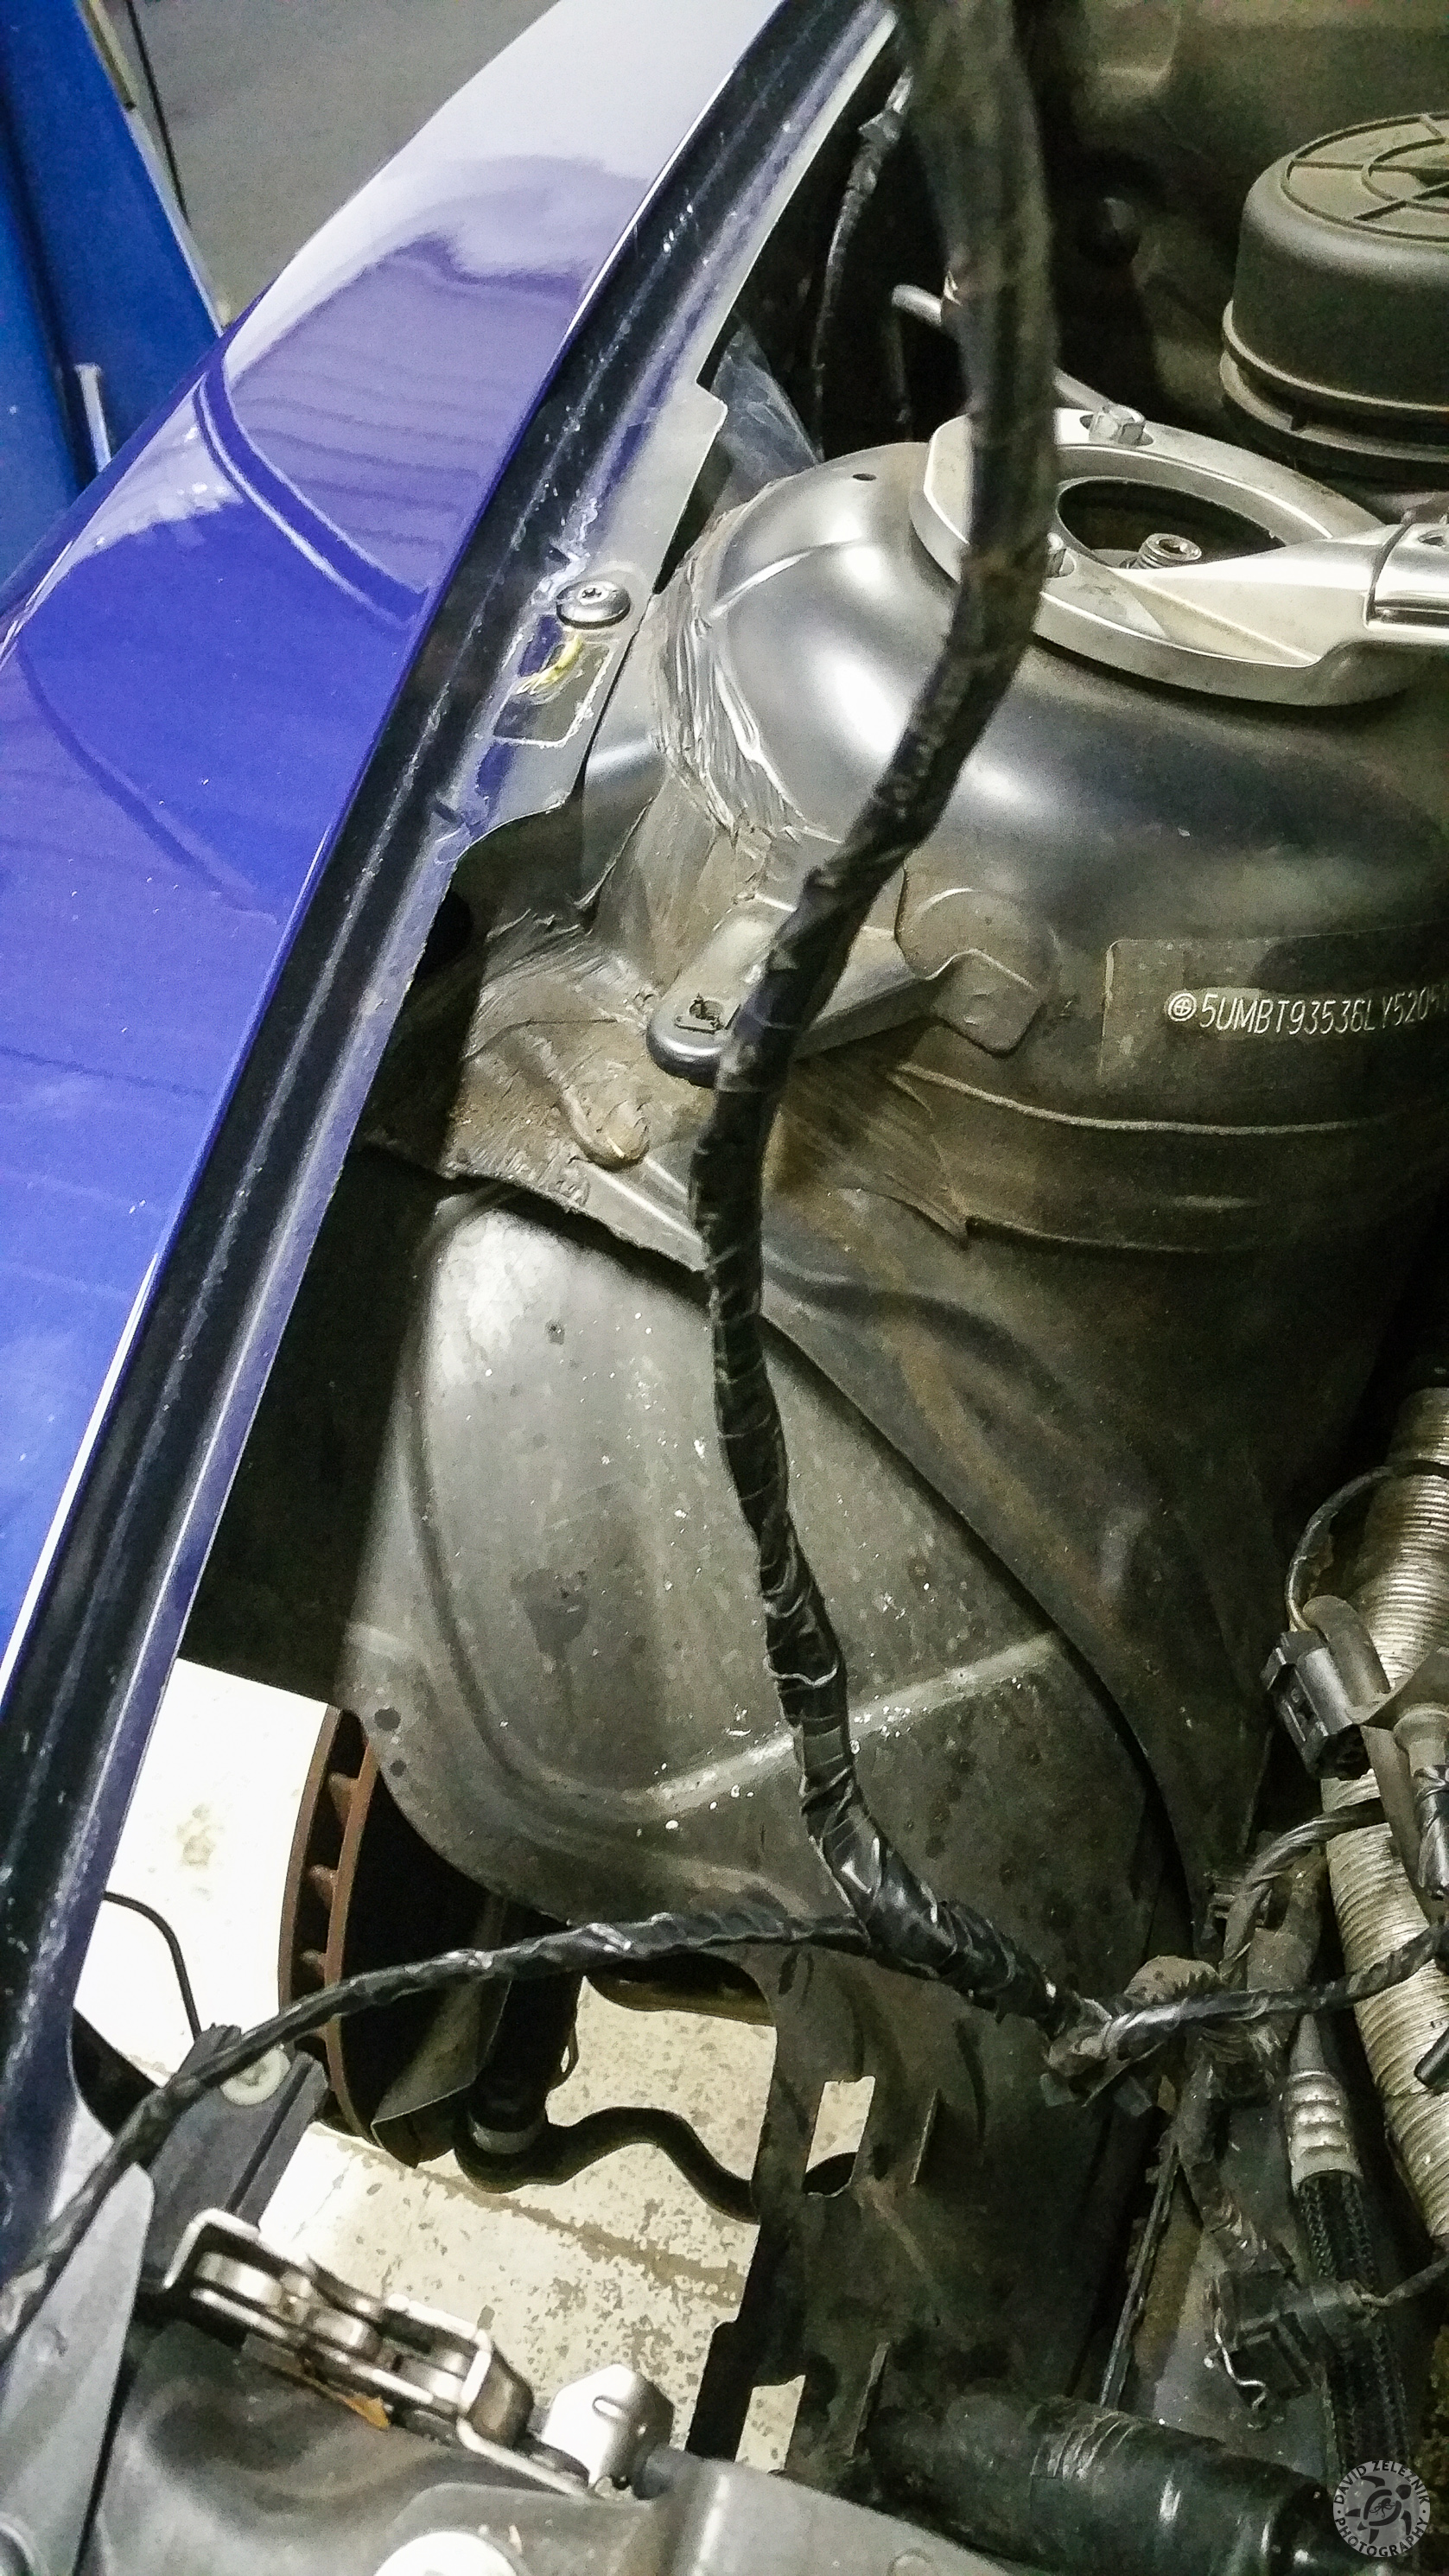
I removed the front passenger tire to gain access to the back of the headlight assembly. The headlight cable is circled on the right and it loops below the lip of the hatch opening and was rubbing (and shorting out!) against the metal plate circled on the left.
After several months of headlight insanity I eventually detected a pattern that the flake-outs tended to happen when it was raining or damp. So, the other day it was warm enough outside for me to shoot the hose gently at the headlights to see if I could localize it. Sure enough, wetting down the passenger side headlight caused both headlights to go crazy. There was no detectable moisture getting inside the headlights, so I looked inside with the hood up and saw a few small wisps of smoke coming from the passenger side headlight cable! With a flashlight in the tight space it looked like the cable was pinched between the plastic wheel well liner and the edge of the metal plate that supports the engine fan.
I removed the front passenger tire to gain access to the back of the headlight assembly. The headlight cable is circled on the right and it loops below the lip of the hatch opening and was rubbing (and shorting out!) against the metal plate circled on the left.
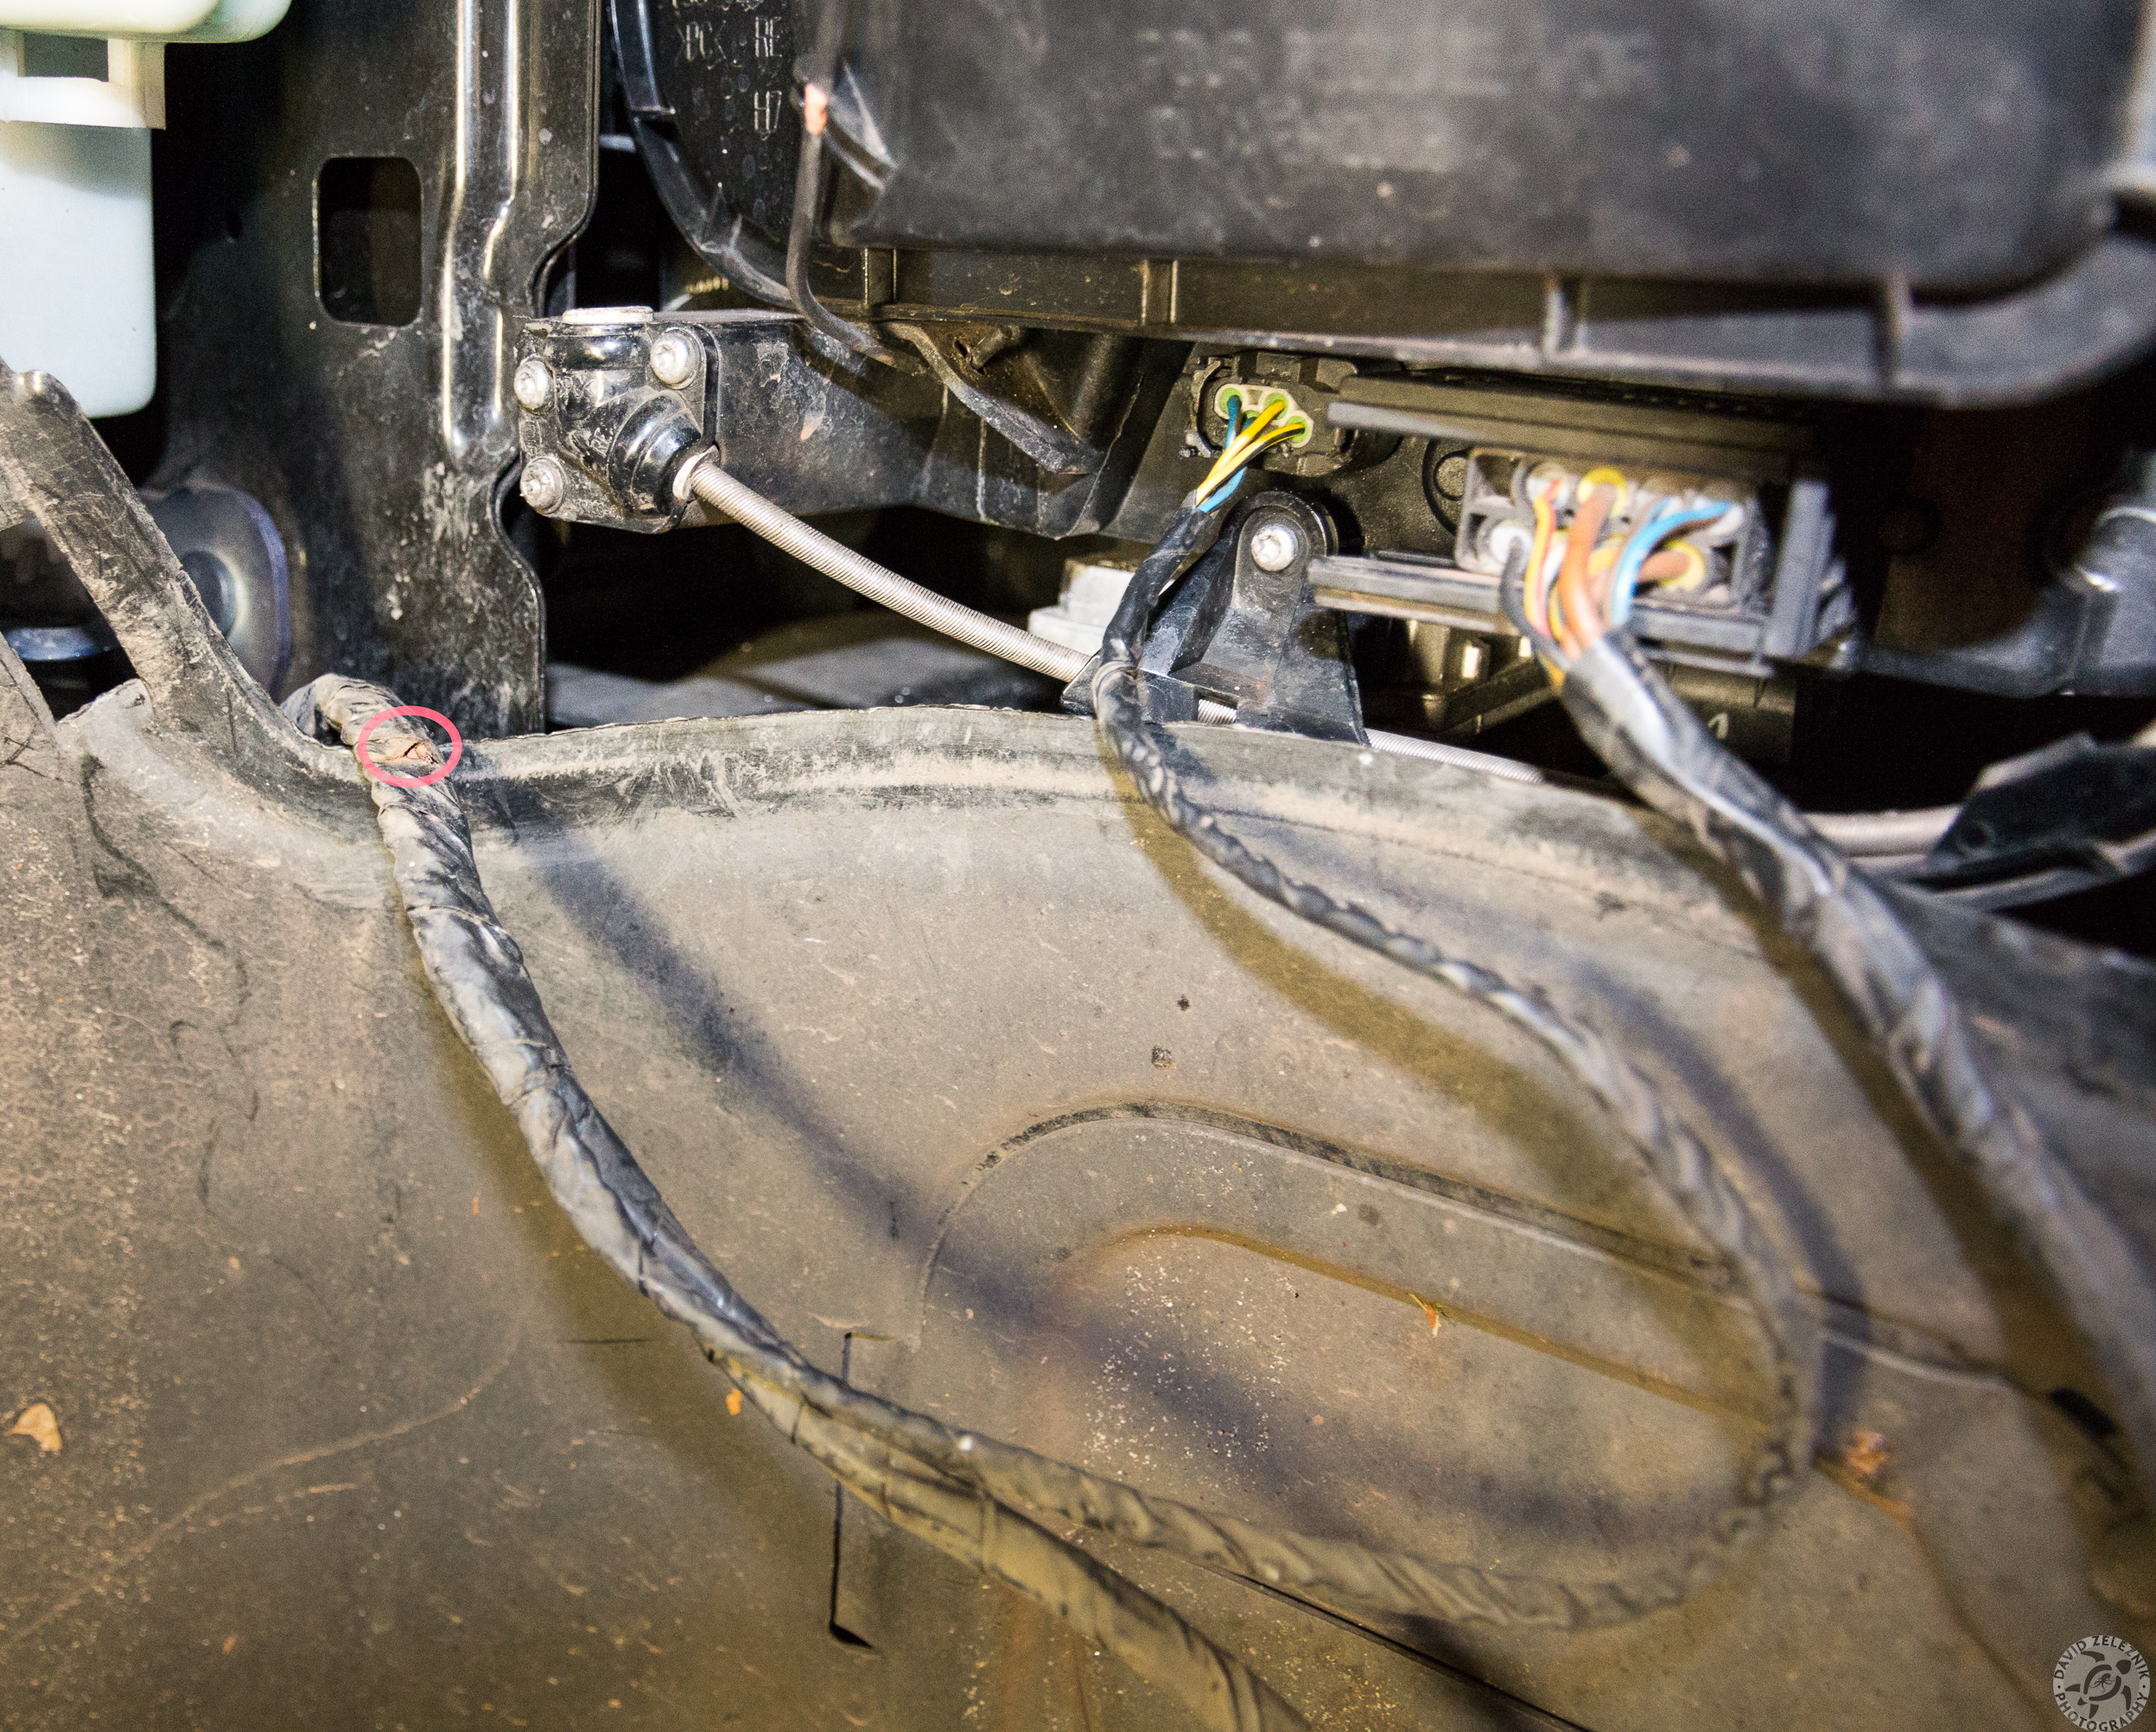
2 There was plenty of slack to pull out the headlight cable and you can see where the insulation was cut through and the wires shorted by rubbing against that metal plate.

3 Closeup of the damage done to the headlight harness. Seems to be a major design flaw since the driver side headlight cable is routed similarly. A web search turned up nothing similar happening to others, which really surprised me.
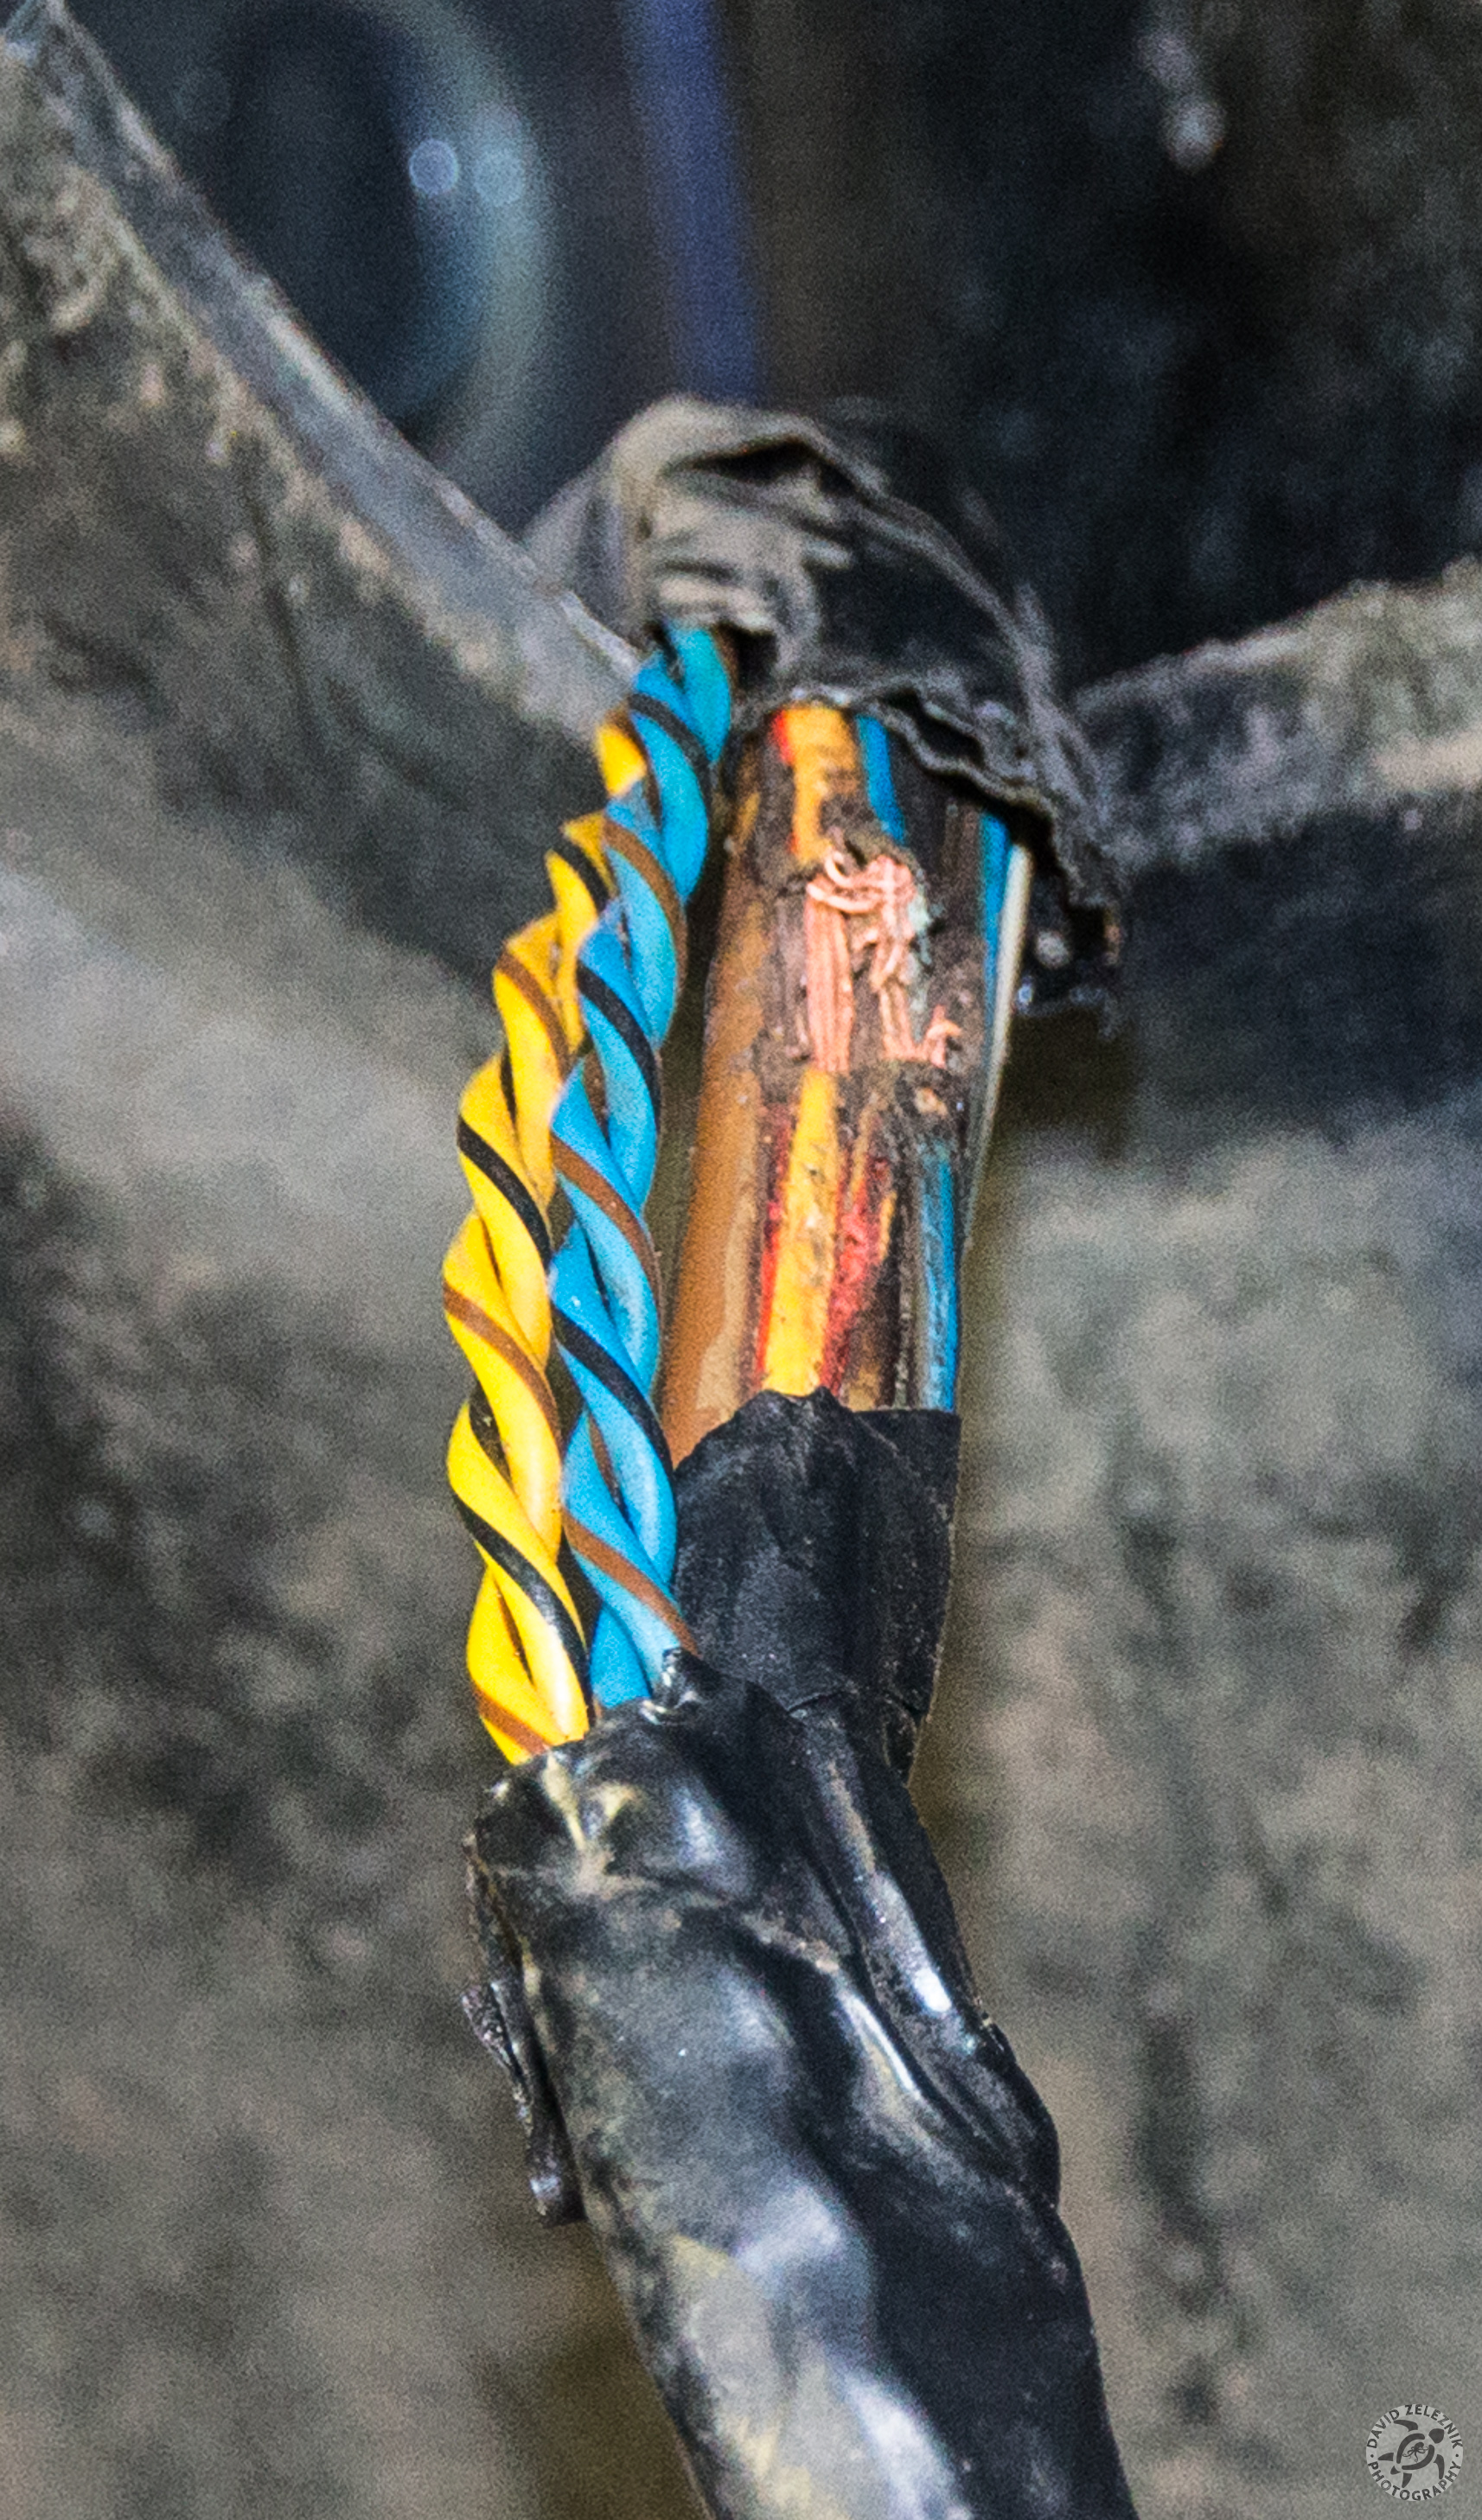
4 I peeled back the harness outer wrap to reveal the true extent of the damage. Hard to believe that the only symptom from all this was just the high beams going flaky. Can't believe that this did not throw any error codes and I suppose I'm lucky not sparking an engine fire!
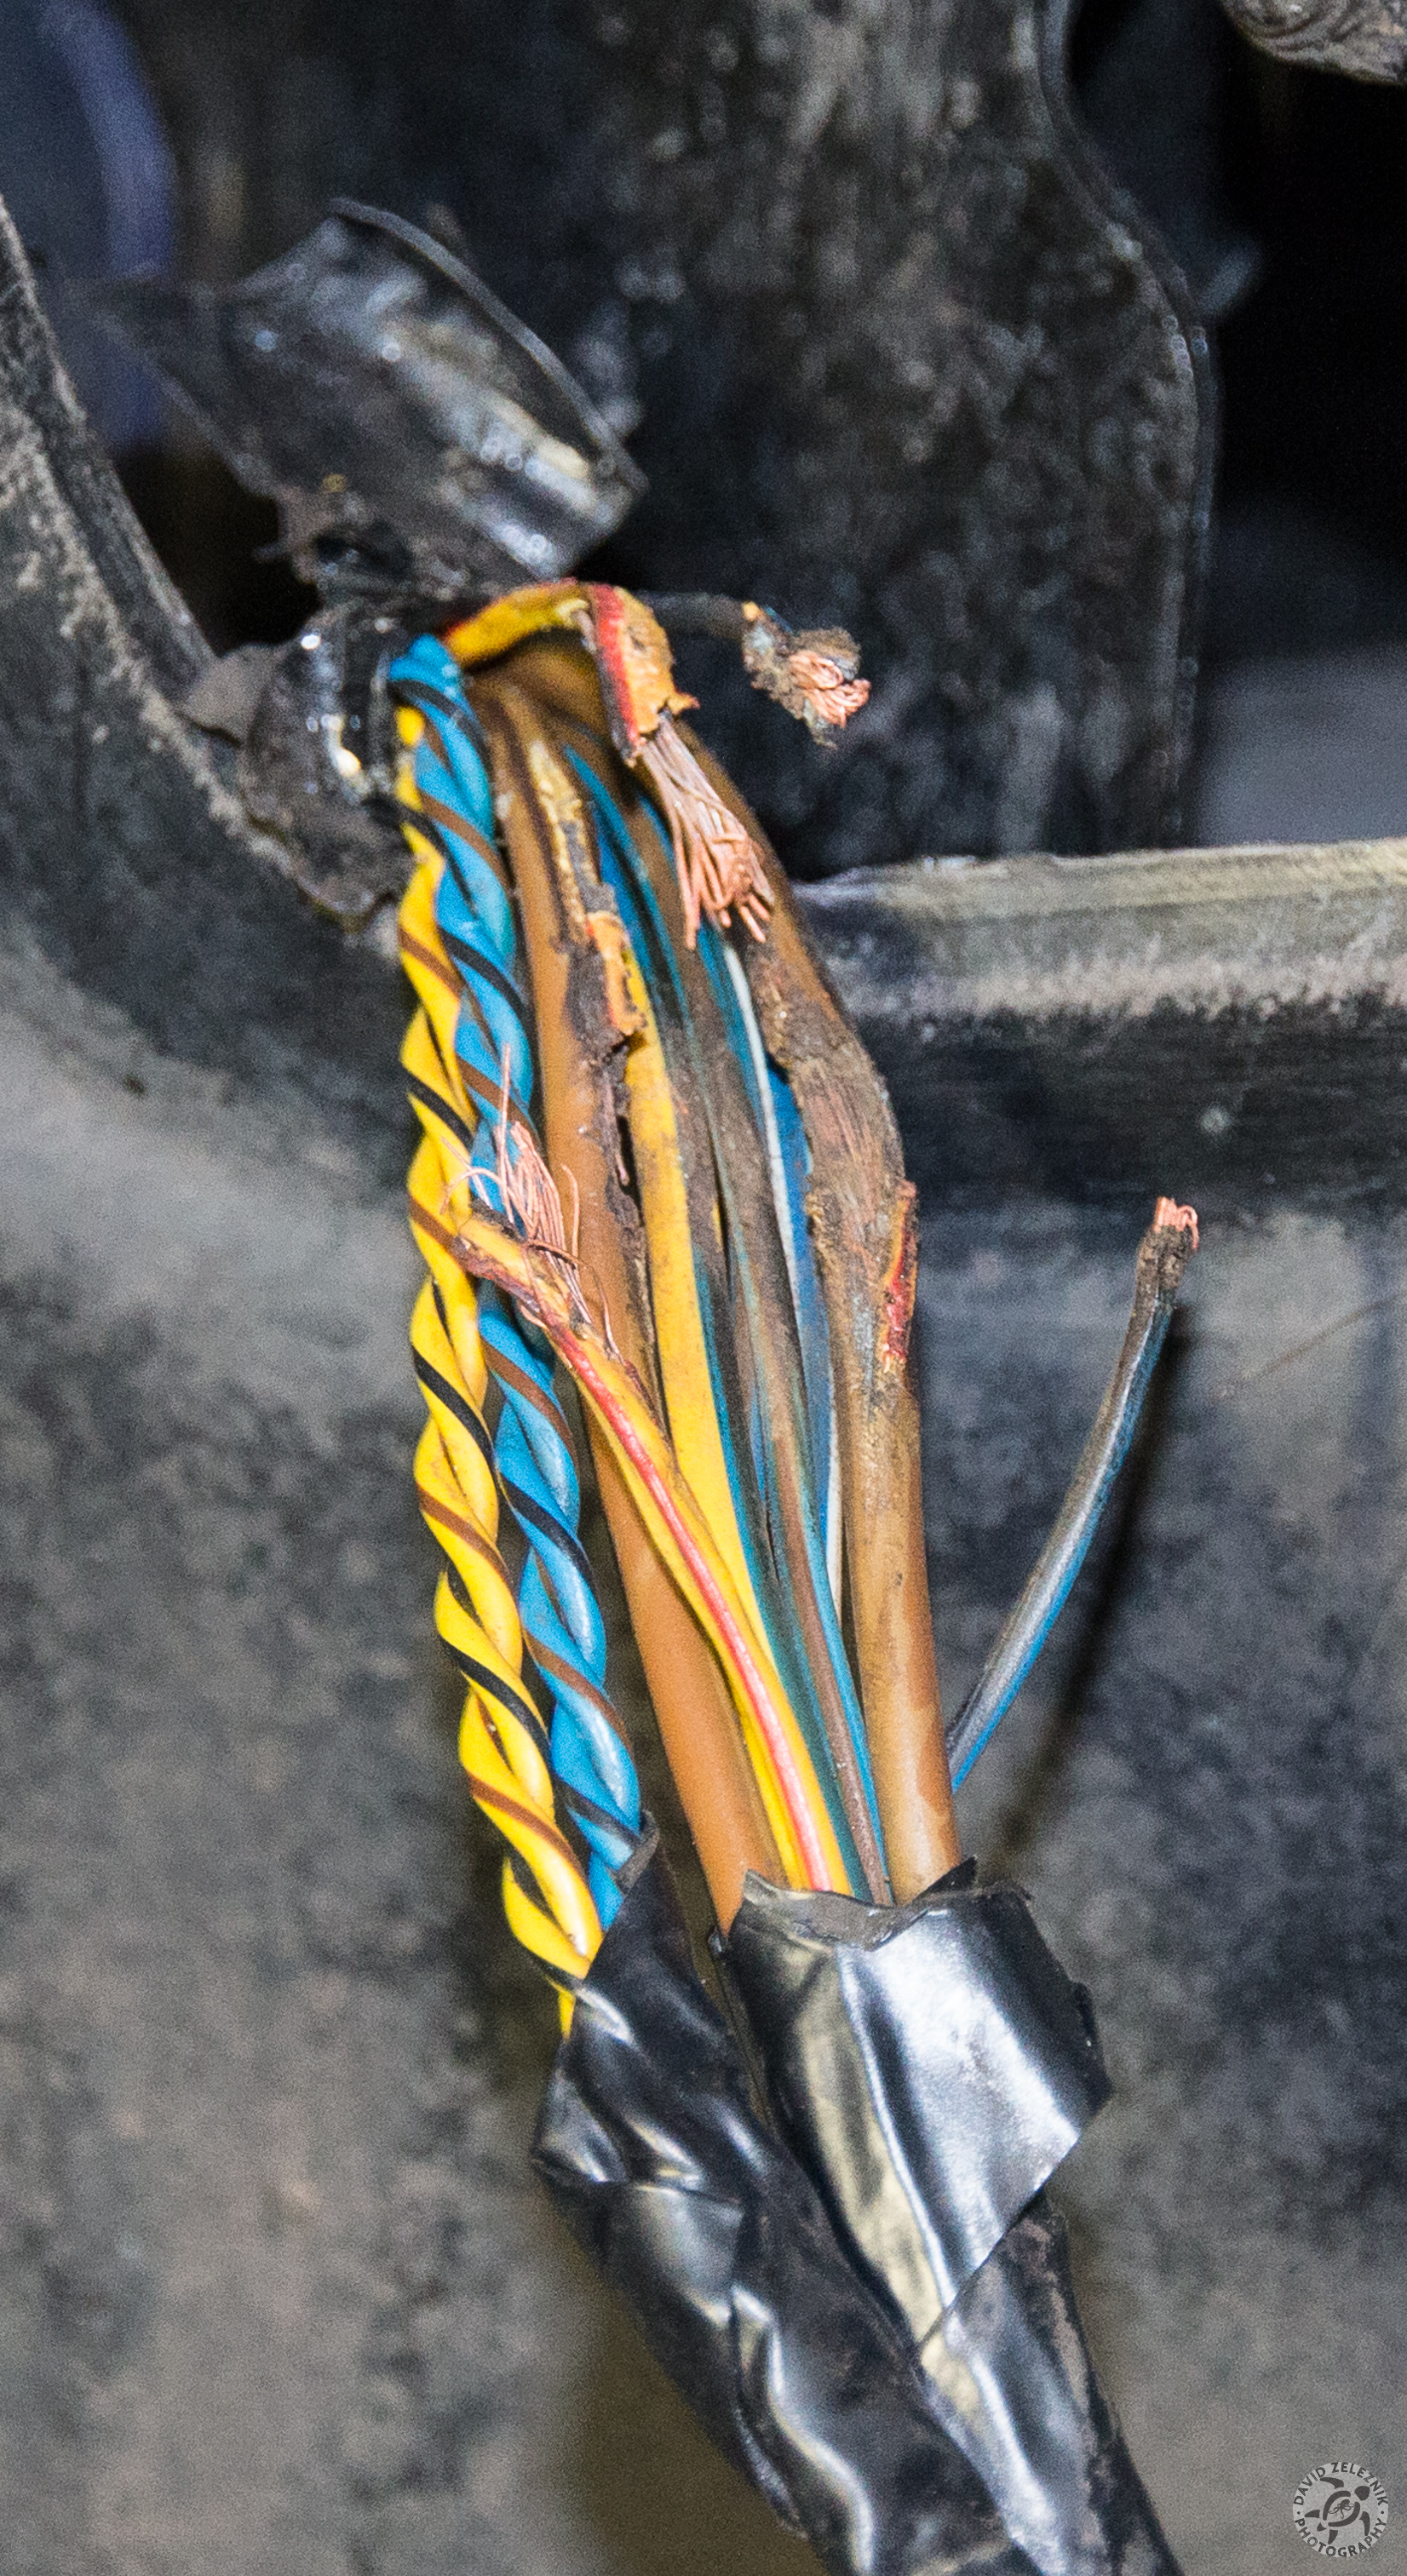
5 Yep, looking mighty nasty. Separated the damaged wires to make a temporary repair to get me through the week until it goes into Mark Aunger at Northeast Motorwerks for a professional repair.

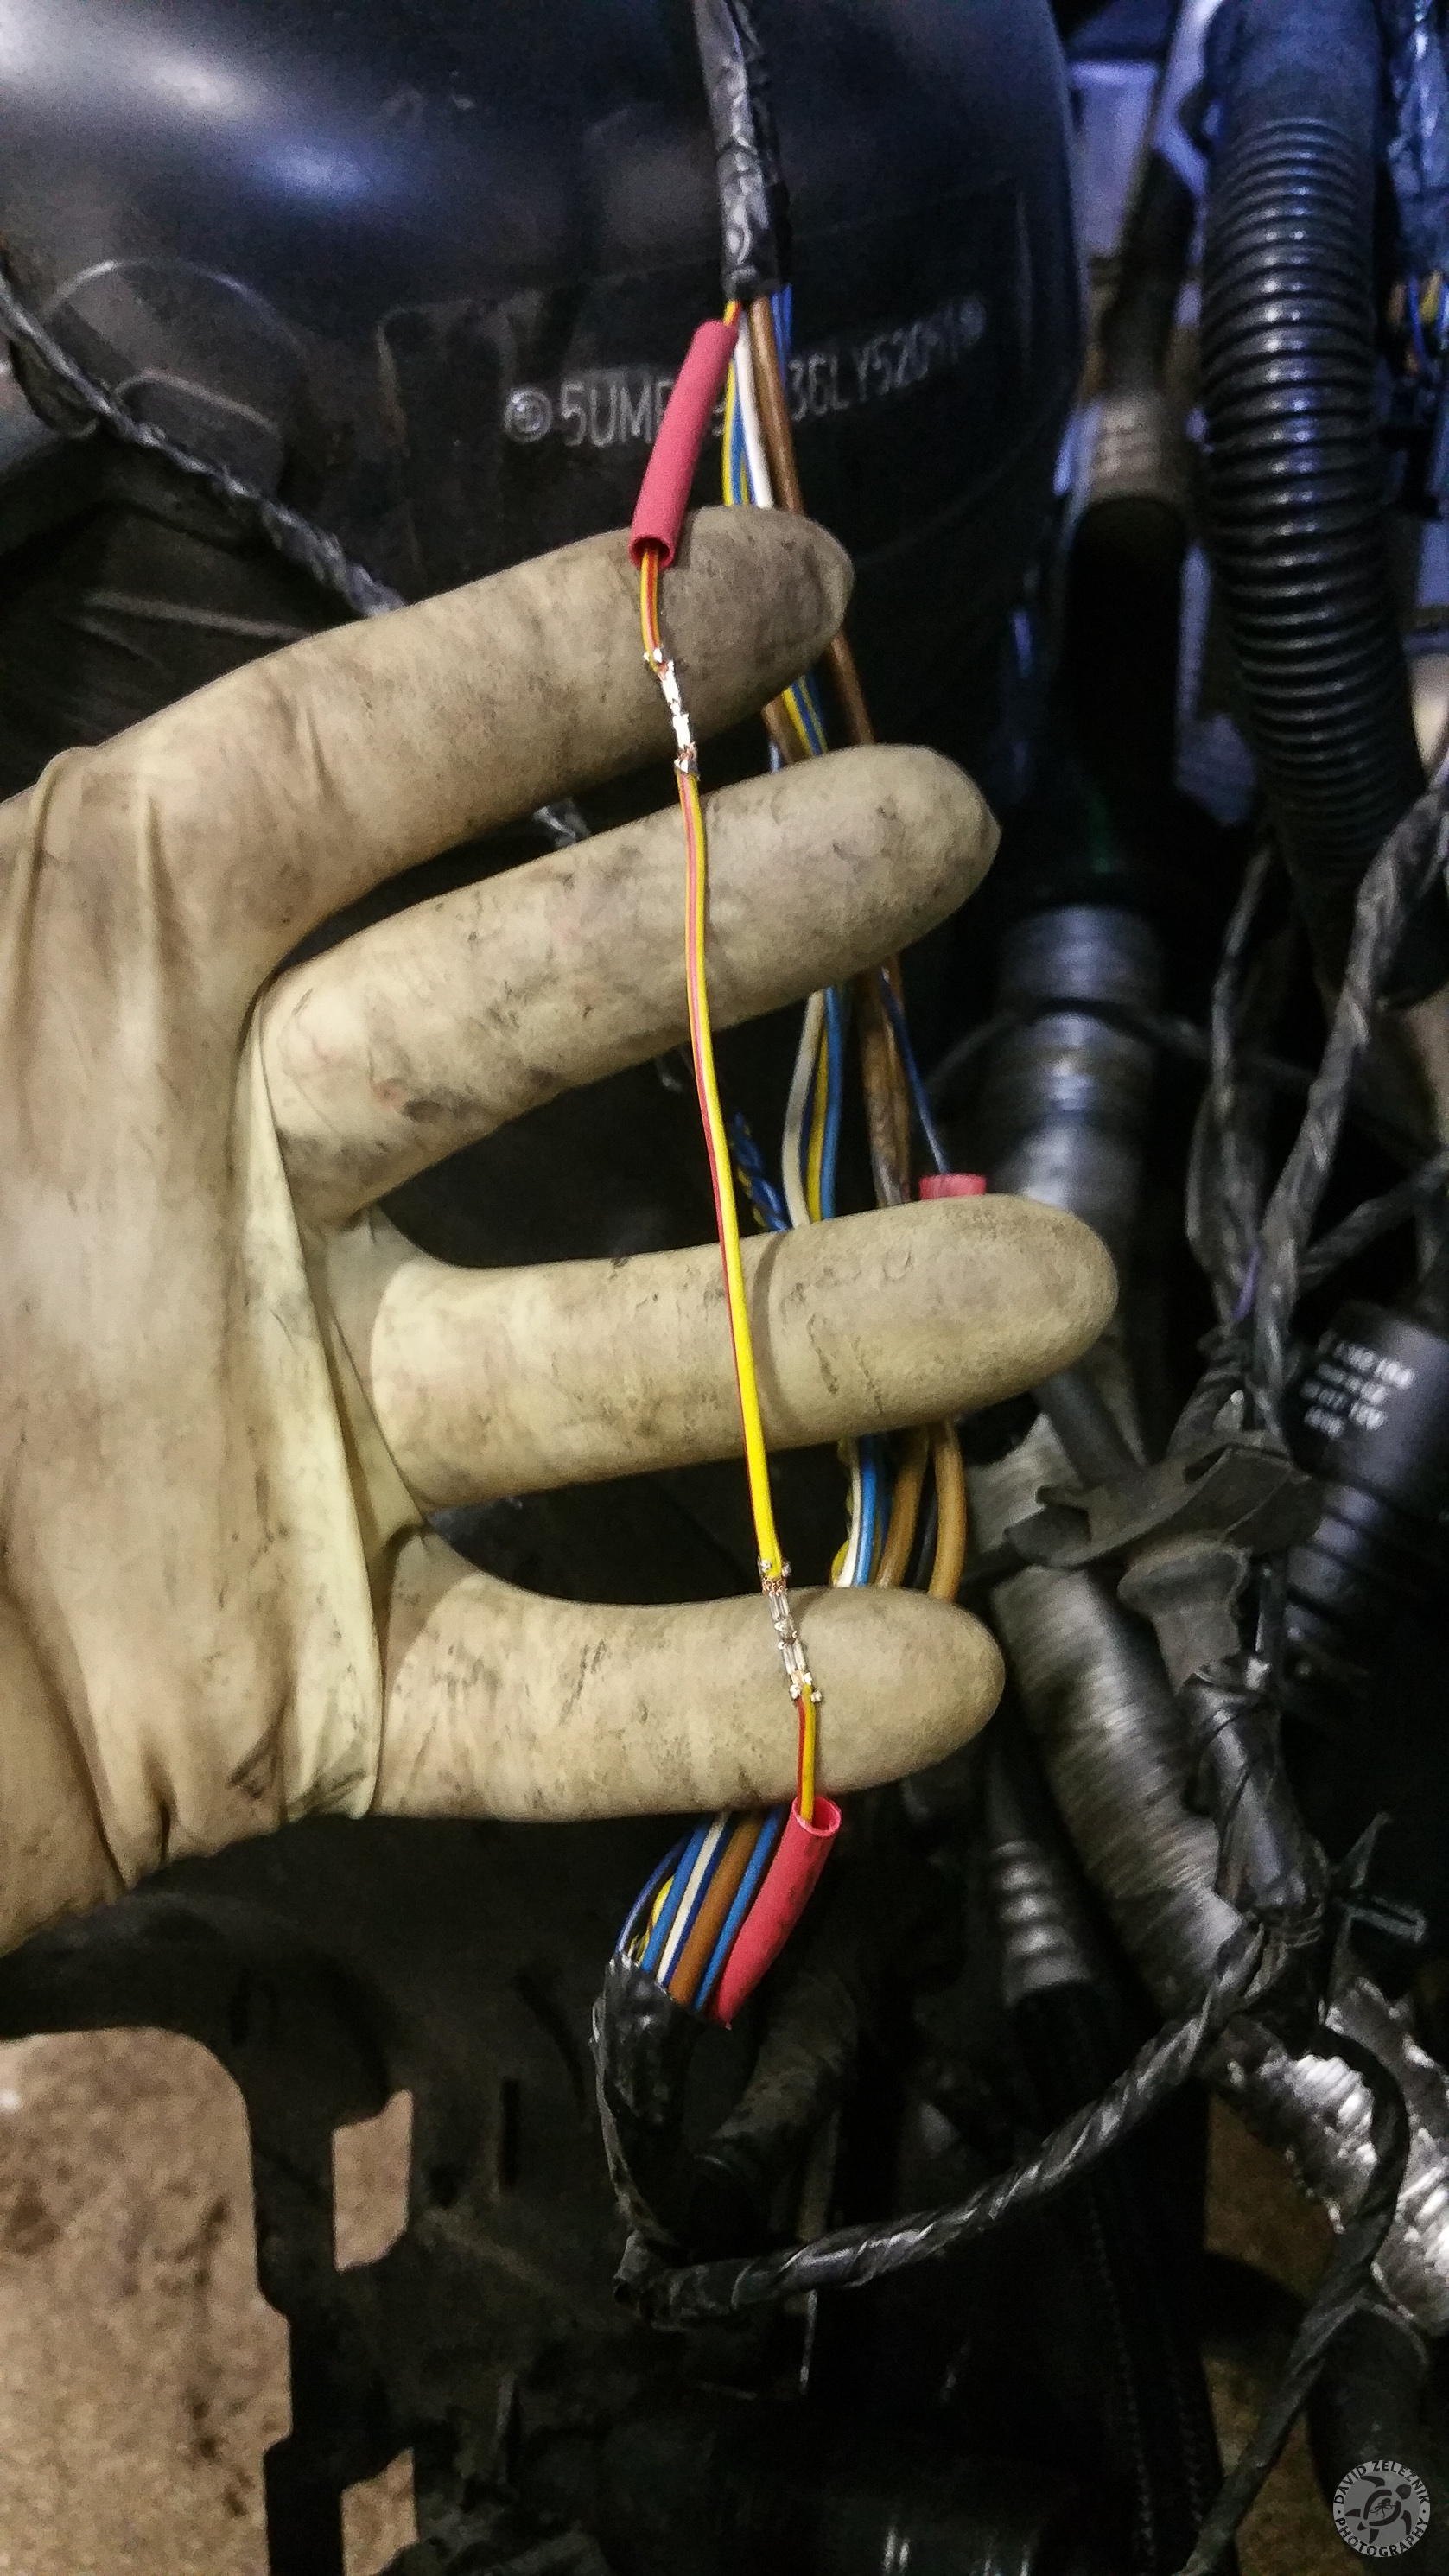
6 Electrical tape and butt connectors will get me through for a couple of days.
7 Instead of letting the cable drop back down to rub against the same metal plate, I tied it up out of the way as a temporary kludge. I'll let Mark figure out how to more permanently reroute both headlight cables next week.
8 One week later and it's time for professional repair by Mark Aunger at Northeast Motor Werks. First step is to cut out the damaged section of the wiring harness and splice in a repair using gas-tight crimp connectors.
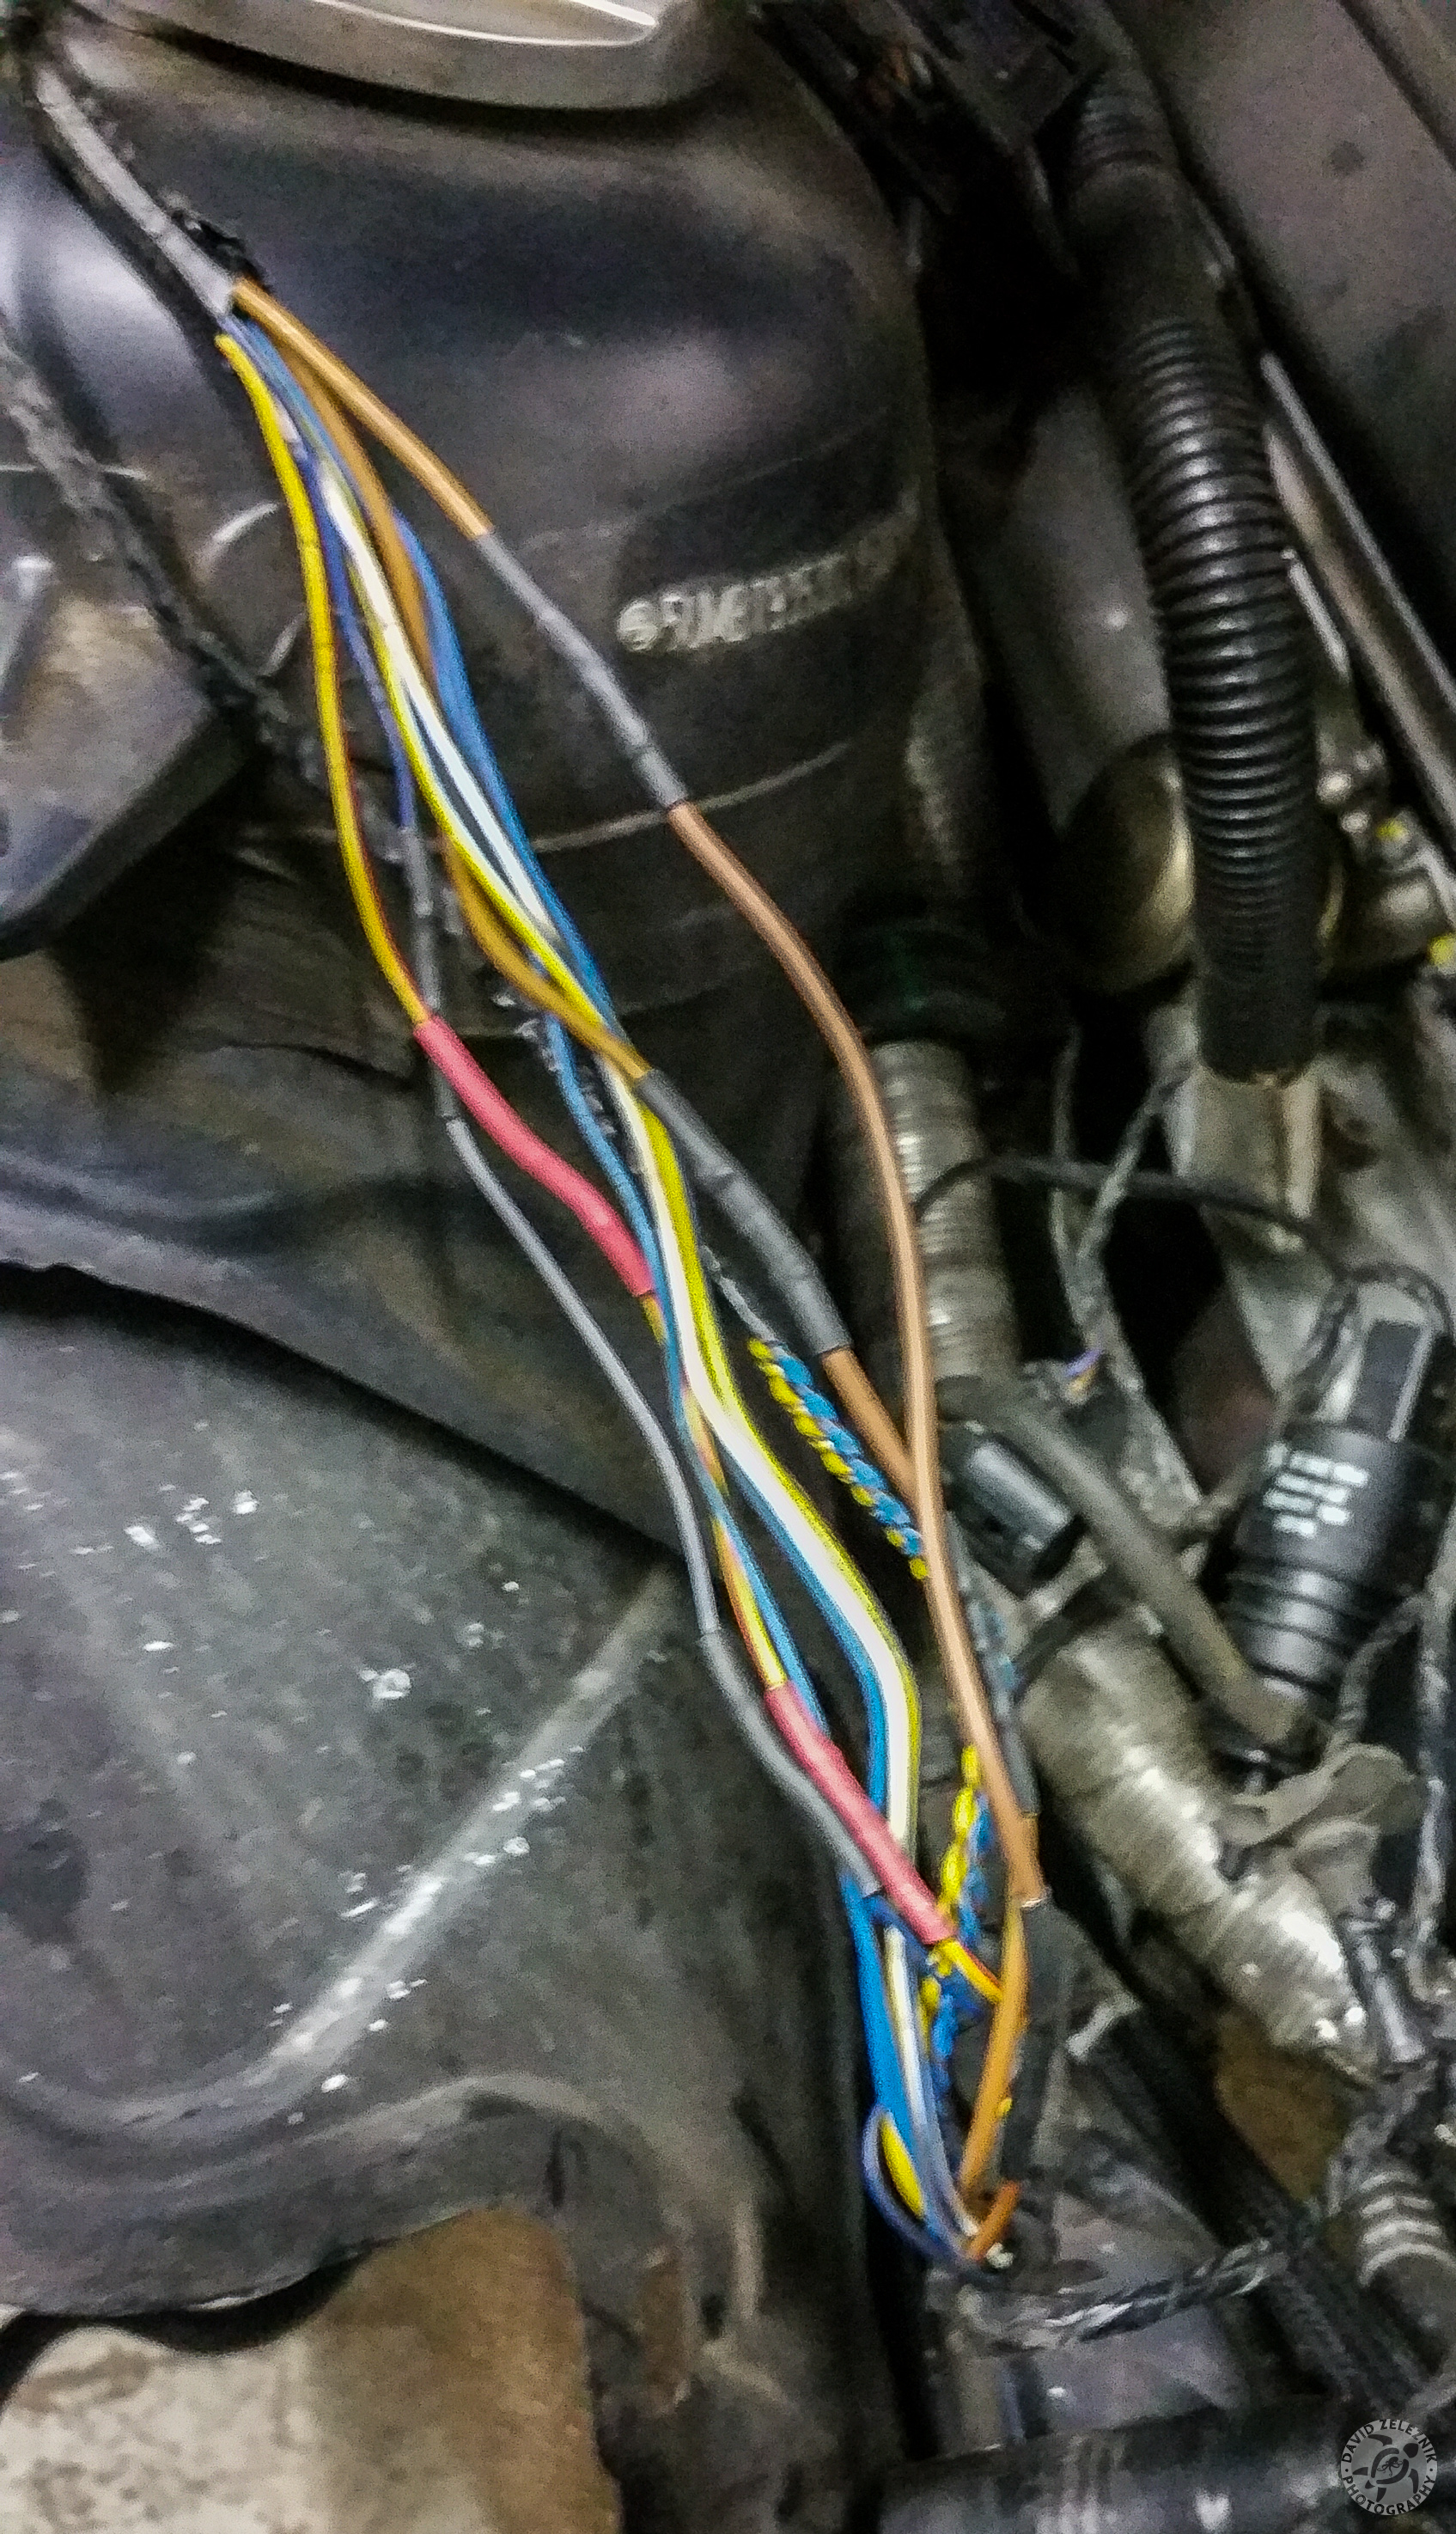
9 All of the wires in the headlight harness have now been spliced back together and the connections sealed with heat shrink tubing
10 Next step is to re-wrap the wiring harness

11 The final step is to prevent the damage ever happening again by putting the harness inside a corrugated wiring loom. You can see in the middle of the photo where the loom is protecting the wires as they bend to the right against the edge of the metal plate that caused all the damage.