
1
2
3
4
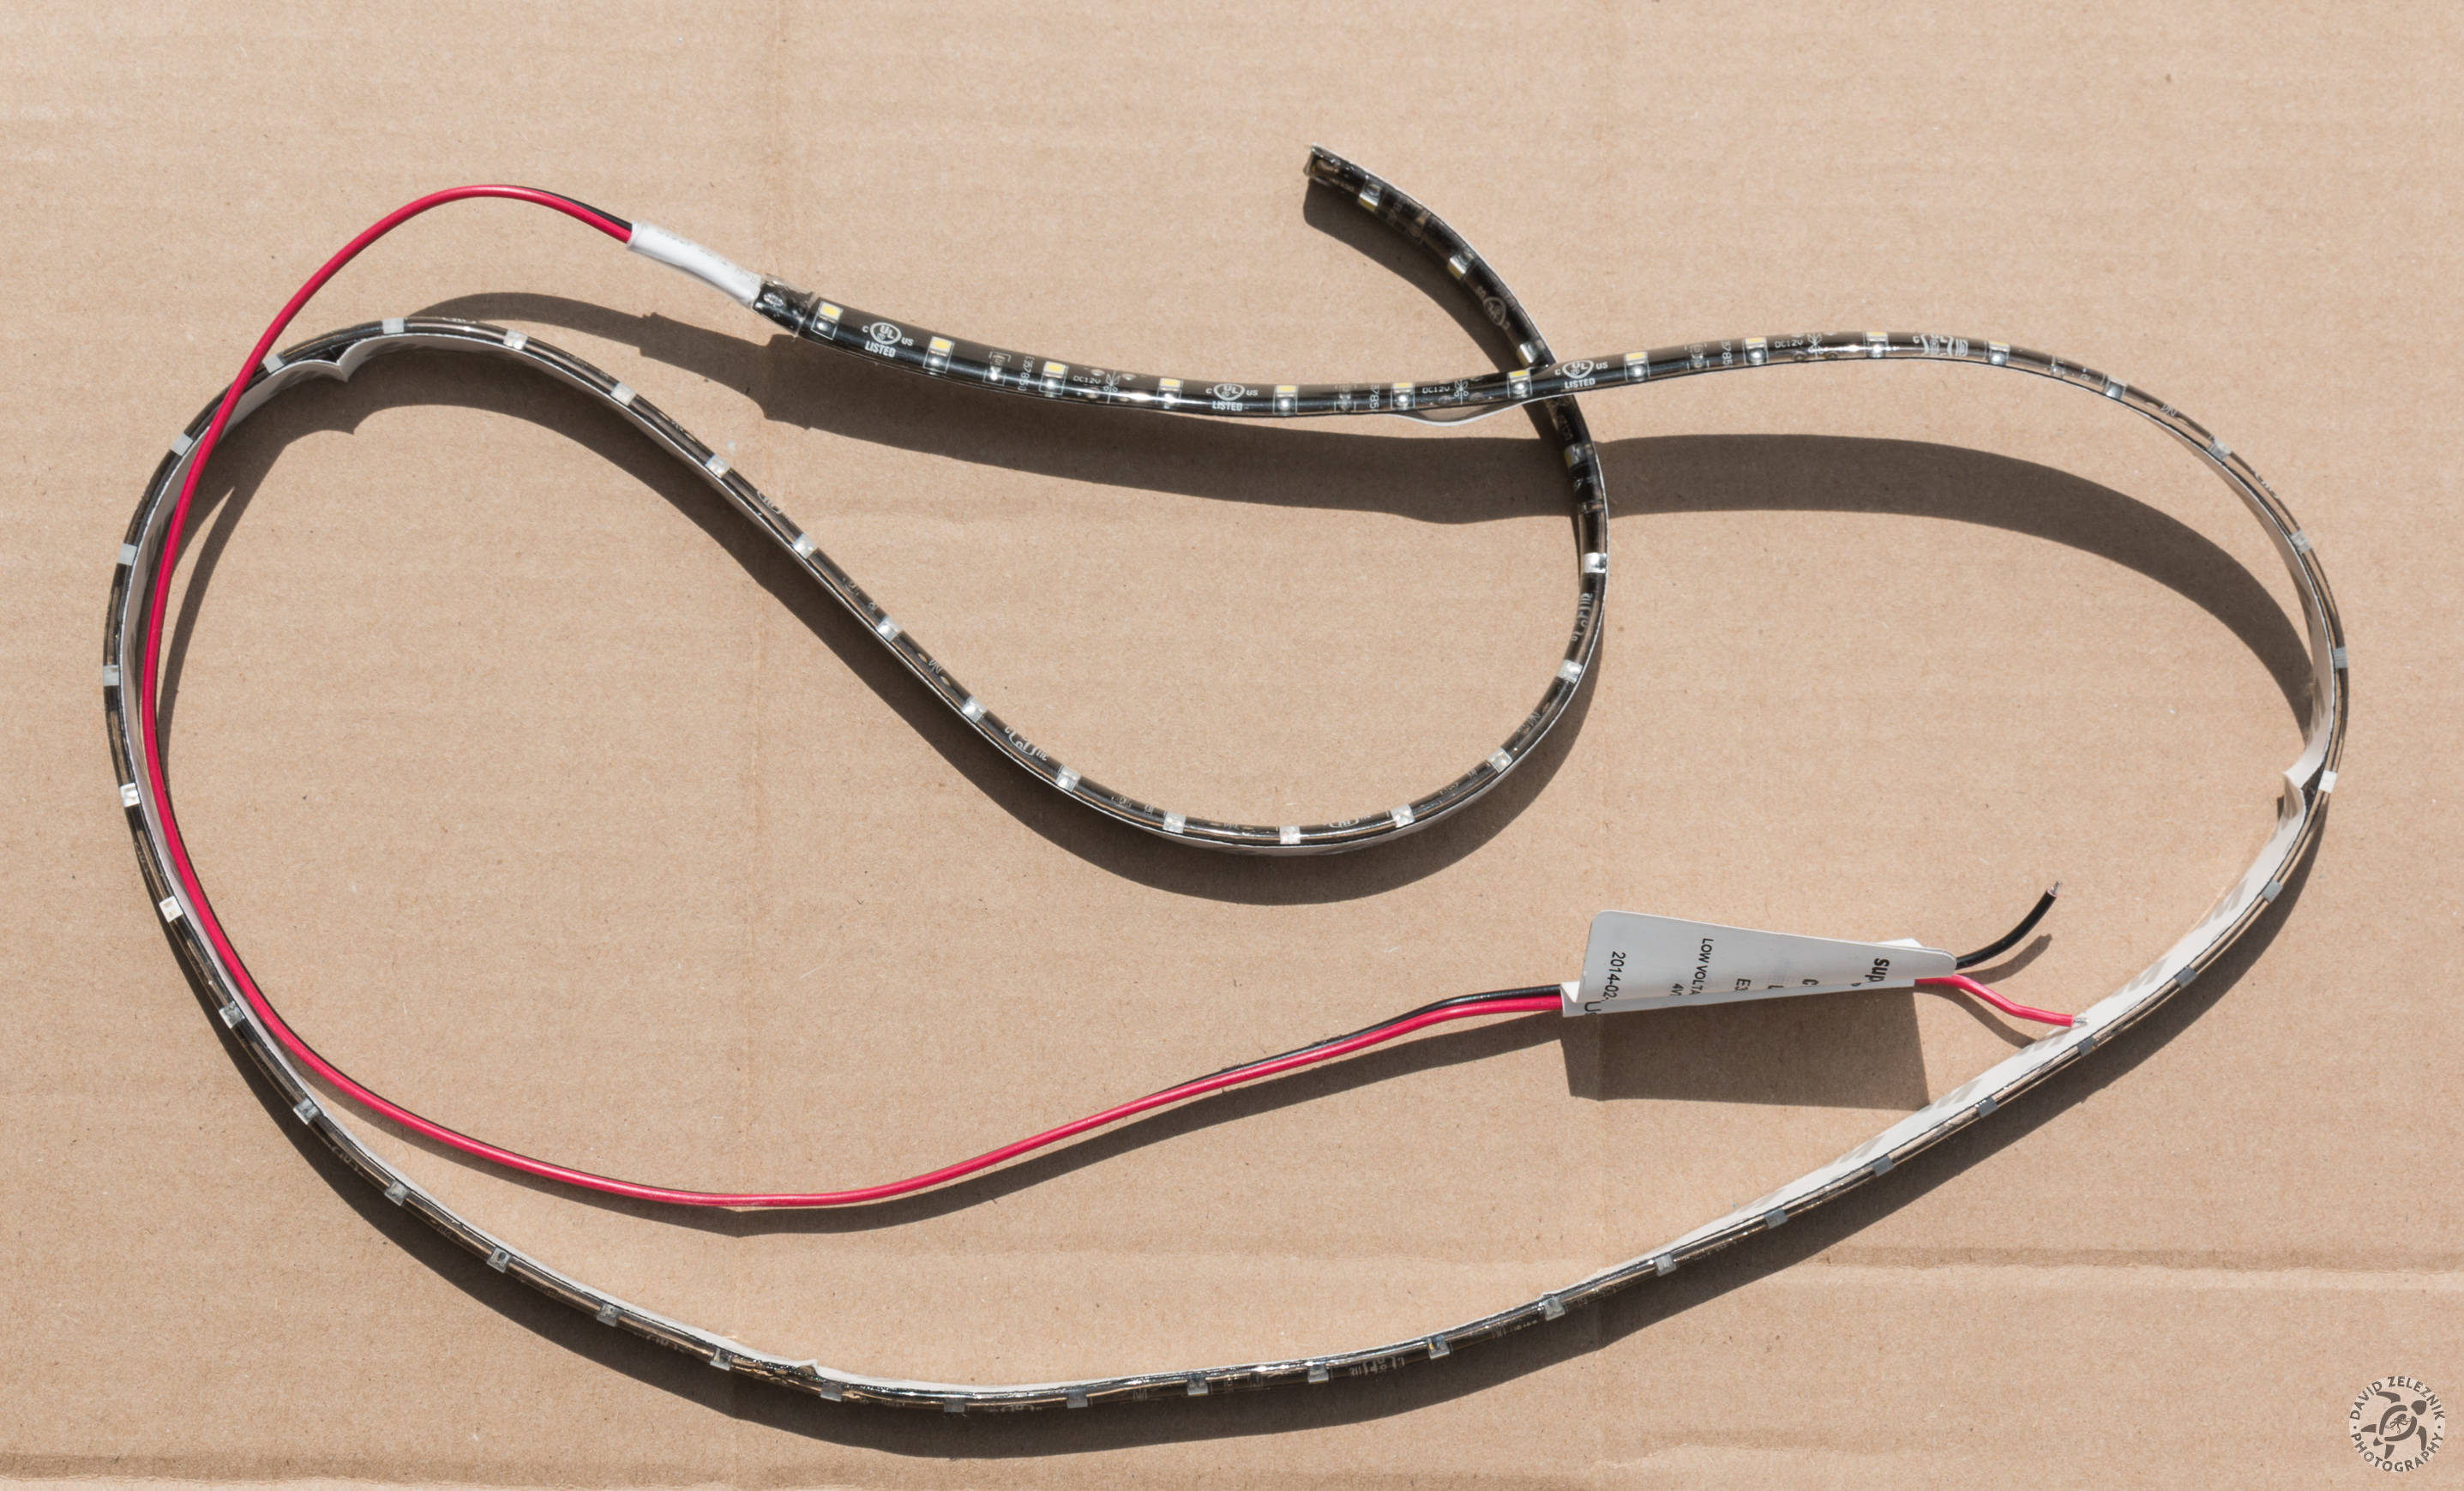
5 I ordered this 100cm/39" adhesive-backed weatherproof LED strip from http://superbrightleds.com. I got the black finish with natural-white (4500K) LEDs: Weatherproof High Power LED Flexible Light Strip - WFLS-x. Cost was approx $27.
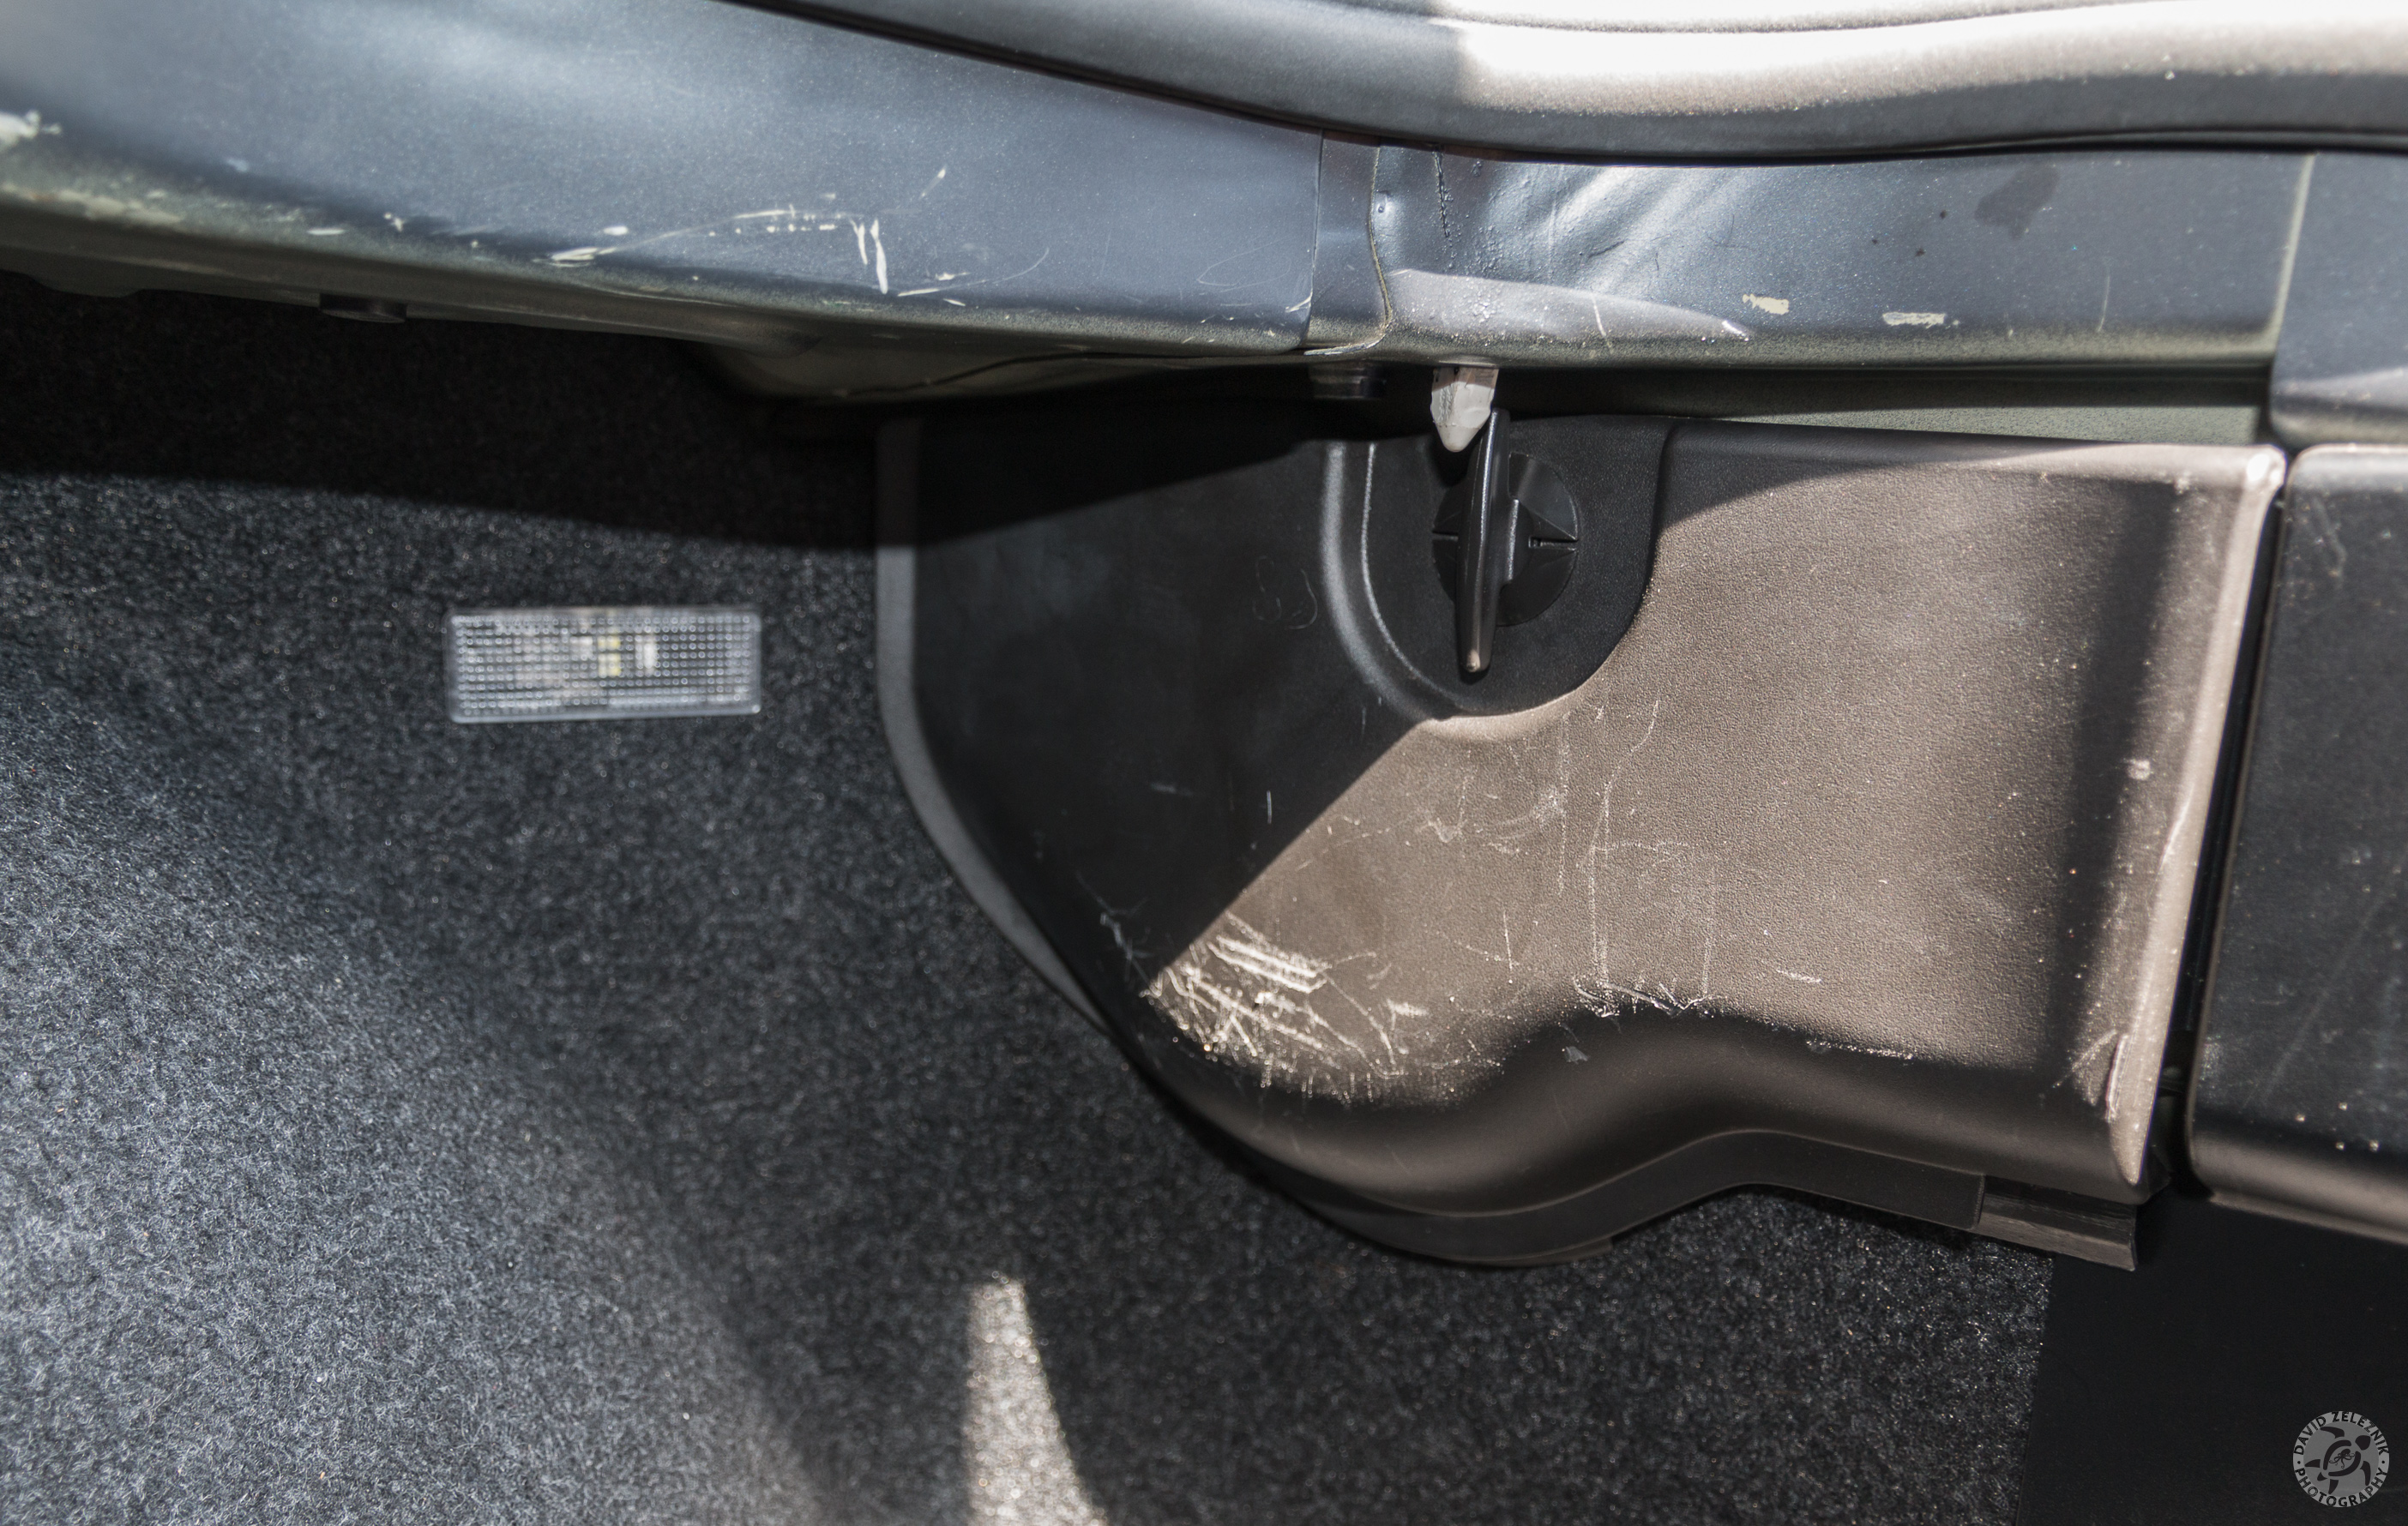
6 We're going to wire the LED strip into the existing trunk light on the passenger side. To gain access, turn the latch counter-clockwise to remove the plastic panel covering the tail lights.
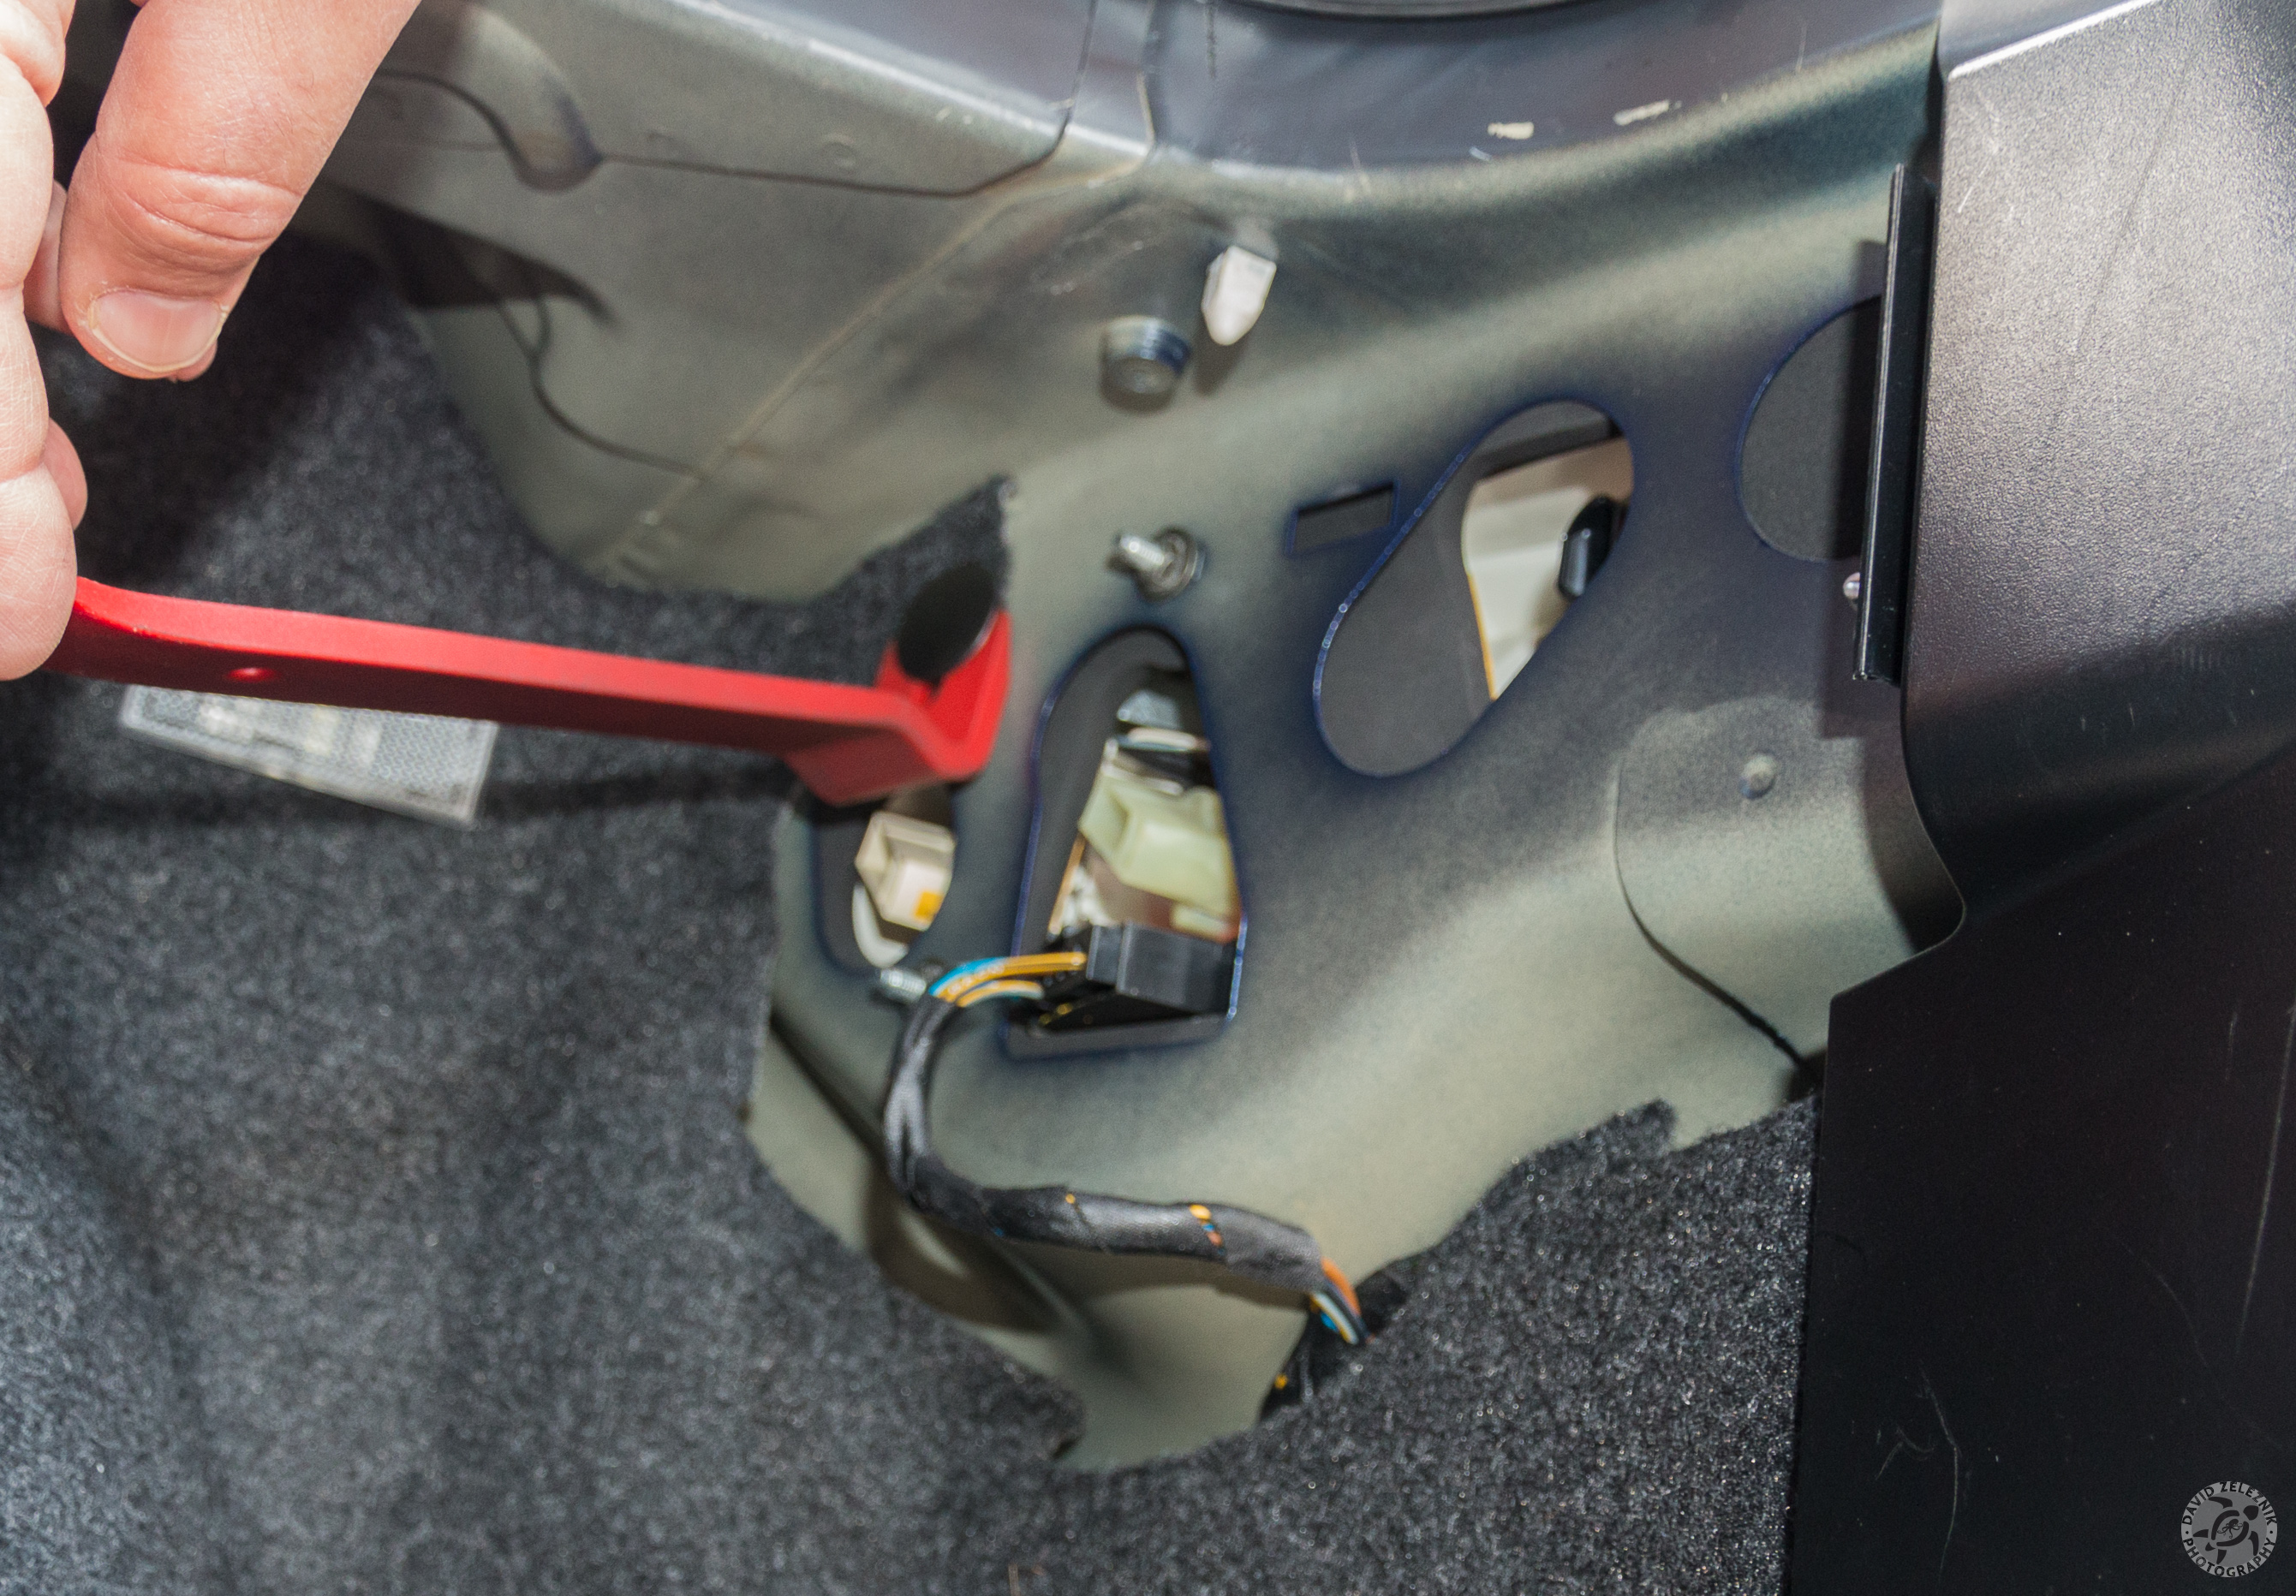
7 Using a trim tool, pop the plastic fastener holding down the trunk liner.
8 Now you can peel back the trunk liner to access the rear of the trunk light. Notice that I had already replaced the bulb with an LED after installing a complete LED Interior Lighting Kit from ECSTuning.
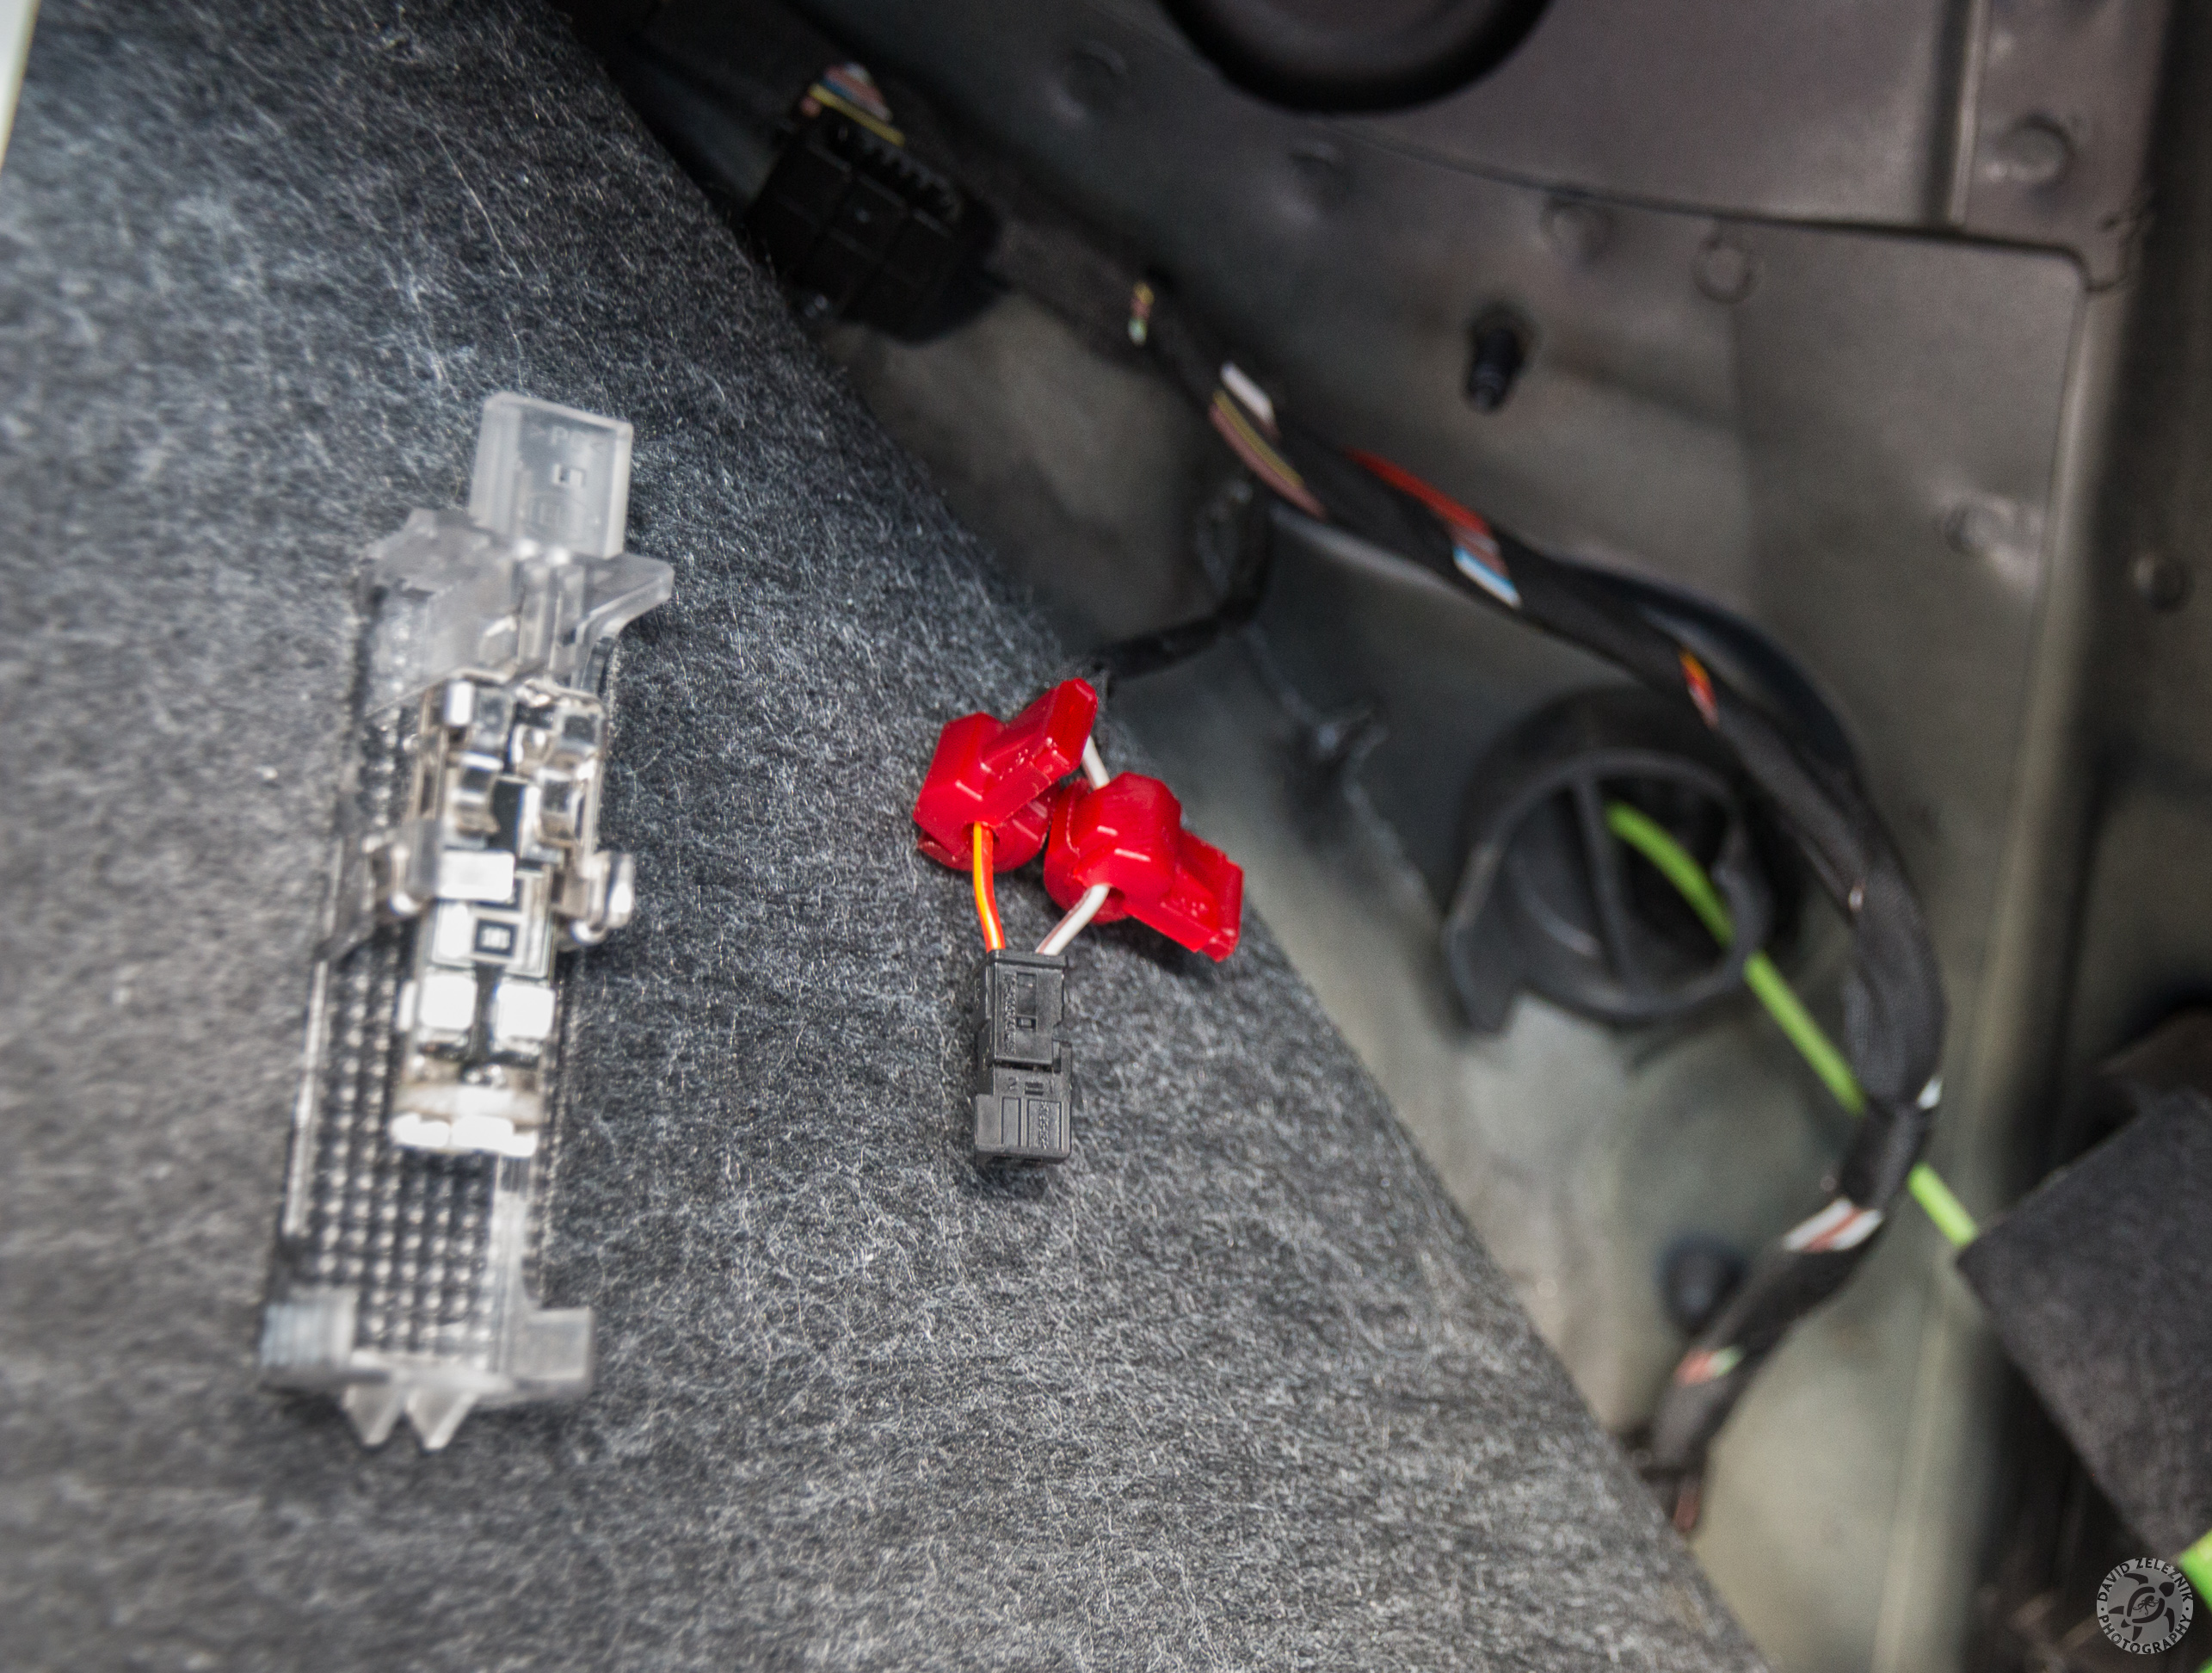
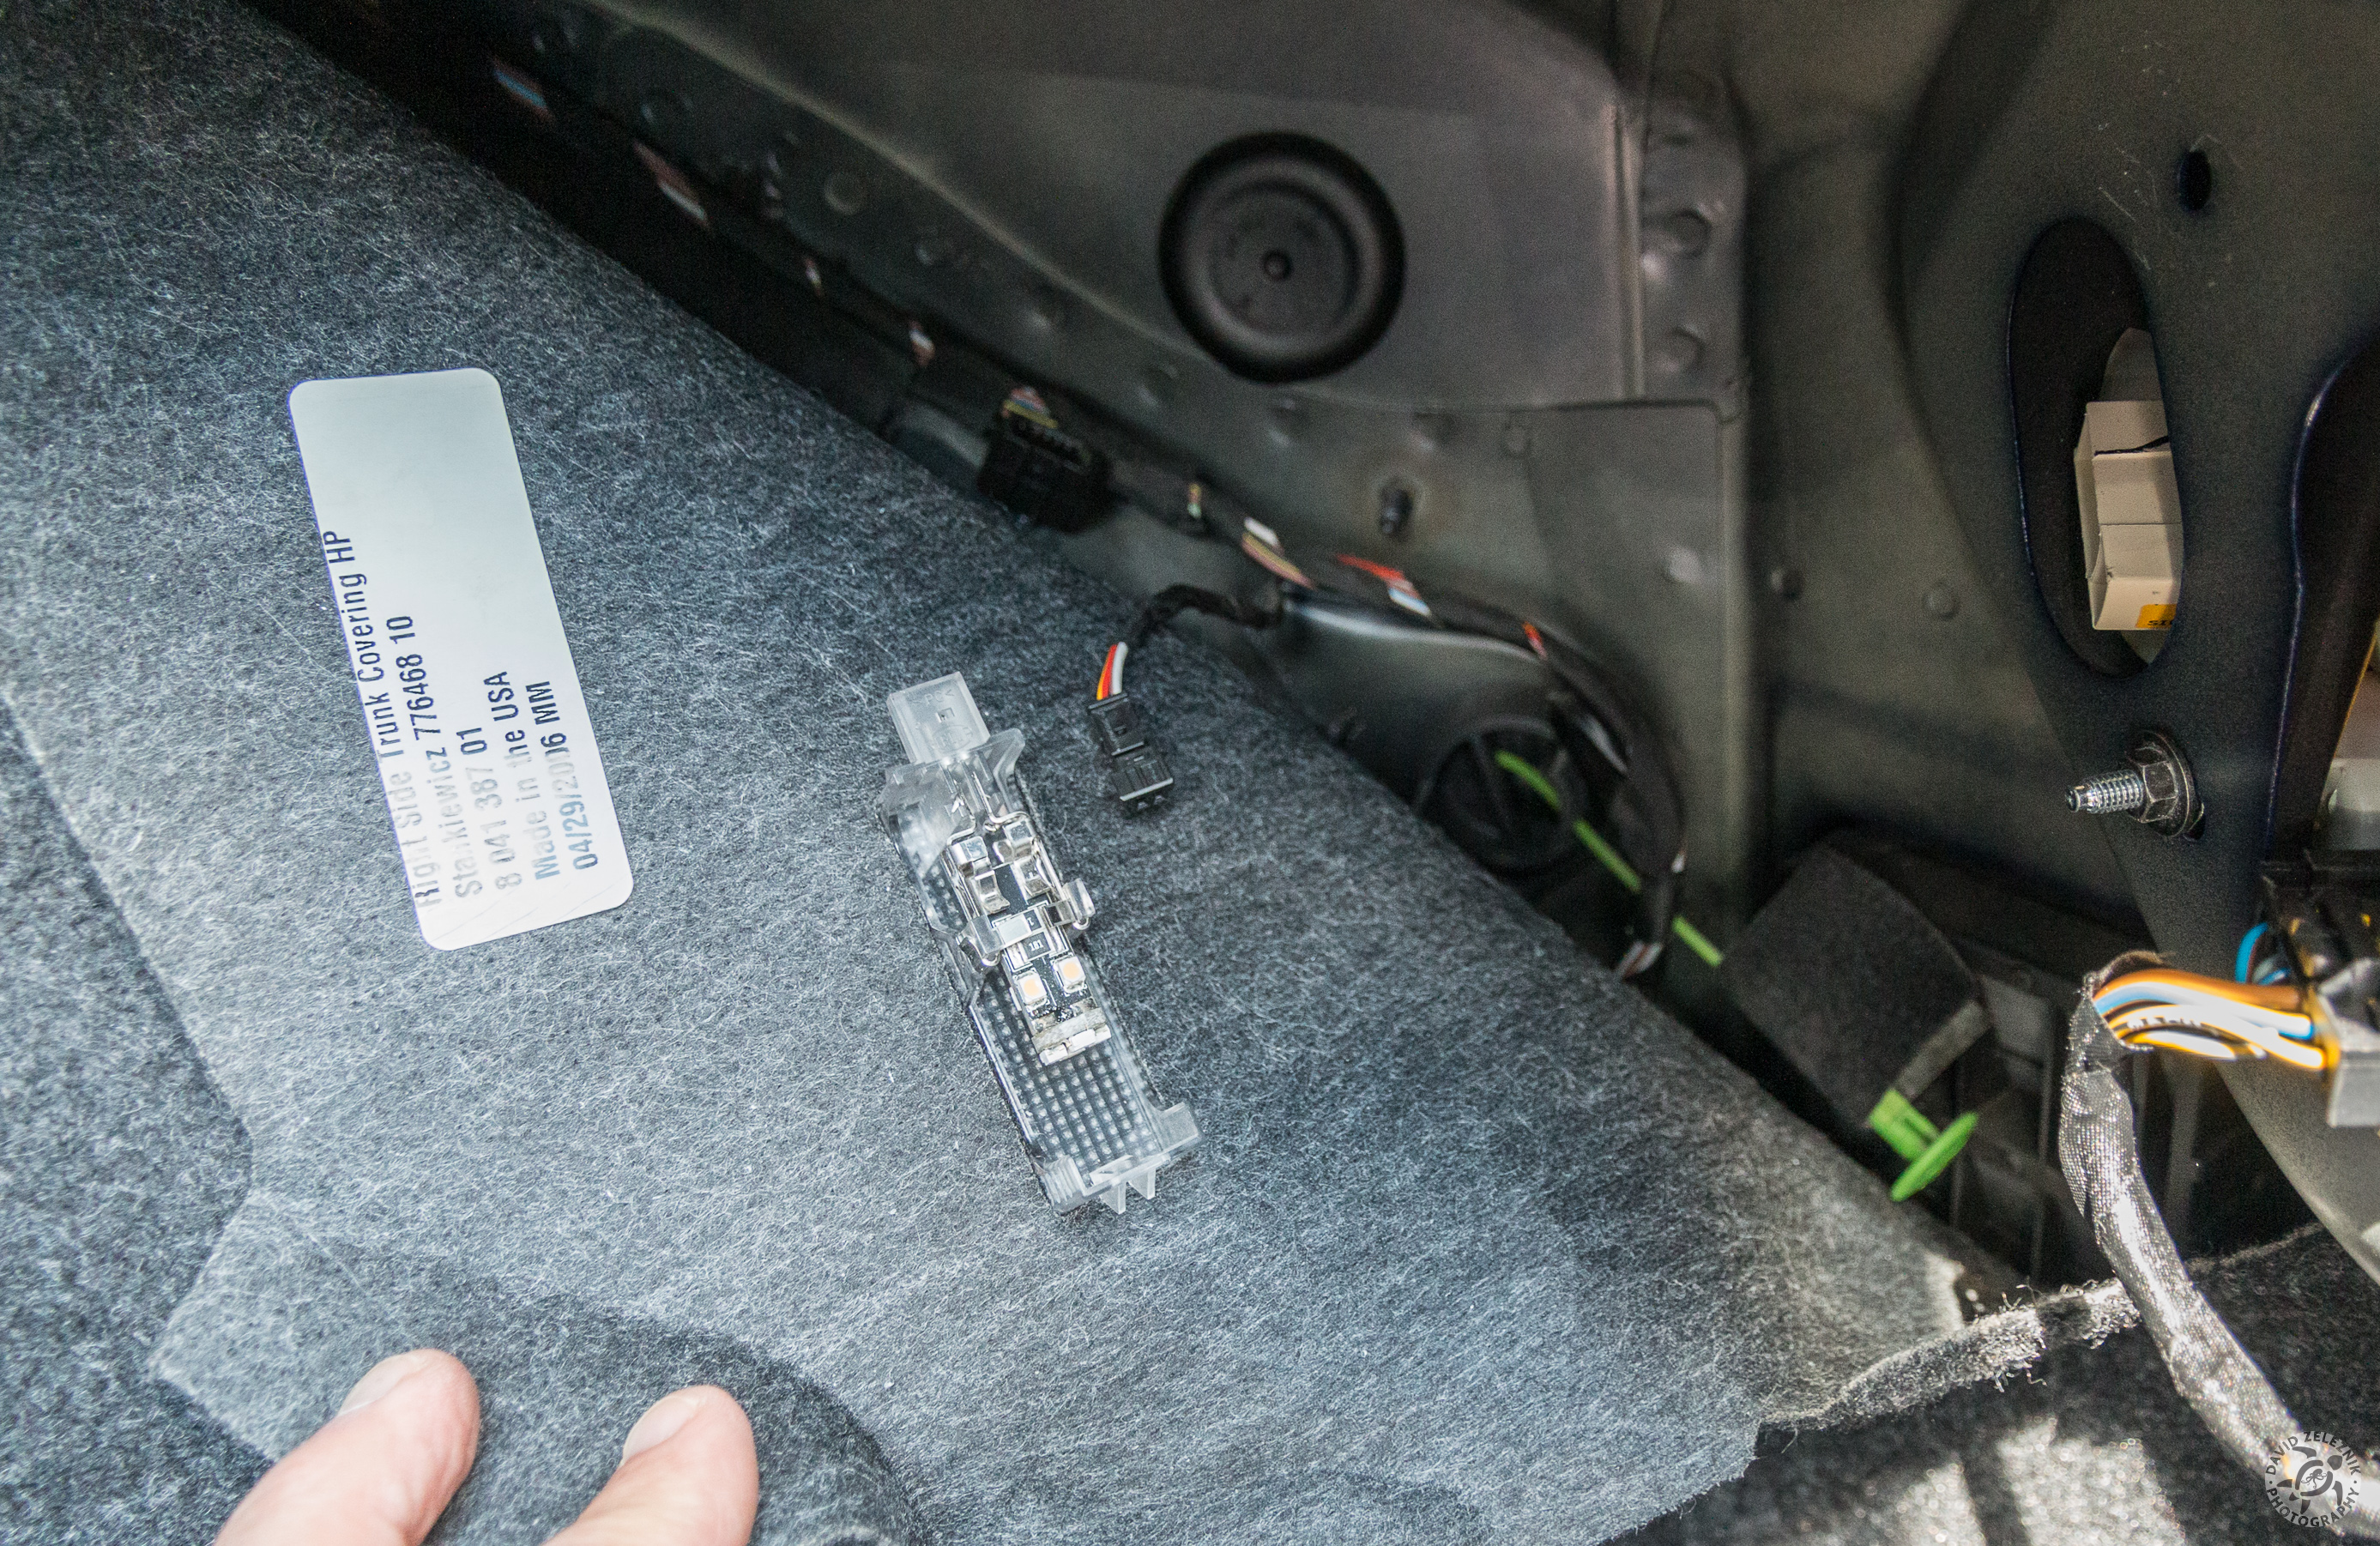
9 After disconnecting the cable from the trunk light, I peeled back the tape wrap enough to give me access to the individual wires. I then attached an 18-22 gauge t-tap to each wire.
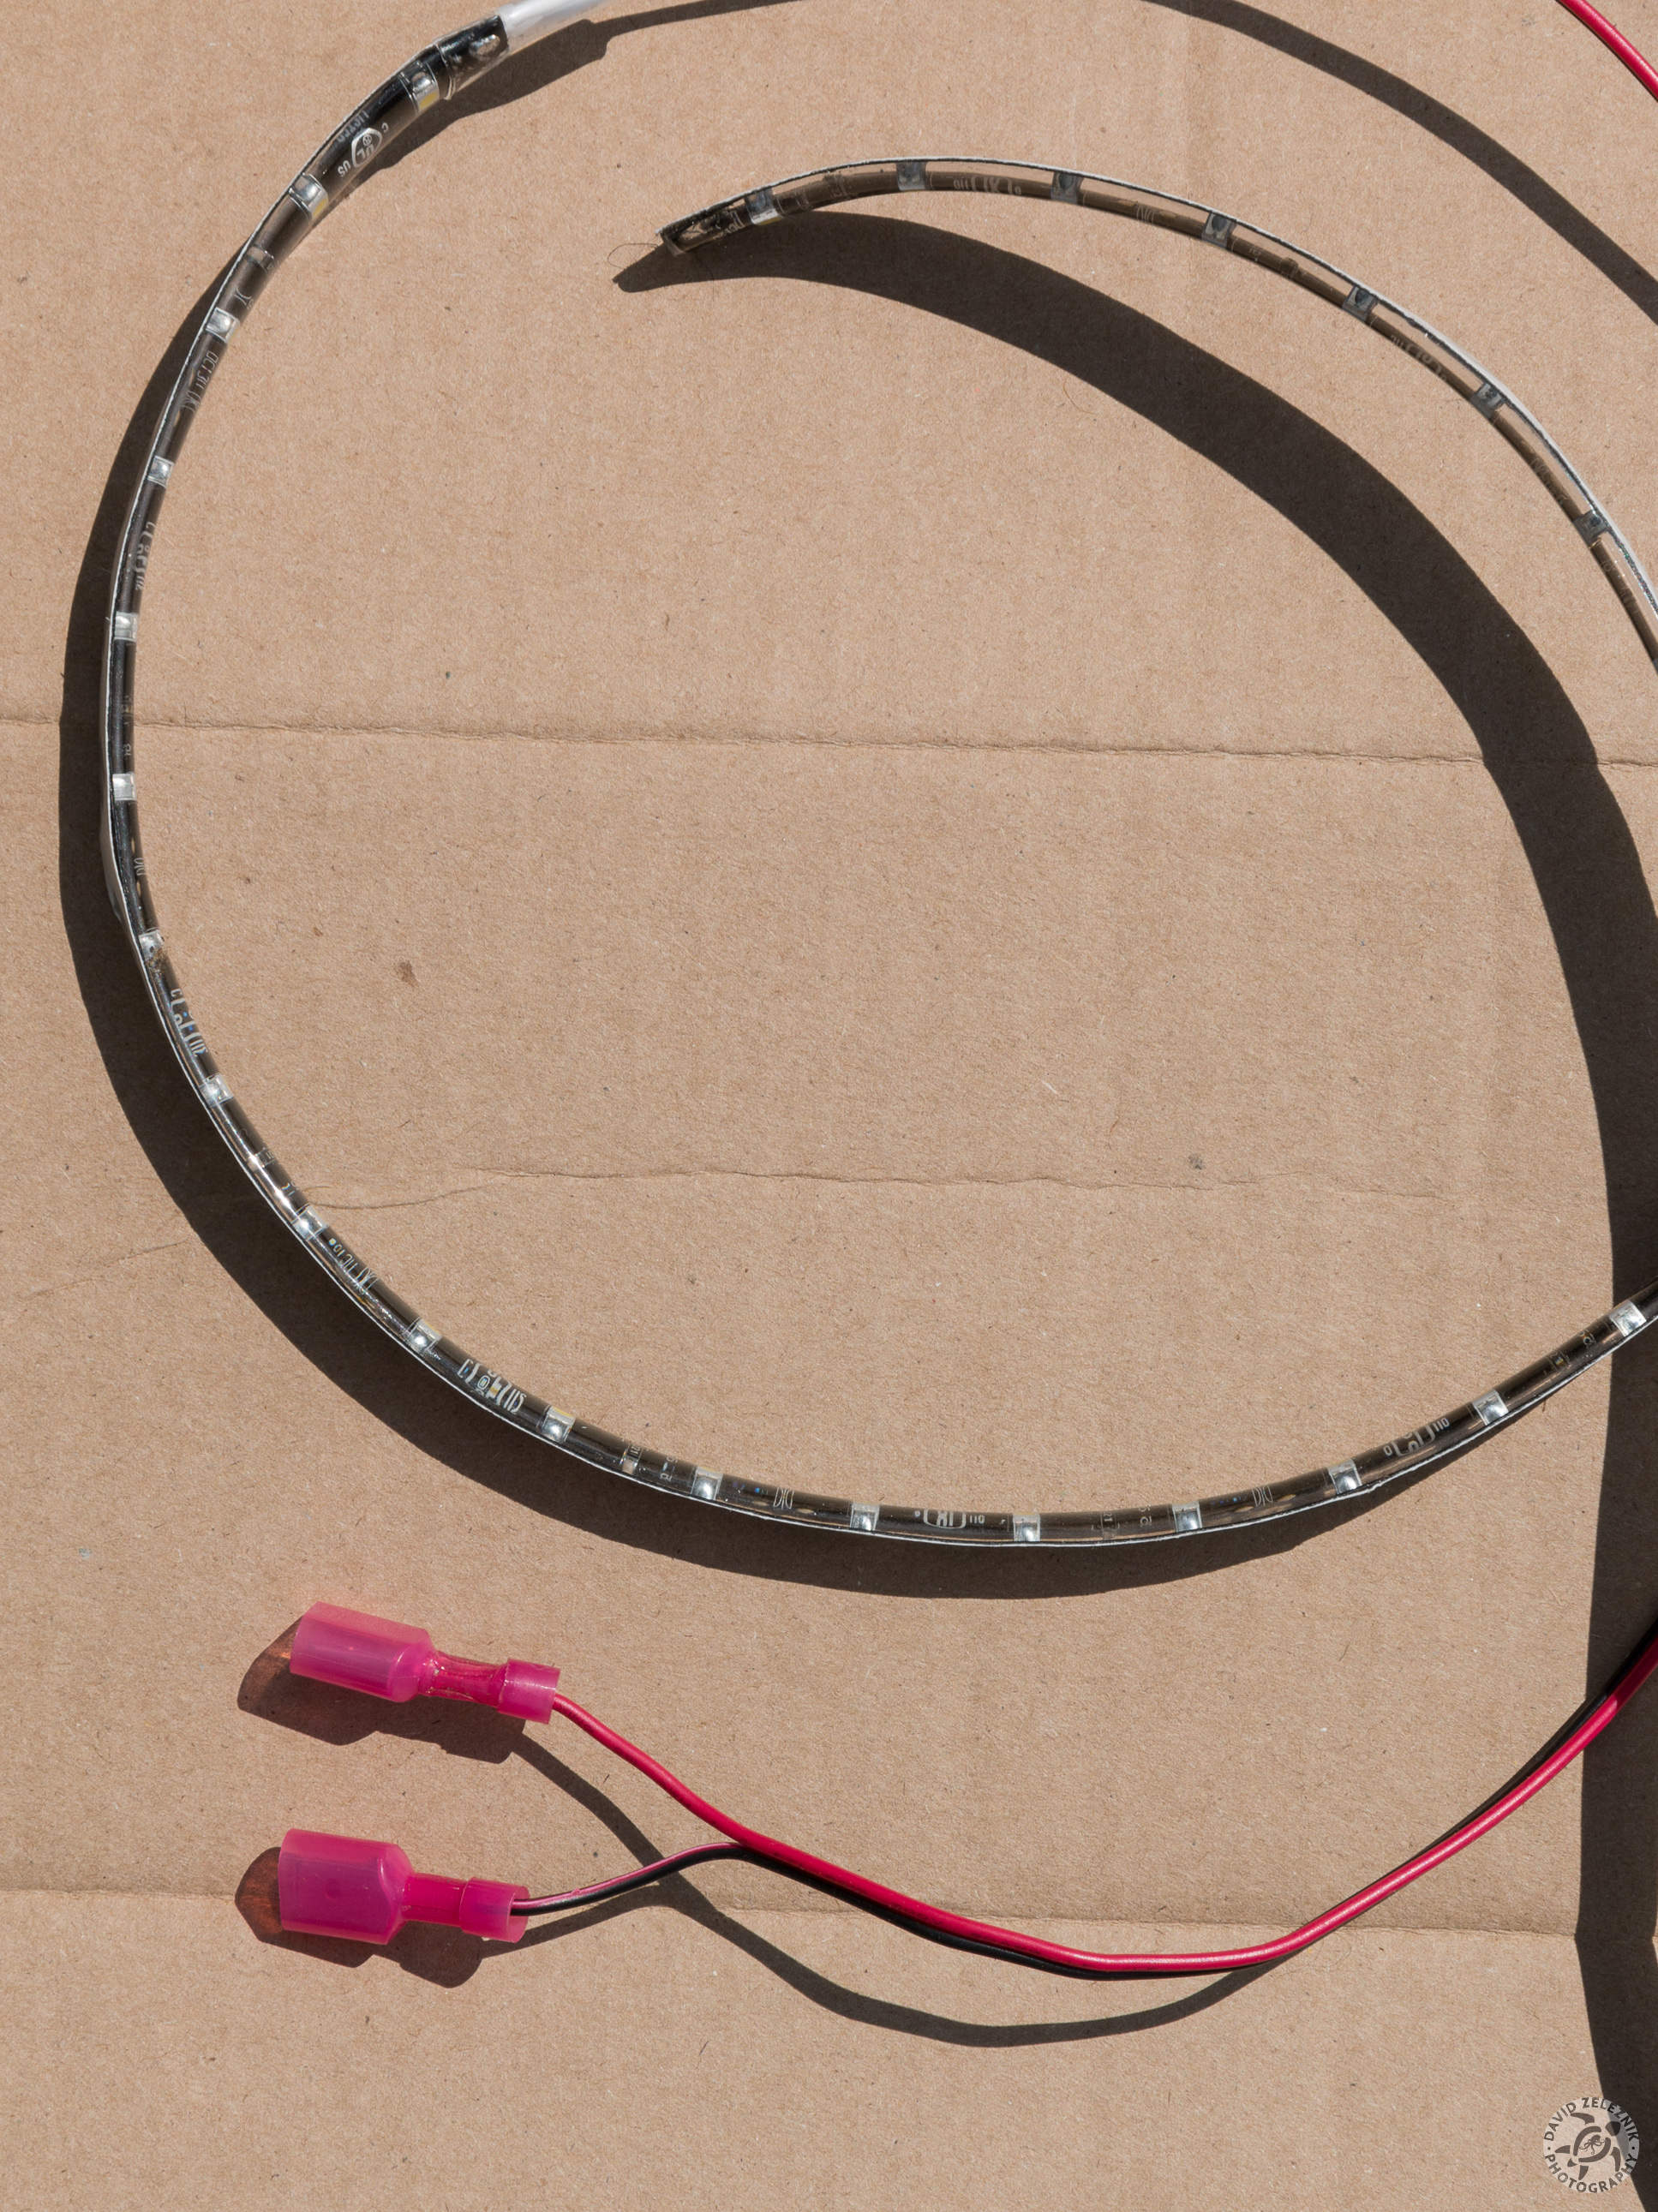
10 I crimped a male 1/4" 18-22 gauge quick disconnects to the LED strip pigtails.

11 Next step was to test the wiring and that everything was working. The red/hot pigtail lead plugs into the t-tap on the red/yellow striped wire. The black/ground pigtail lead plugs into the t-tap on the white wire. Close and reopen the trunk to activate the light.
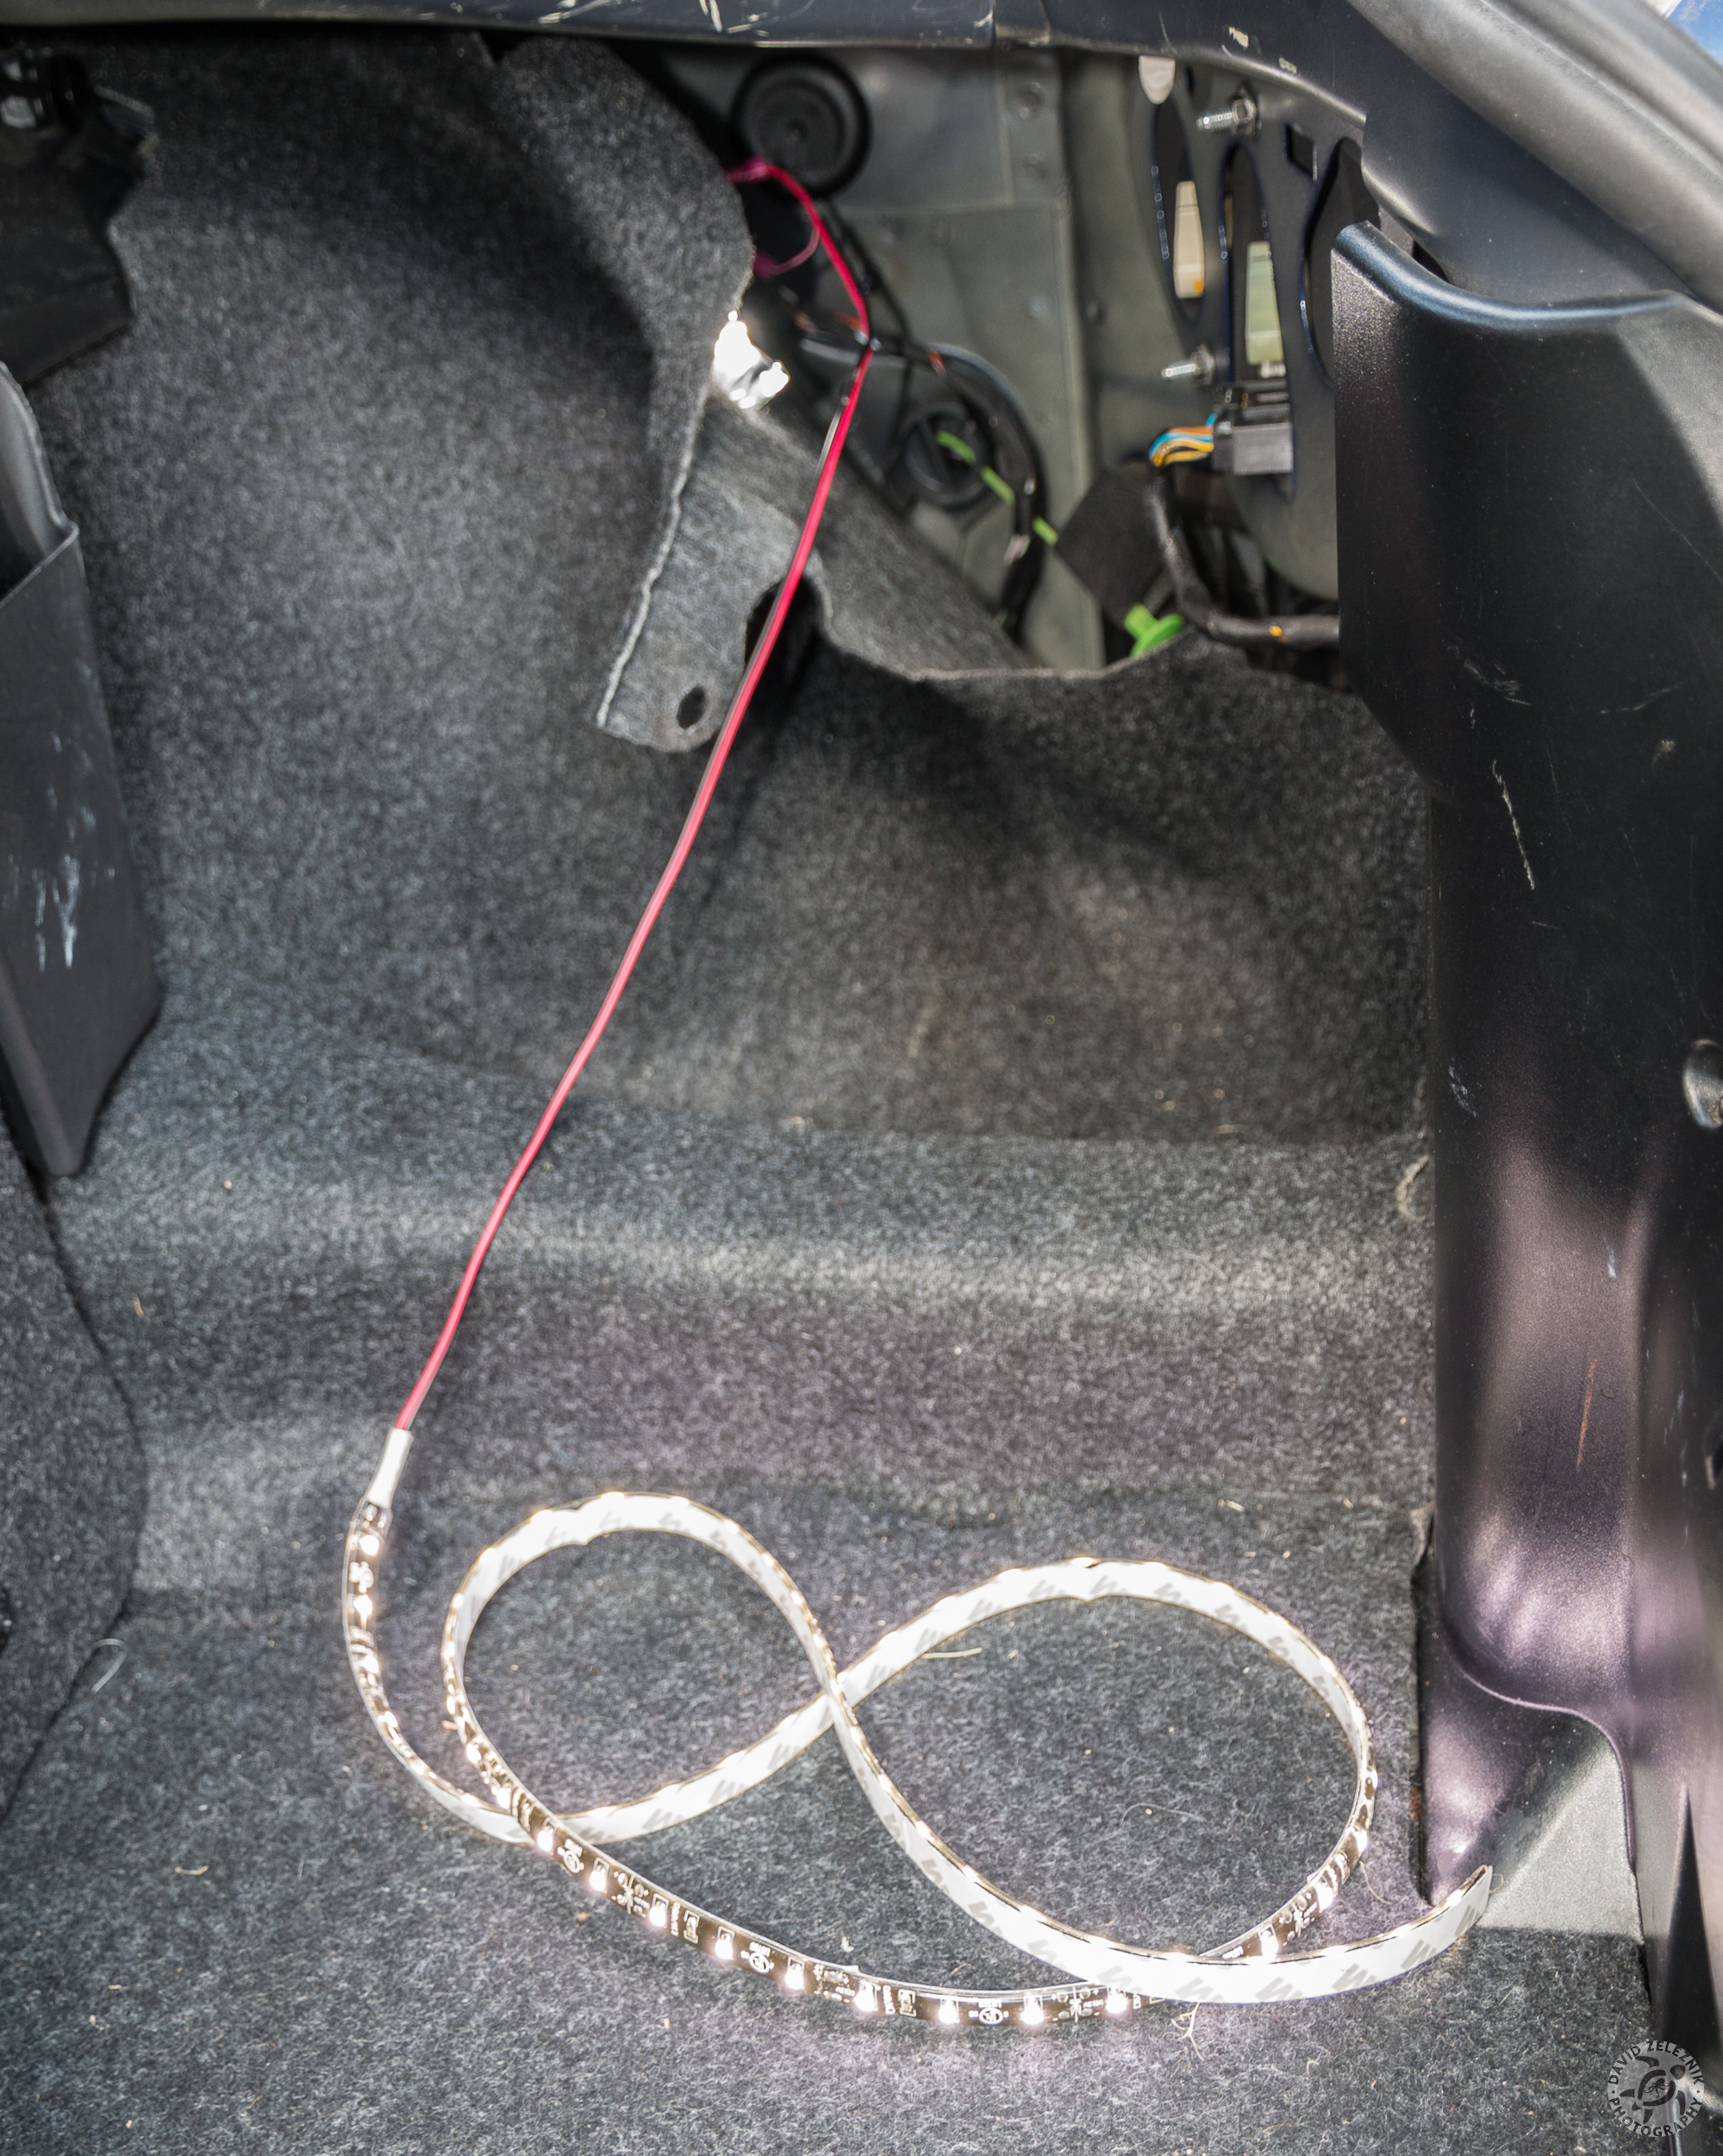
12 Yep, both the trunk light and the LED strip are working!
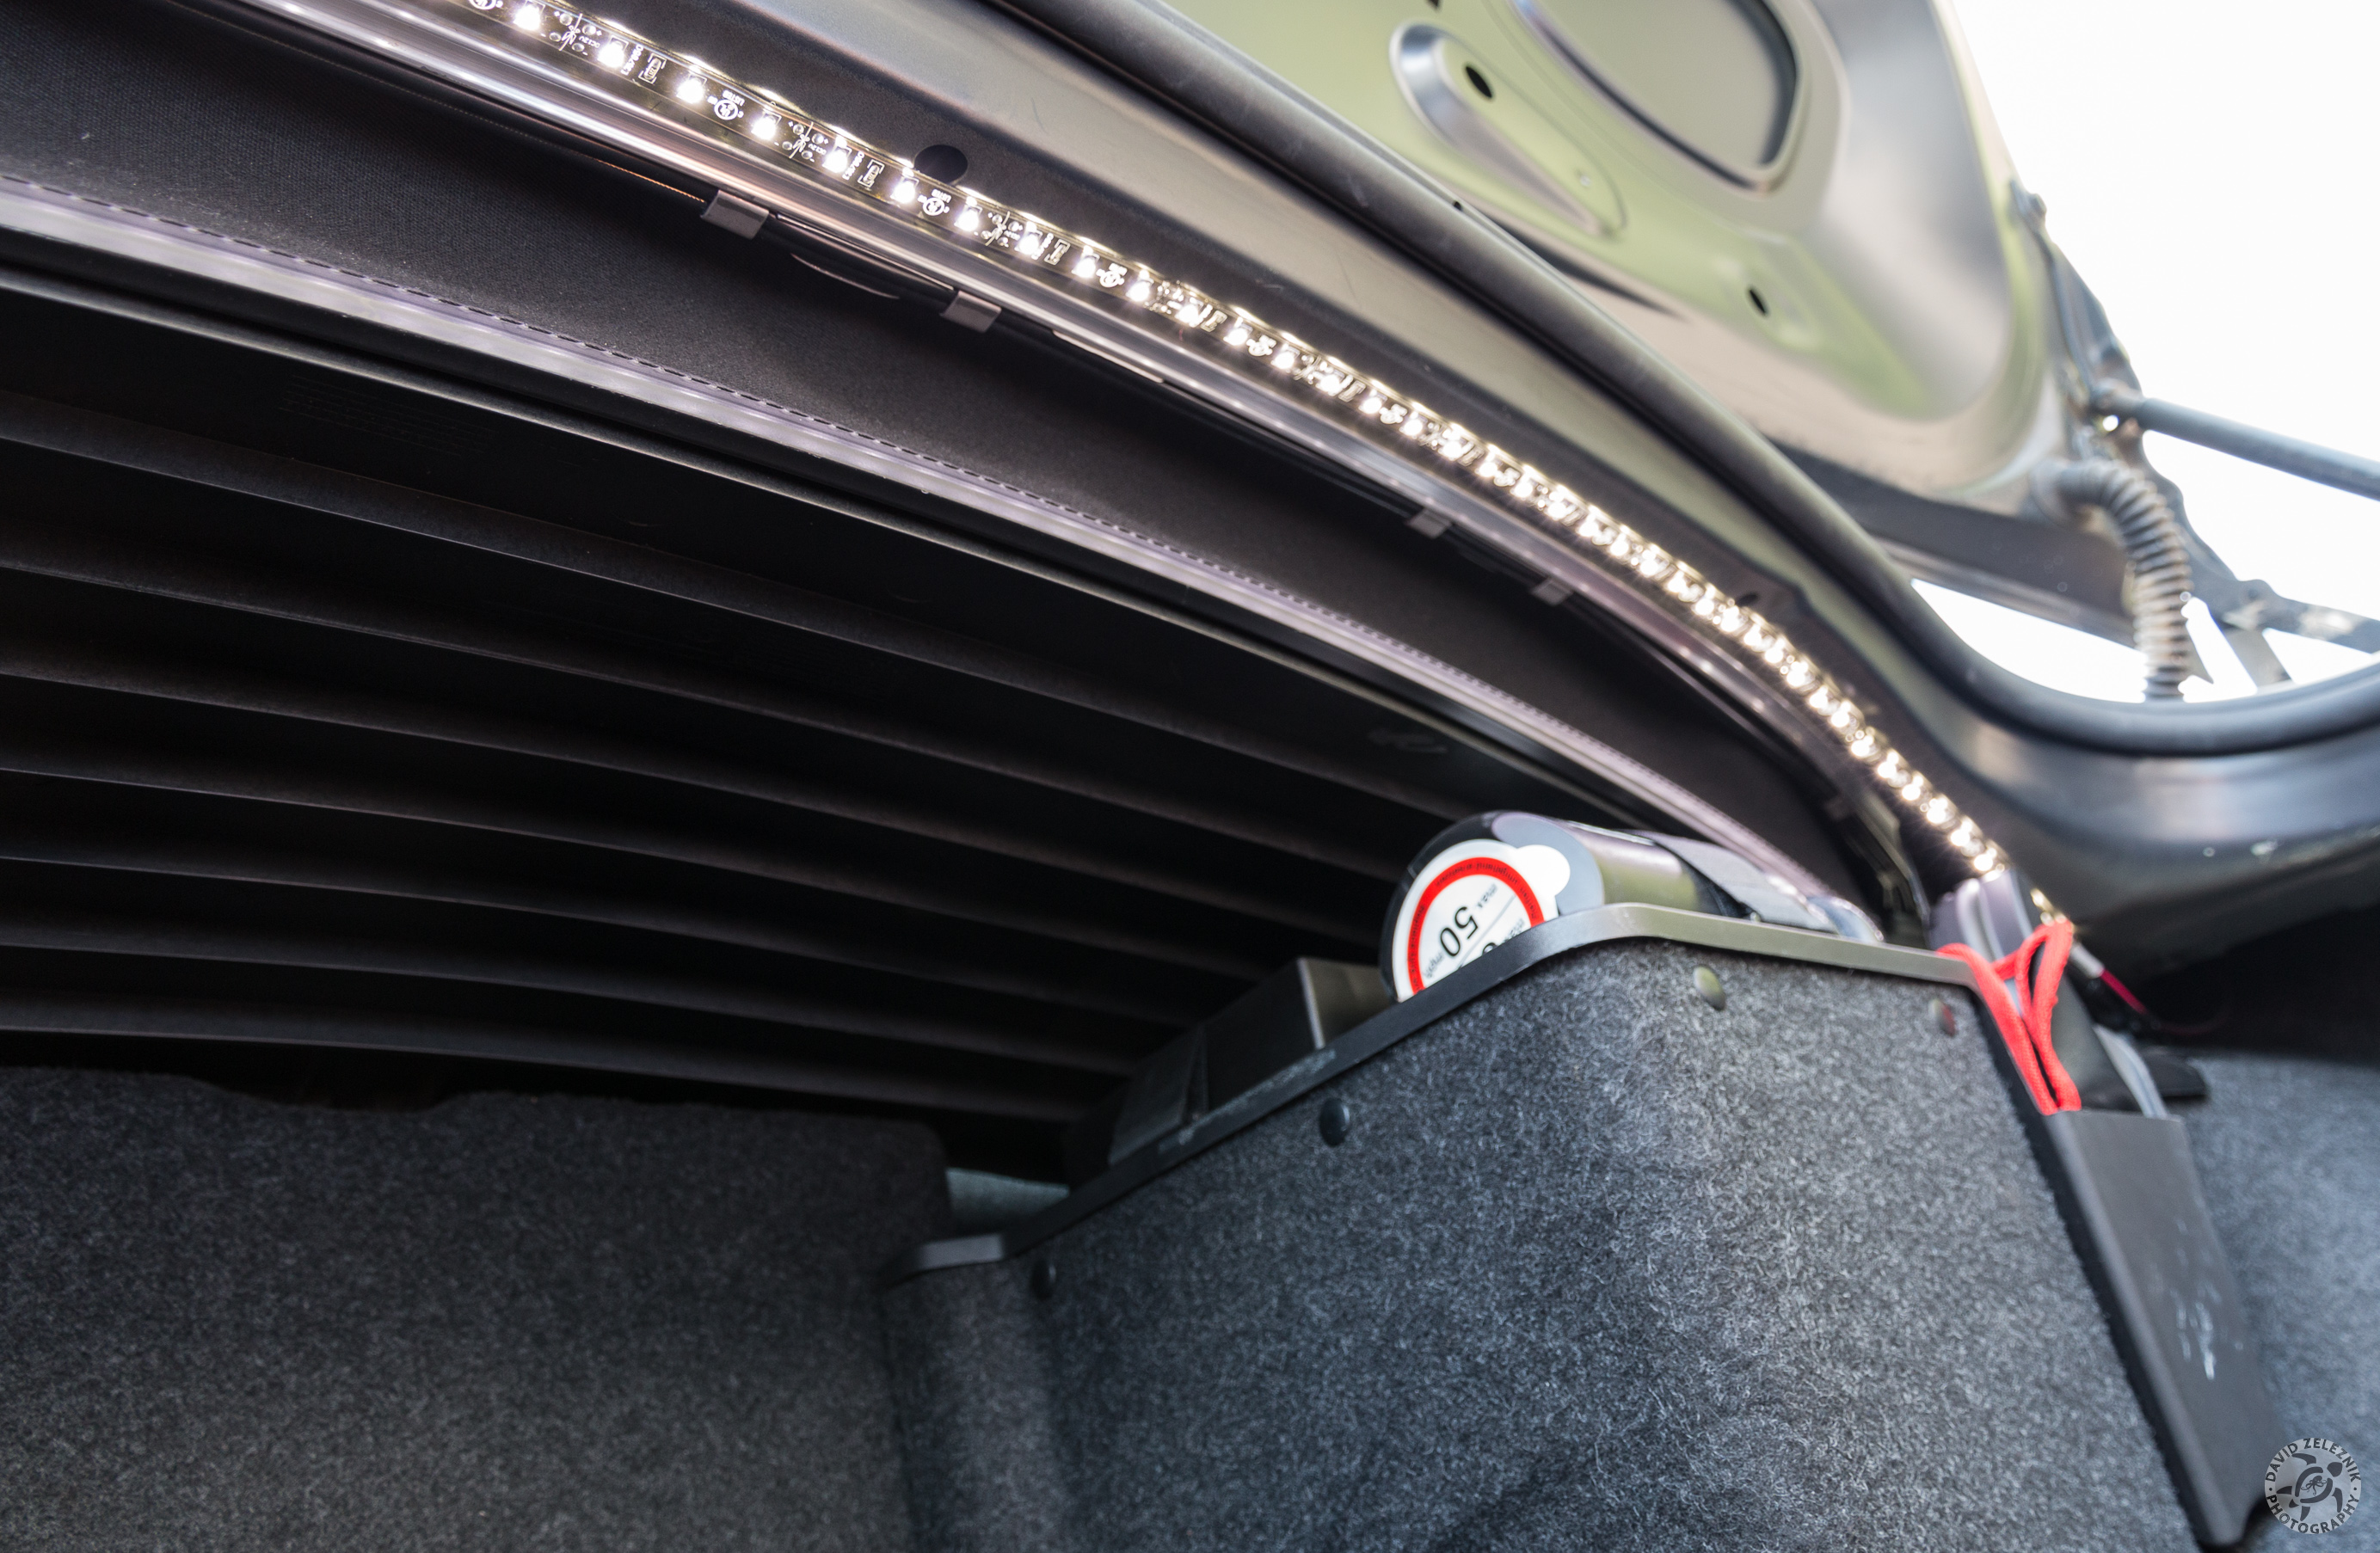
13 The 100cm LED strip is the perfect length to attach under the top rim of the trunk. I thoroughly cleaned the whole area first with rubbing alcohol. Then I started from the right/wired side, peeling back the protective film, exposing the adhesive backing, and pressing the LED strip into place. I made sure that the wire leads had some slack and were threaded behind the trunk liner.
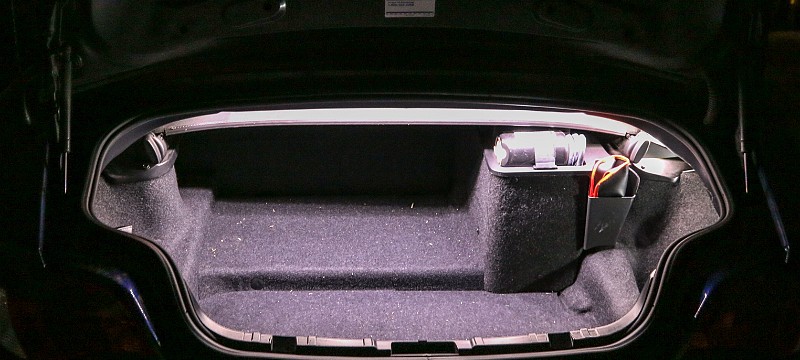
14 The end result in daylight shows that the LED strip illuminates all areas of the trunk and that from a normal standing position the strip itself is not visible.
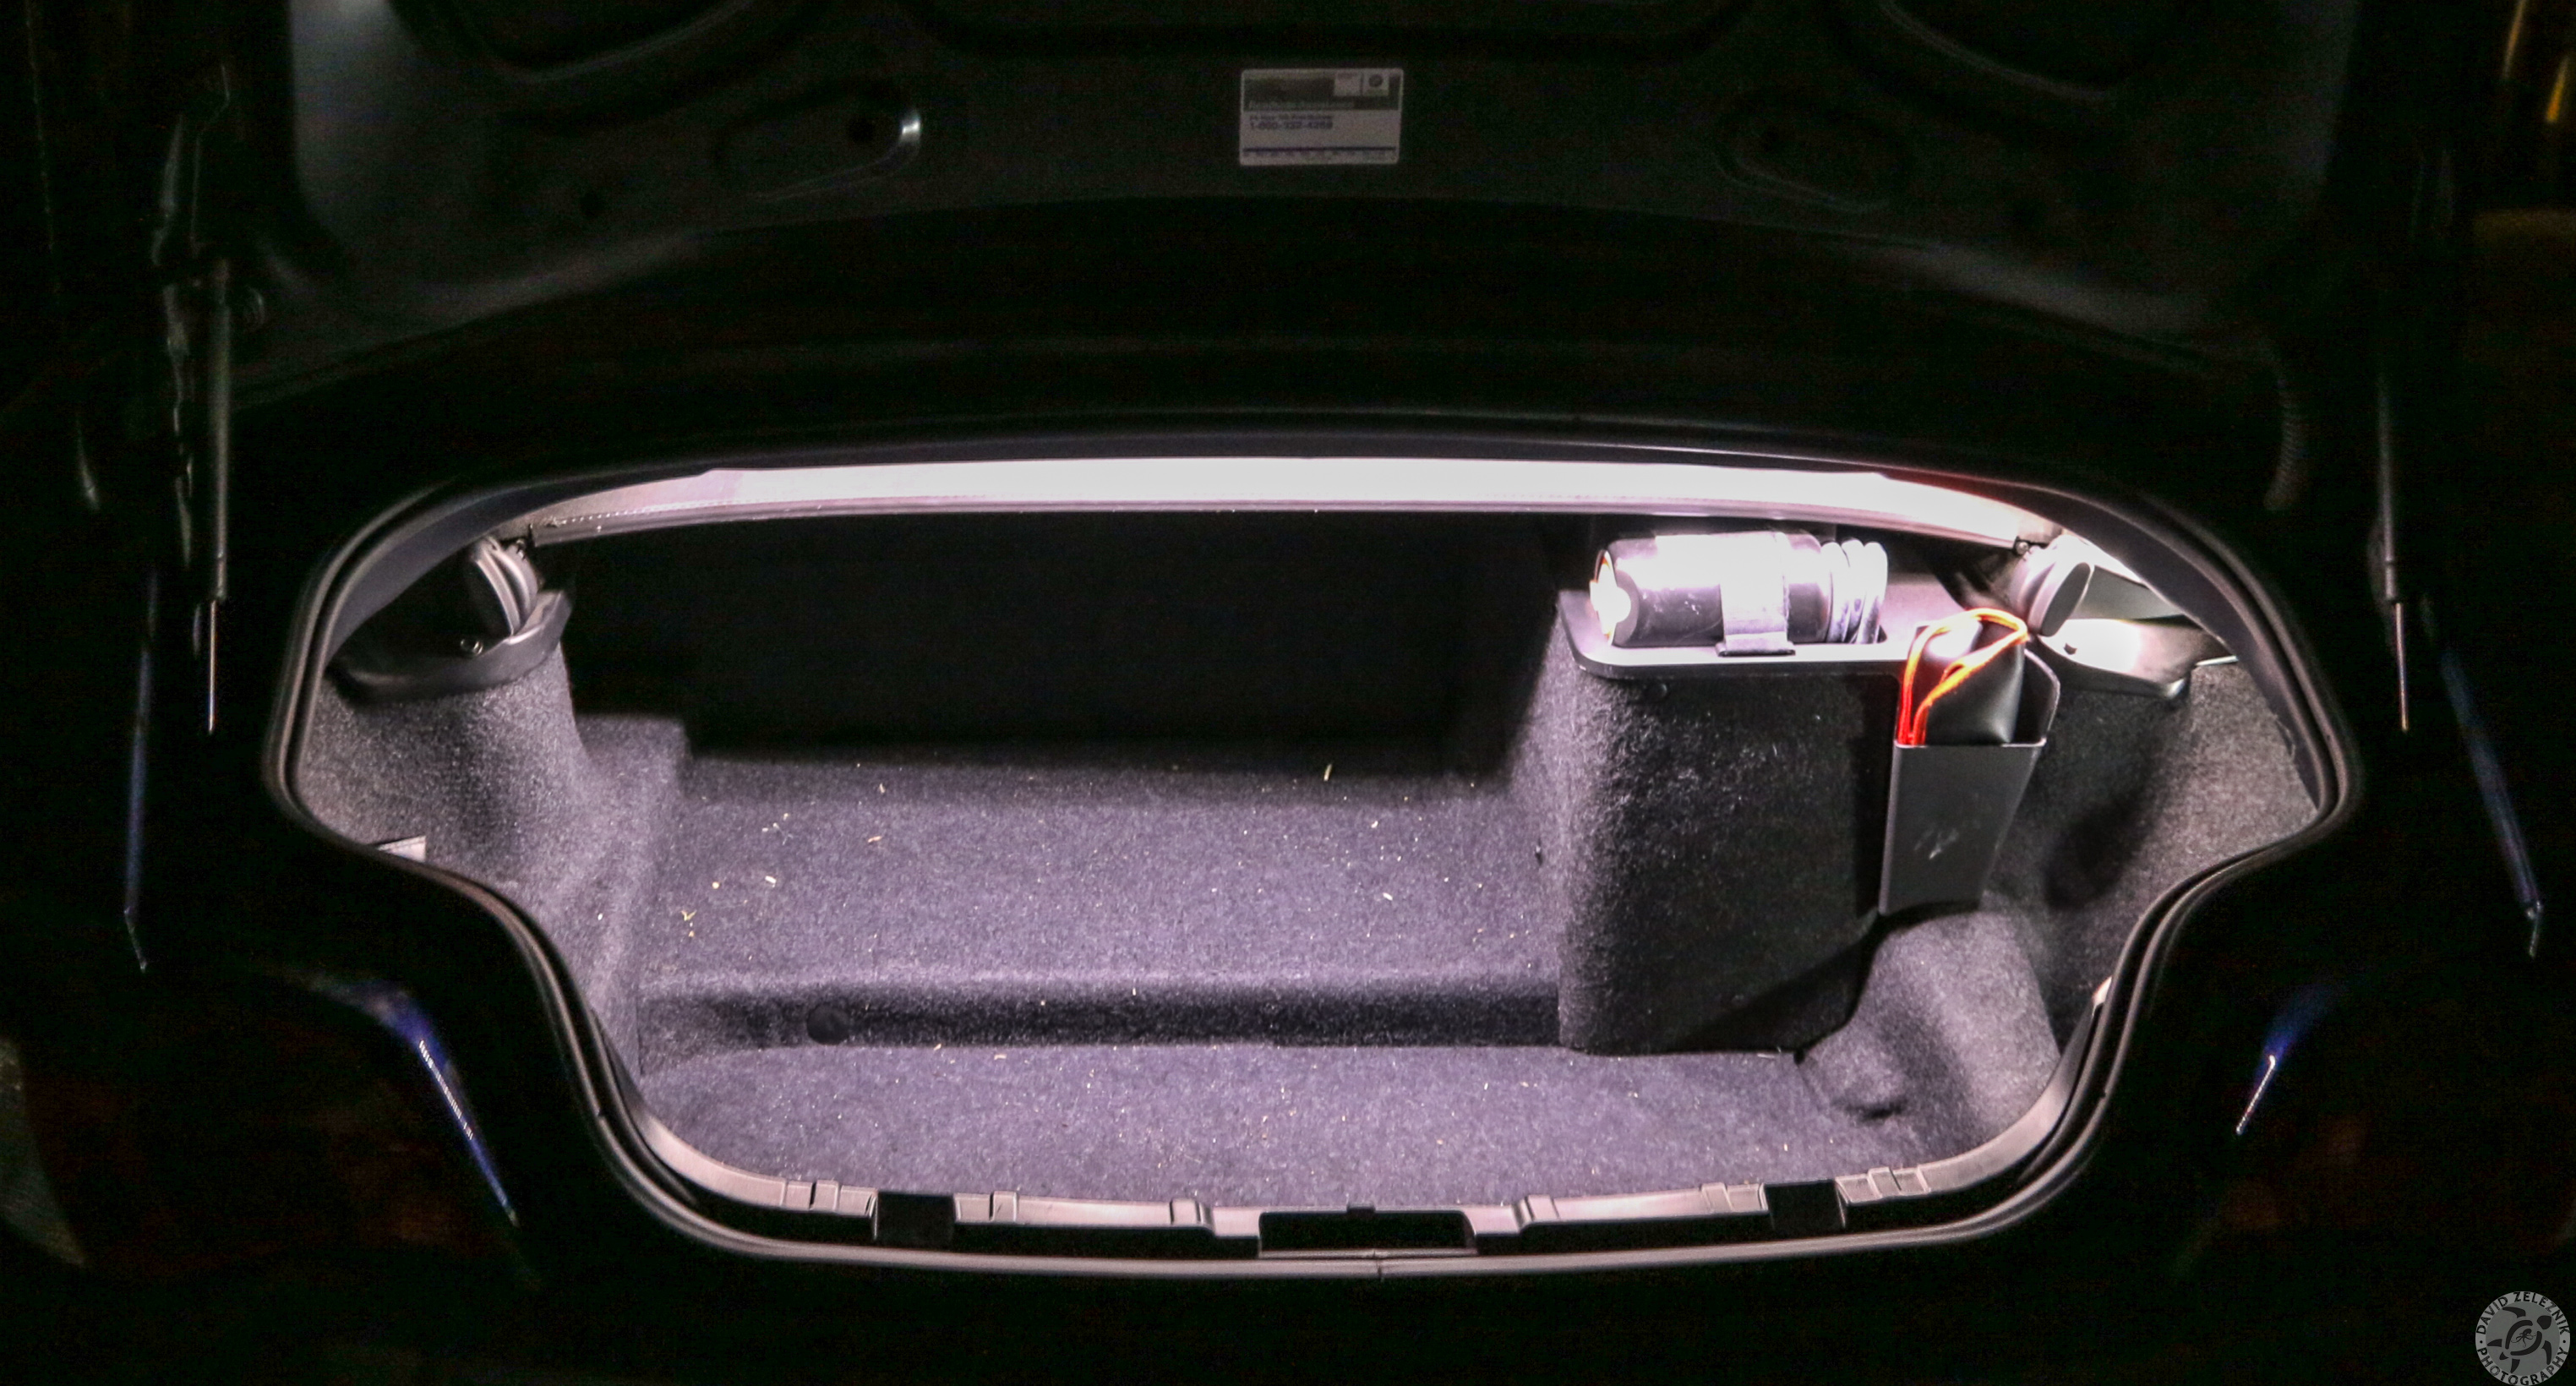
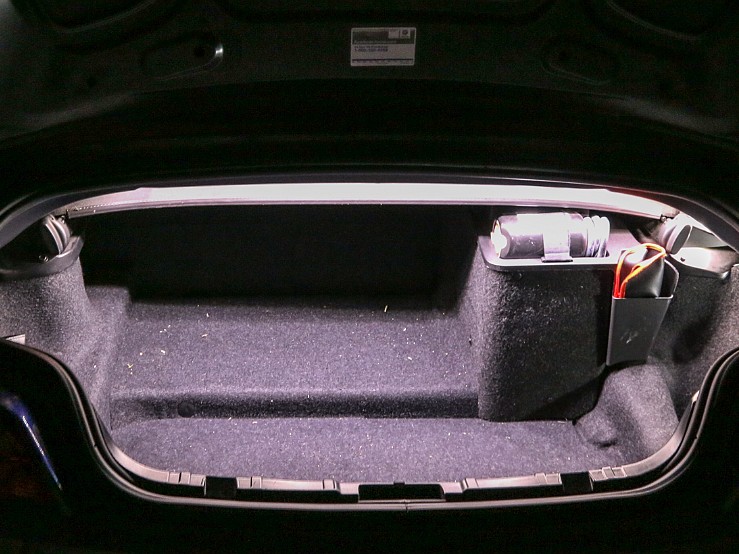
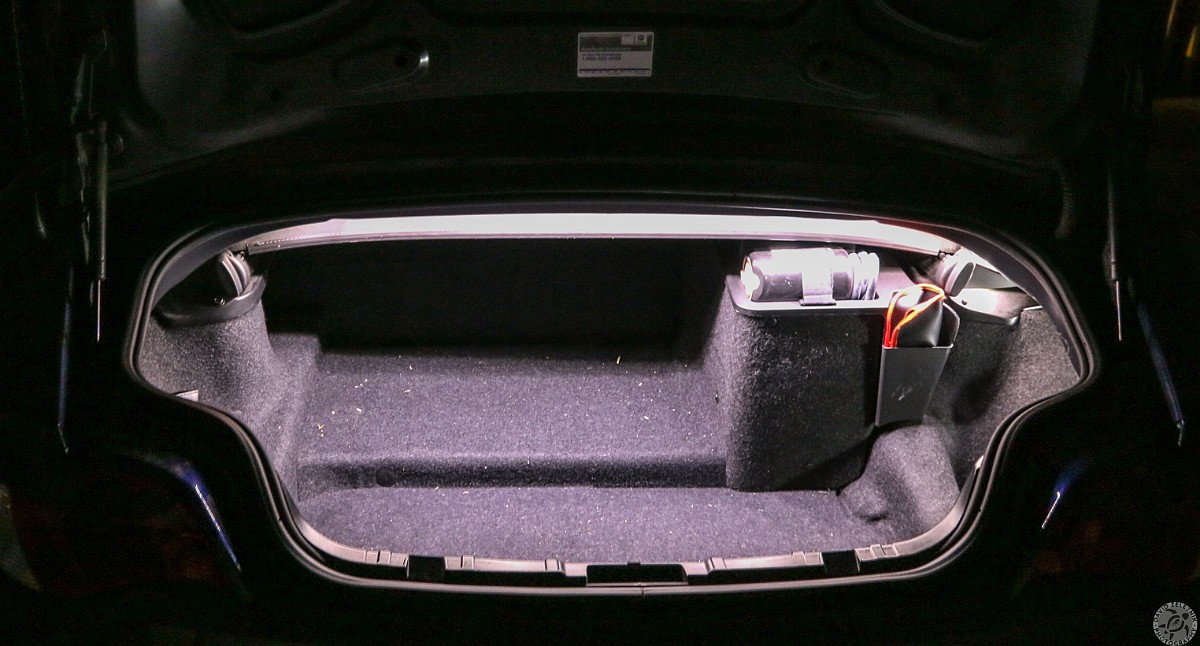
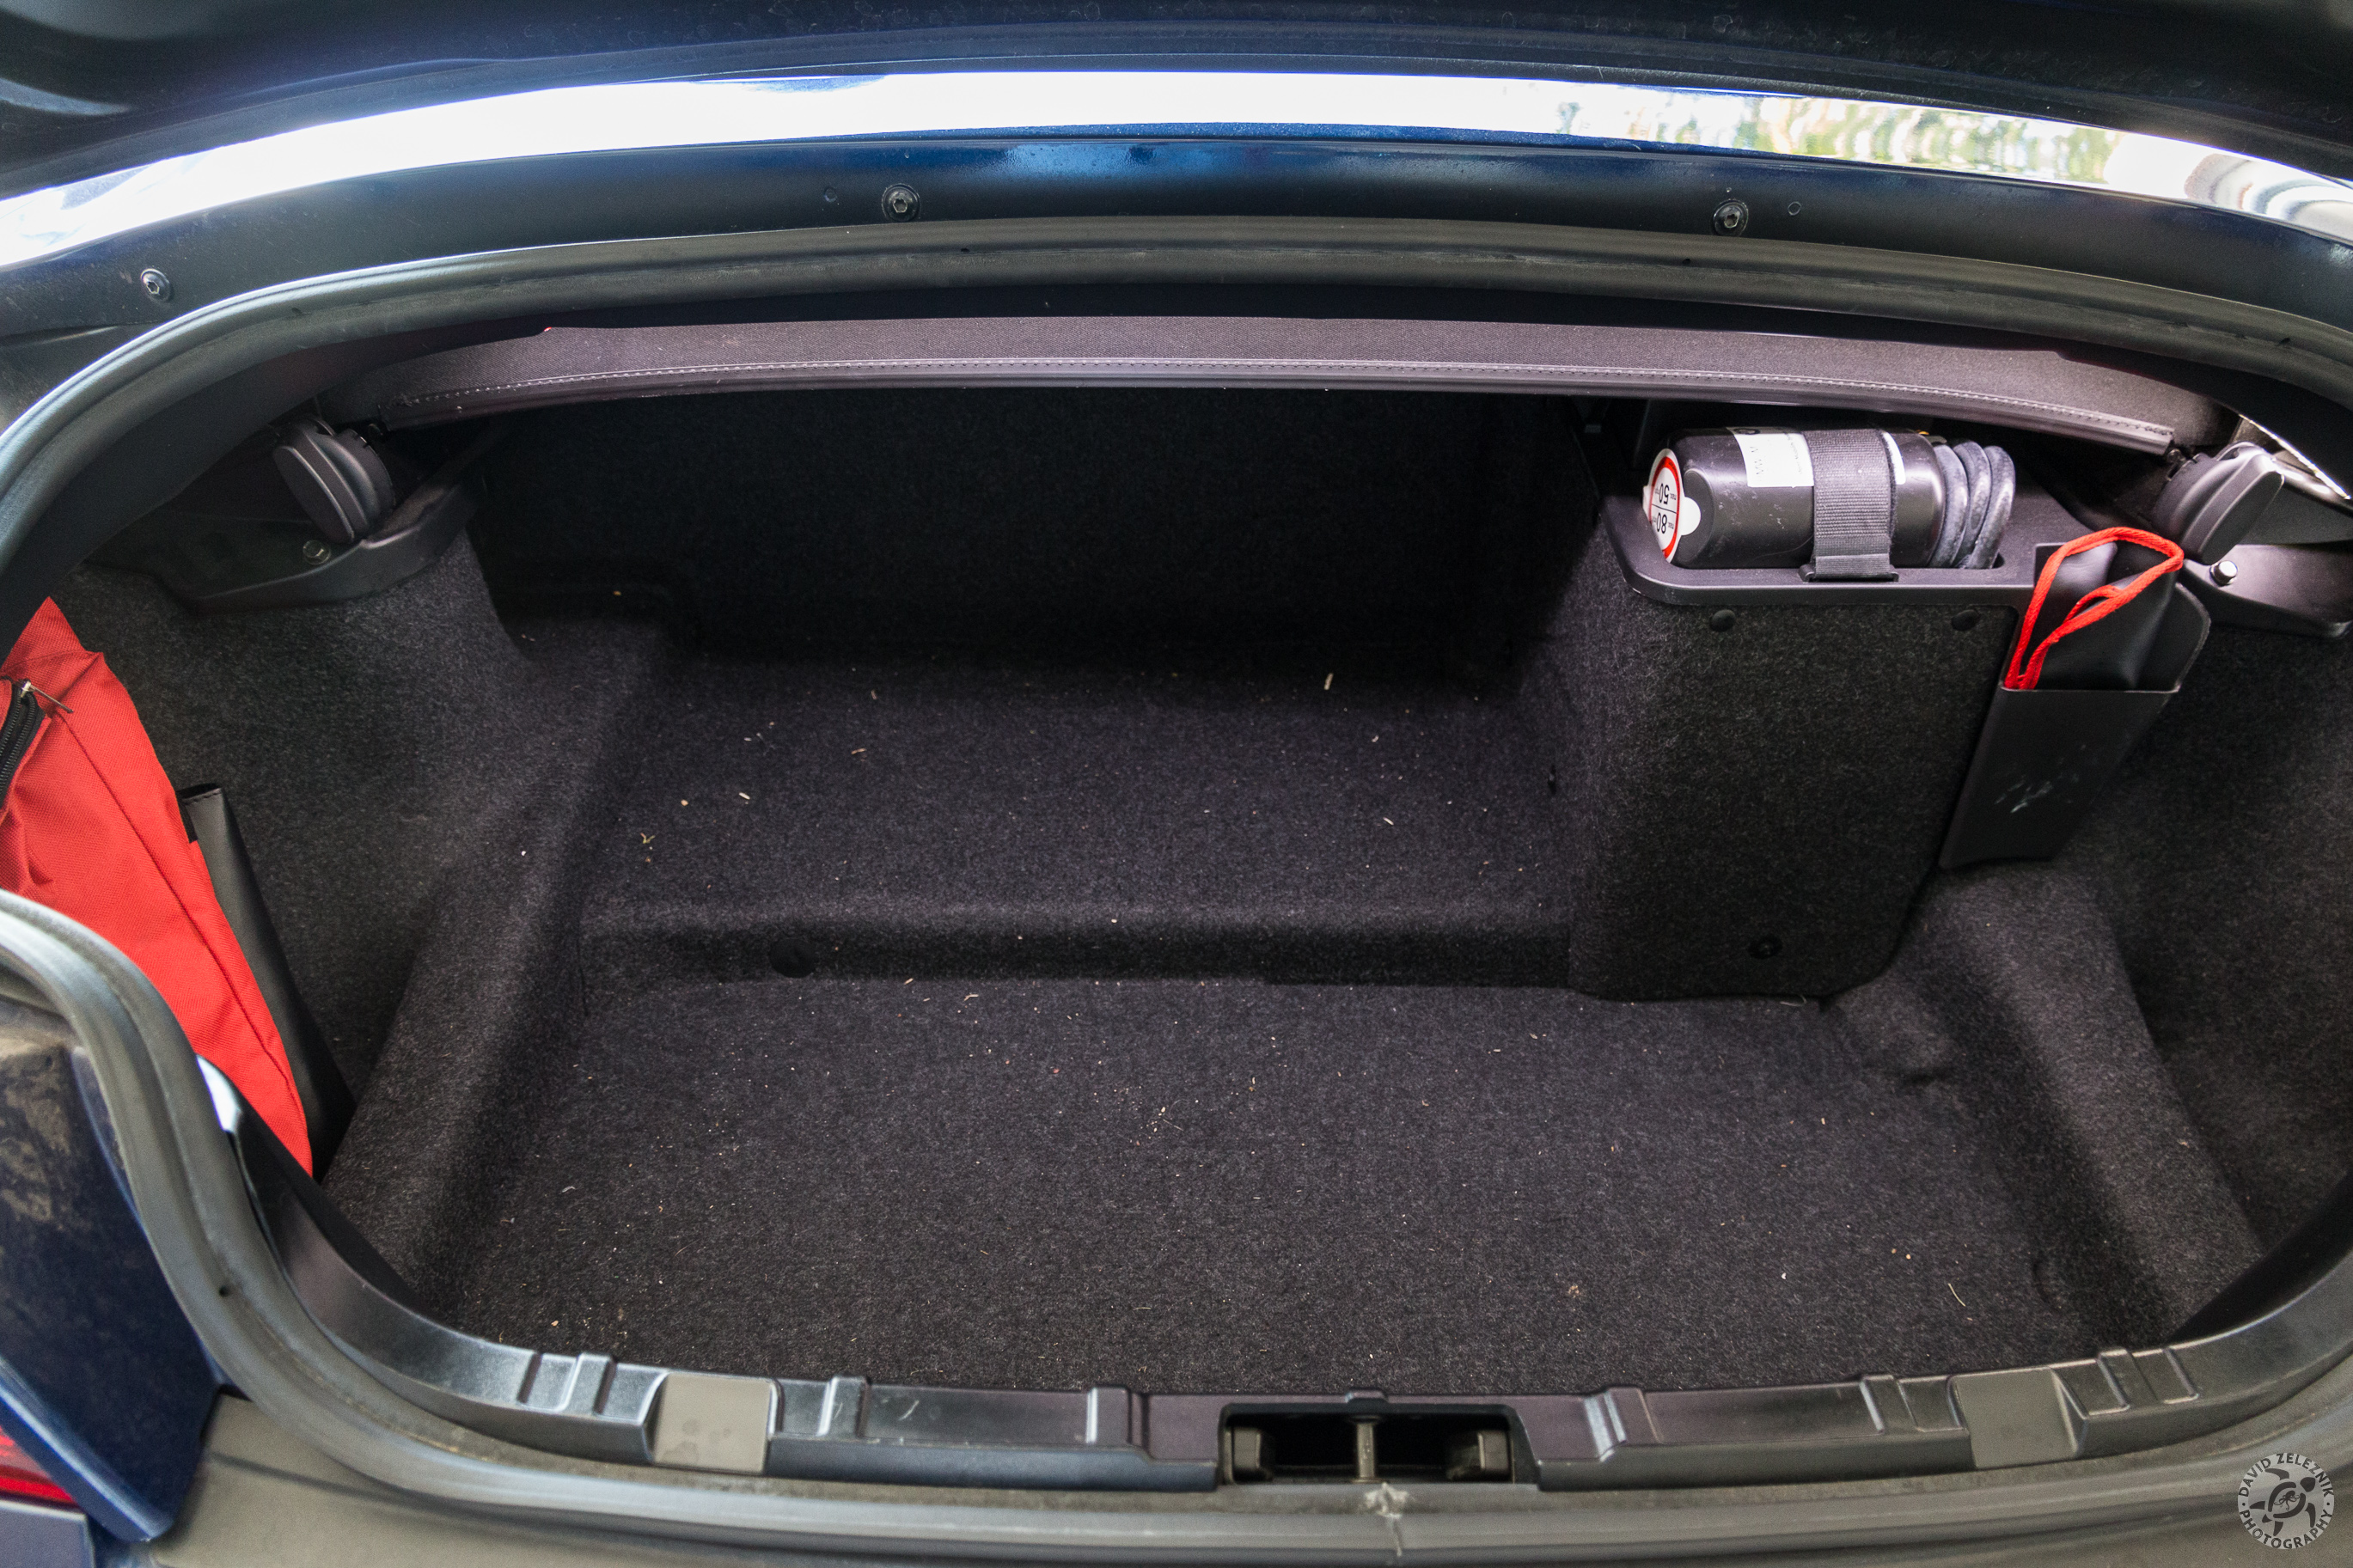
15 Net result showing improved trunk illumination at night

